
Creating an estimate in DESTINI Cloud Estimator is the first step in developing an accurate, data-driven cost model for your project. We recommend customers create new estimates using a template, which automatically pre-defines the following in the estimate:
- Fee table
- WBS properties
- Assemblies
- Layouts
- Highlight rules
- Project properties
Starting an estimate with these items pre-defined can help your teams create consistent estimates over time.
You can create estimates from scratch or copy an existing estimate. This article describes how to create an estimate using the recommended practice of starting with a template.
Before You Begin
Before creating an estimate, verify the following:
- You downloaded DESTINI Cloud Estimator.
- Your business (working with your Beck Technology implementation specialist) has configured at least one cost database in DESTINI Cost Library.
- Your business (working with your Beck Technology implementation specialist) finalized at least one estimate template, assemblies, and project properties.
- You have appropriate permissions to create and edit estimates.
- You have necessary project information, such as the project name, location, and scope.
Create a New Estimate
- Sign in to DESTINI Cloud. The Start View displays.
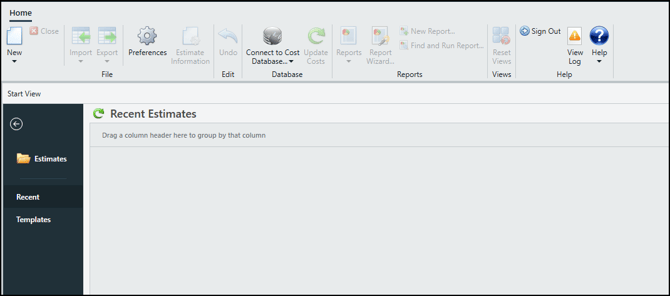
- In the left navigation, click Templates.
- In the ribbon, click Connect to Cost Database and then click the database with the data you want to work with in your estimate.
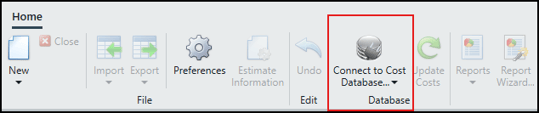
Estimator takes a snapshot of the selected database and embeds it in the estimate. - Locate the template card from which you want to create a new estimate and click New Estimate.
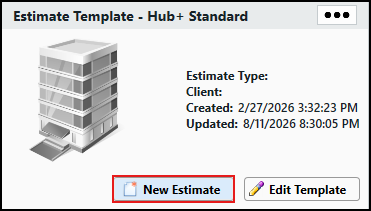
- Enter information in the Create New Estimate dialog box:
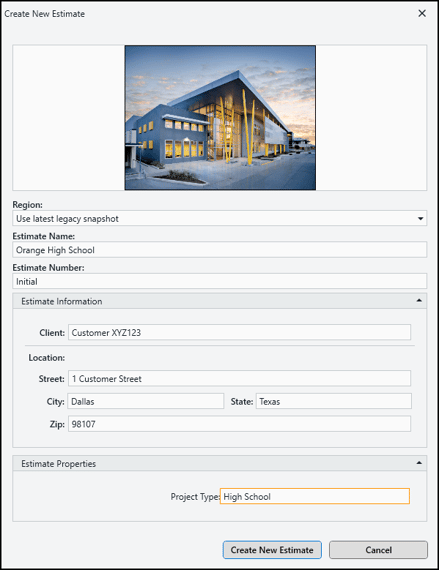
- Hover over the default image and click the folder icon to upload a new image.
- In the Region dropdown list, choose an option. The selected region determines the geographic cost data, labor and equipment rates, crew assignments, and regional pricing markups available in the estimate.
- In the Estimate Name field, use a naming convention that clearly identifies the estimate's purpose and revision history. Consistent naming makes estimates easier to locate, compare, and manage over time. For more information, see Estimate Naming and Versioning Standards.
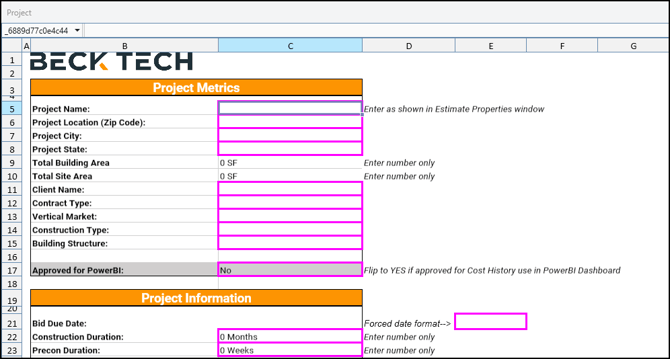
- Enter an estimate number, client information, and the project type, and then click Create New Estimate. Estimator displays the Project View.
If other panels, such as Cost Database or Conditions, block a portion of your view, click the pin icon to unpin them.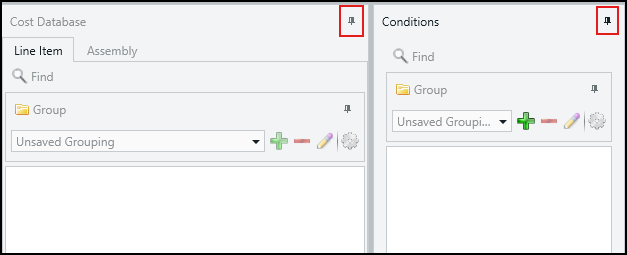
The views are minimized to the left side of the screen.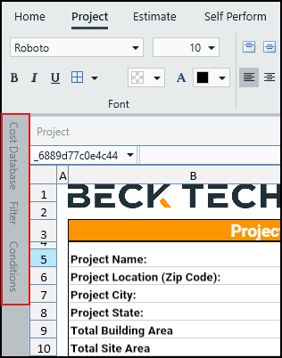
- Enter information in the Project View. For more information, see How to Use the Project View.
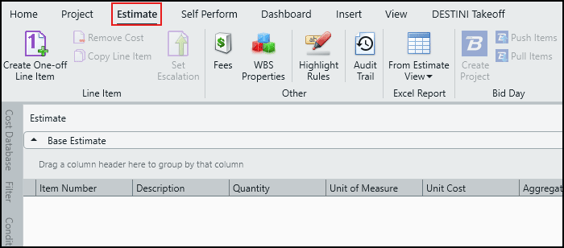
- When you're ready to start building out your estimate click Estimate to open the Estimate View.
Build Out the Estimate
- In the Estimate View, click Fees.
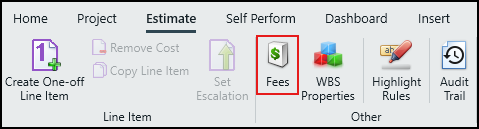
Verify the Fee Editor includes standard fees used by your business. Additionally, you can add estimate-specific fees. For more information, see An Overview of Fees and the Fee Editor. - Click WBS Properties and verify the dialog box includes standard WBS properties used by your business. Additionally, you can create estimate-specific properties. For more information, see Create Estimate-Specific WBS Properties.
- In the Estimate View, if the Cost Database view is minimized to the left side of the screen, click it and pin it open.
- If the Cost Information view is minimized to the bottom of the screen, click it and pin it open.
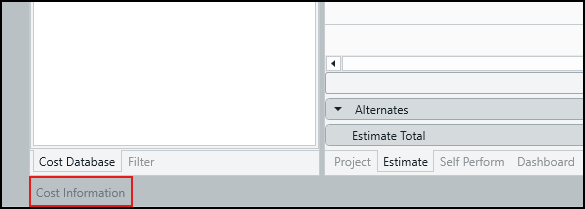
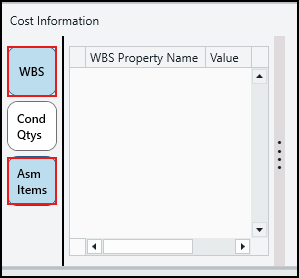
- In the Cost Information view, click the WBS and Asm Items buttons.
With Estimator configured similar to the following, you're ready to begin adding line items to the Estimate grid.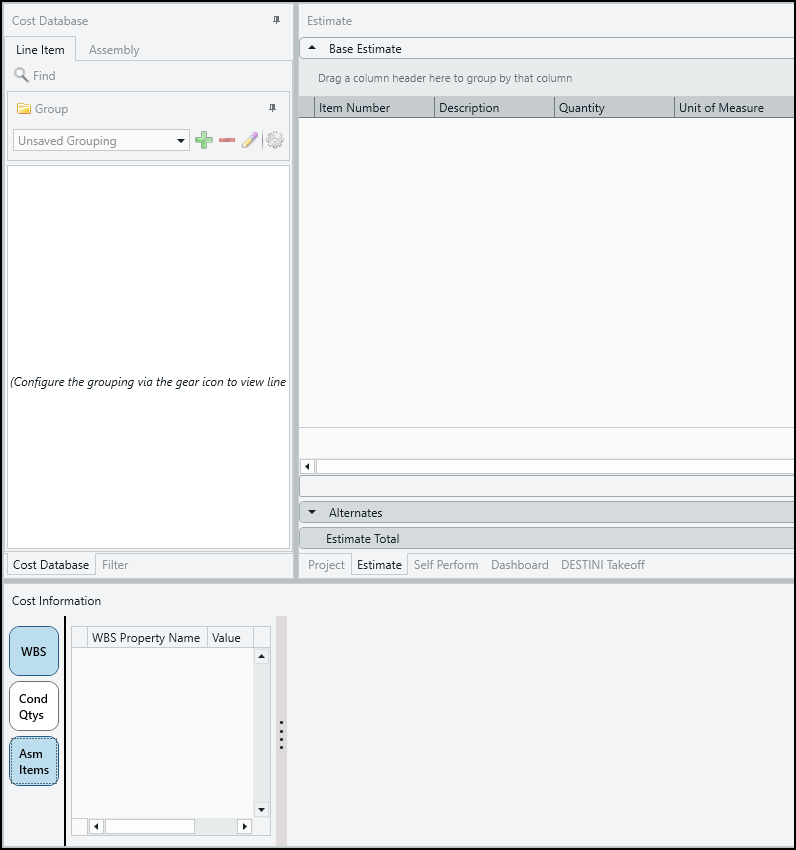
- You can add line items to the grid on an ad hoc basis from the Line Items tab or you can add a collection of related line items from the Assembly tab. For more information about Assemblies, see Using and Modifying Assemblies in Estimator.
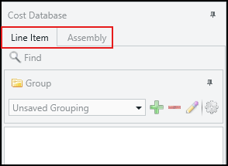
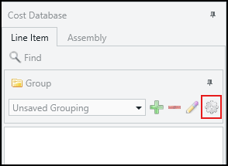
- On the Line Item tab, click the gear icon.
- In the Configure Grouping dialog box, select one more WBS properties to use to group line items in the Estimate grid and then click the right arrow.
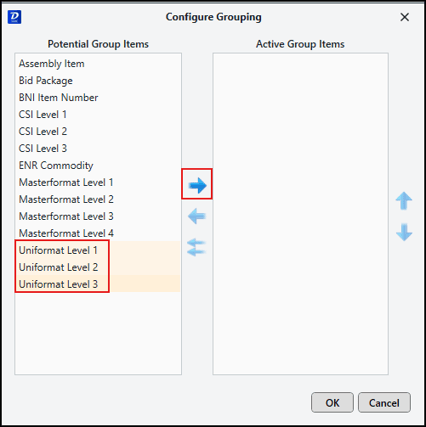
- Click OK. The Cost Database view displays available line items using the selected grouping properties.
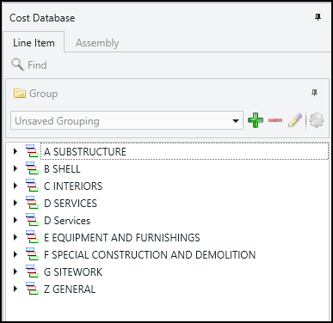
- Either search for a resource or drill down into the grouping structure until you locate a line item you want to add to your estimate. Select the line item.
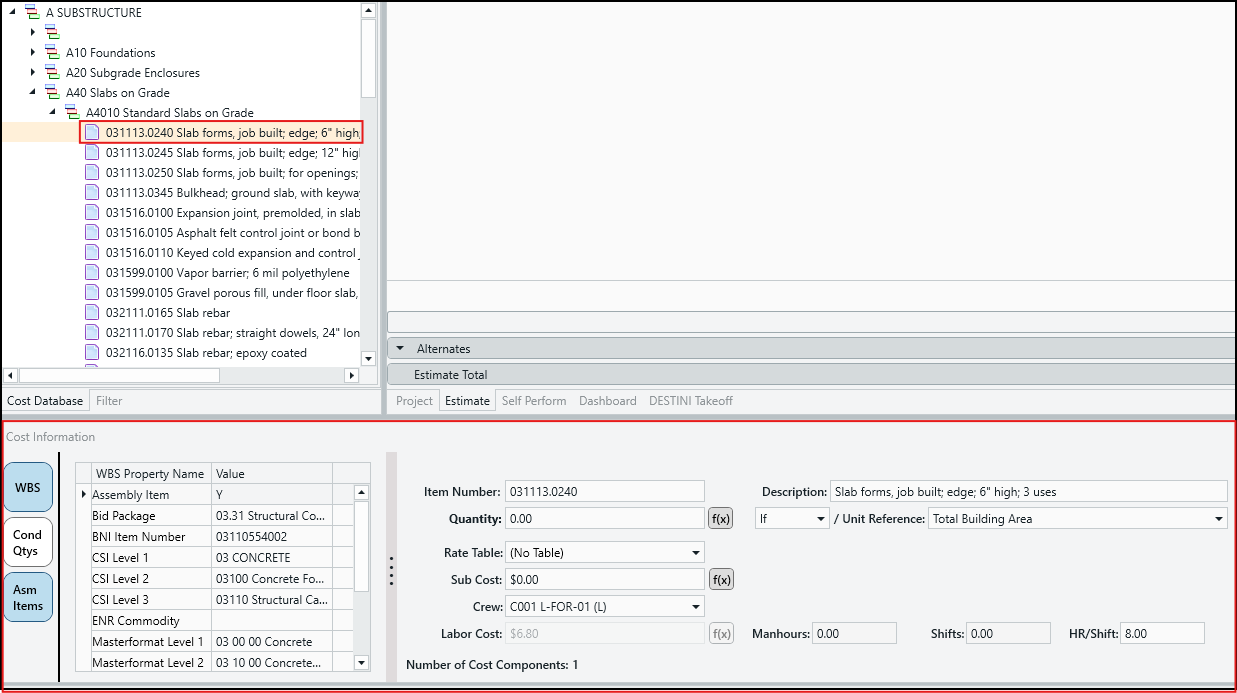
The Cost Information view displays information about the selected line item. You can directly edit WBS properties and line-item details in this view. - Enter a quantity and then click Add to Estimate in the bottom right corner. Estimator adds the line item to the Estimate grid.
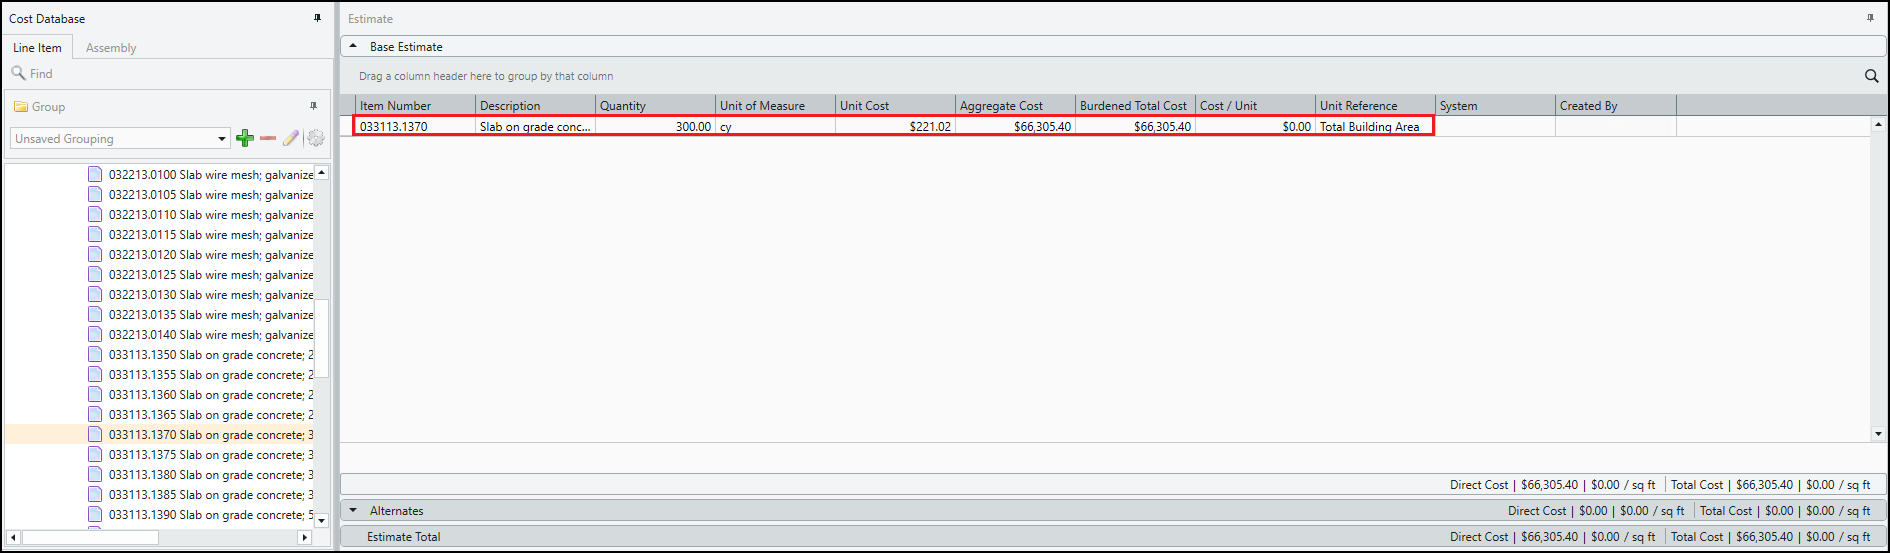 Alternatively, you can double-click the resource in the Cost Database view to immediately add it to the Estimate grid. You can edit line-item details and enter a quantity directly in the Estimate grid.
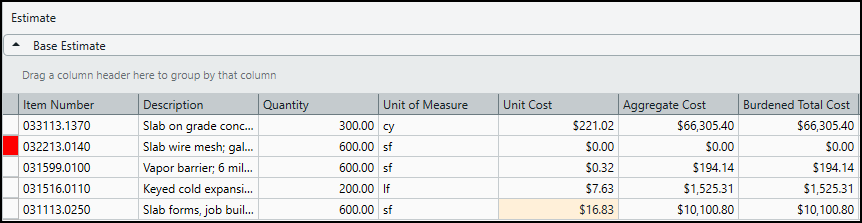
 - As you add line items, highlight rules included in the template automatically display a color on the left edge. The highlight rule is a visual indicator that the line item meets specific criteria. In the following example, the line item has a red highlight rule indicating the user must specify a Unit Cost. For more information, see Creating Highlight Rules.
As you add line items, Estimator calculates costs in the bottom right corner of the Estimate grid.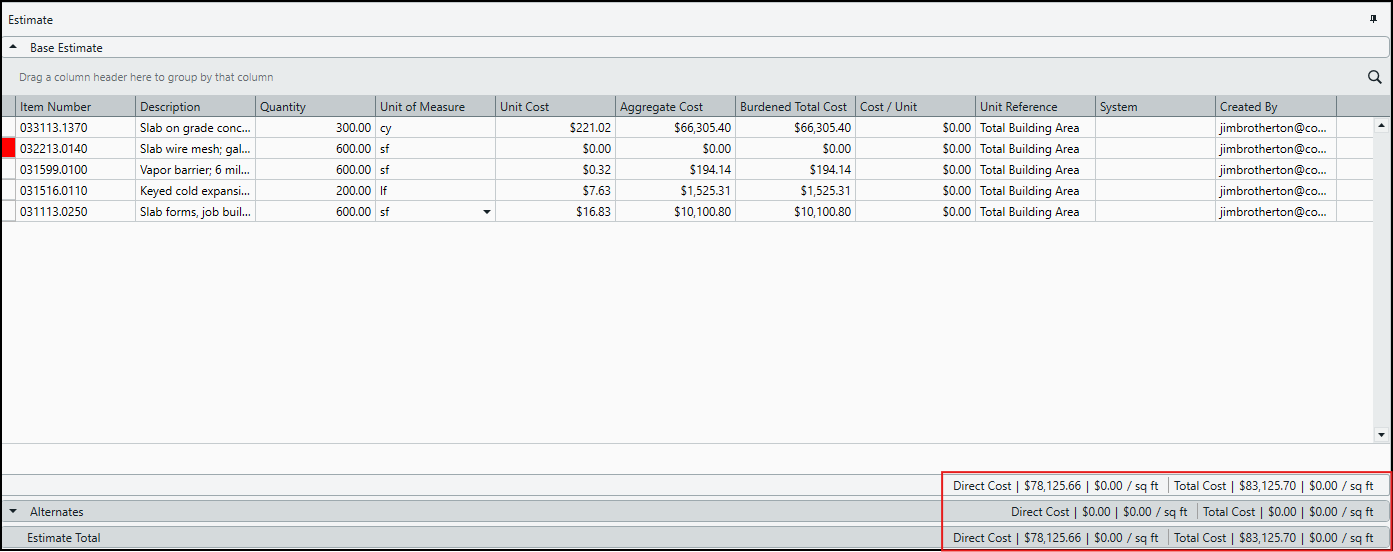
- Continue building the estimate.
Best Practices
- Establish standardized estimate naming conventions.
- Use assemblies whenever possible to improve consistency.
- Leverage historical cost data for benchmarking.
- Review estimates for zero-cost items before publishing results.
- Create versions regularly to preserve important milestones.
- Document assumptions and exclusions within the estimate.
Related Articles
- How to Use the Dashboard View
- How to Close and Create a New Estimate Version
- Audit Trail: Track Changes Made to an Estimate