The goal of this article is to demonstrate how to properly set up login permissions on a centralized server. We recommend that our client create and use an Active Directory group that has all the Users' names including Estimators and IT personnel that will be testing/using the application.
These steps are performed after a database/s is restored.
Note 1: New Employees will need to be added to the A.D. group to access the databases.
Topic covered are:
- How to add Windows Active Directory (A.D.) Login
- How to Map the Active Directory Group to the databases
- How to grant write access to the Cost database
- How to add DESTINIData database Permissions
- Server Permission to view Beck technology databases
How to add Windows Active Directory Login
- Make sure the group is created first with all the Users that will need to connect to the databases.
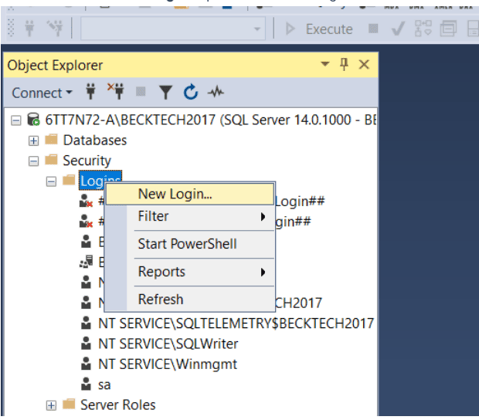
- Next, expand the Server's Security folder, and right-click on the Login folder to open the context menu.
- Please select the New Login.. option to create a login
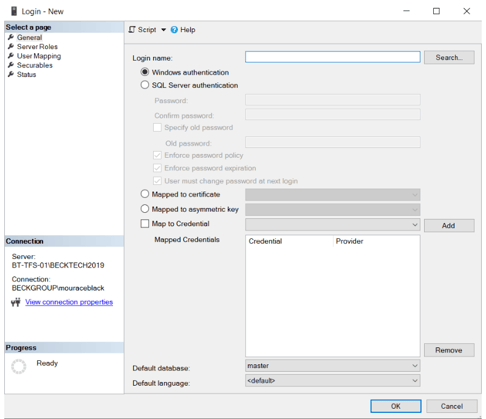
- Once you choose the New Login.. option, the below-shown window will open, click the Search button.
- Once you click on the Search button, the following window will open.

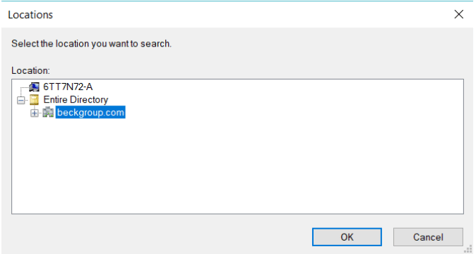
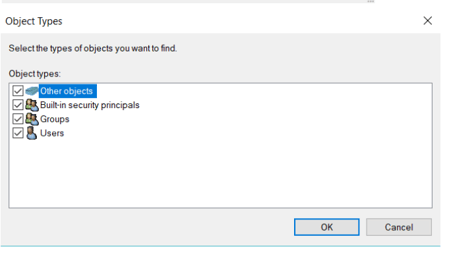
- Click the Locations to change from your local SQL serve to your Network Directory, change the Object Types button to select the Group, and click OK.
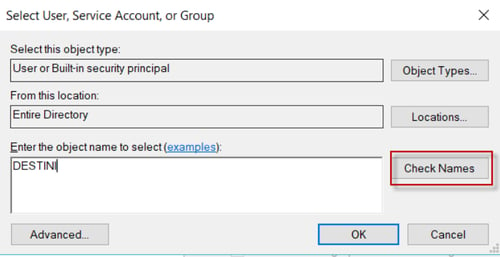
- Type the name inside the text box and click the Check Names button
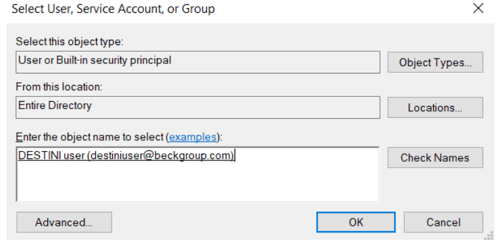
- As you can see, it is automatically retrieving the windows account information
After you add the Active Directory Group the next step is to map the group to the database/s.
How to Map the A.D. Group to each Database
Note 2: You always have to map the A.D. Group, every time you restore a new database/s to the server or the users will not be able to connect.
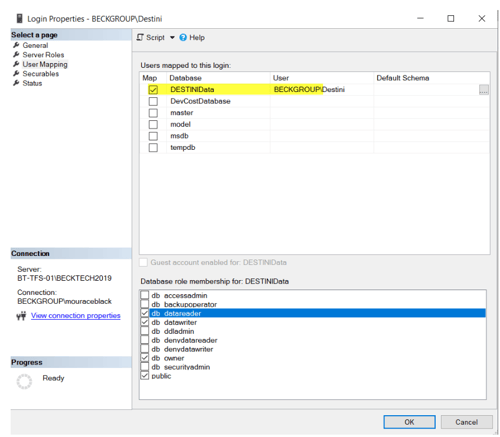
DESTINIData Estimates Database:
1. Open the server Security > double click the name of the Active Directory Group Name

2. Click the User Mapping page, select the Estimates database then check the db_owner, db_datareader, db_datawriter membership roles, then click OK
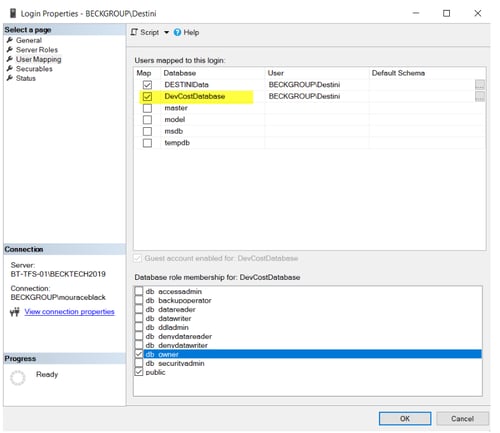
Cost Database:
1. Open the server Security > double click the name of the Active Directory Group Name

2. Click the User Mapping page, select the cost database then check the db_owner, membership role, and then click OK to map the A.D group.
The next set of permissions is specific to ONLY the Cost Database
How to grant Write Access to the Cost Database
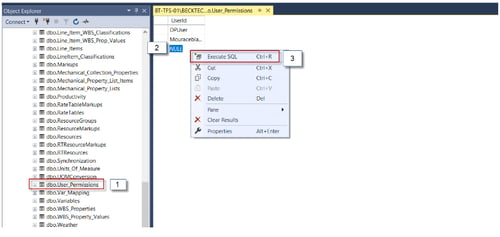
All users that are mapped to the cost database will only have read access no matter what membership role is initially selected. The only table that controls write permission to the cost database is dbo.User_Permissions.
Click the plus on the Databases folder > Cost database > Tables
1. Locate the dbo.User_Permissions table > Right-click > select Edit Top 200 rows
2. Add the Windows login credentials or add the A.D. Group of the users that will be granted write access to the database by typing in the NULL row and Tab out.
3. Right-click and then Execute SQL to commit the changes
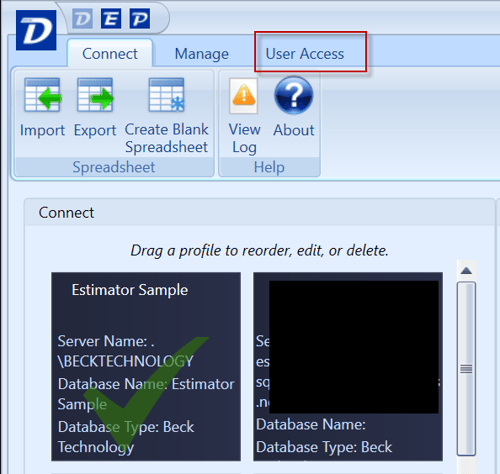
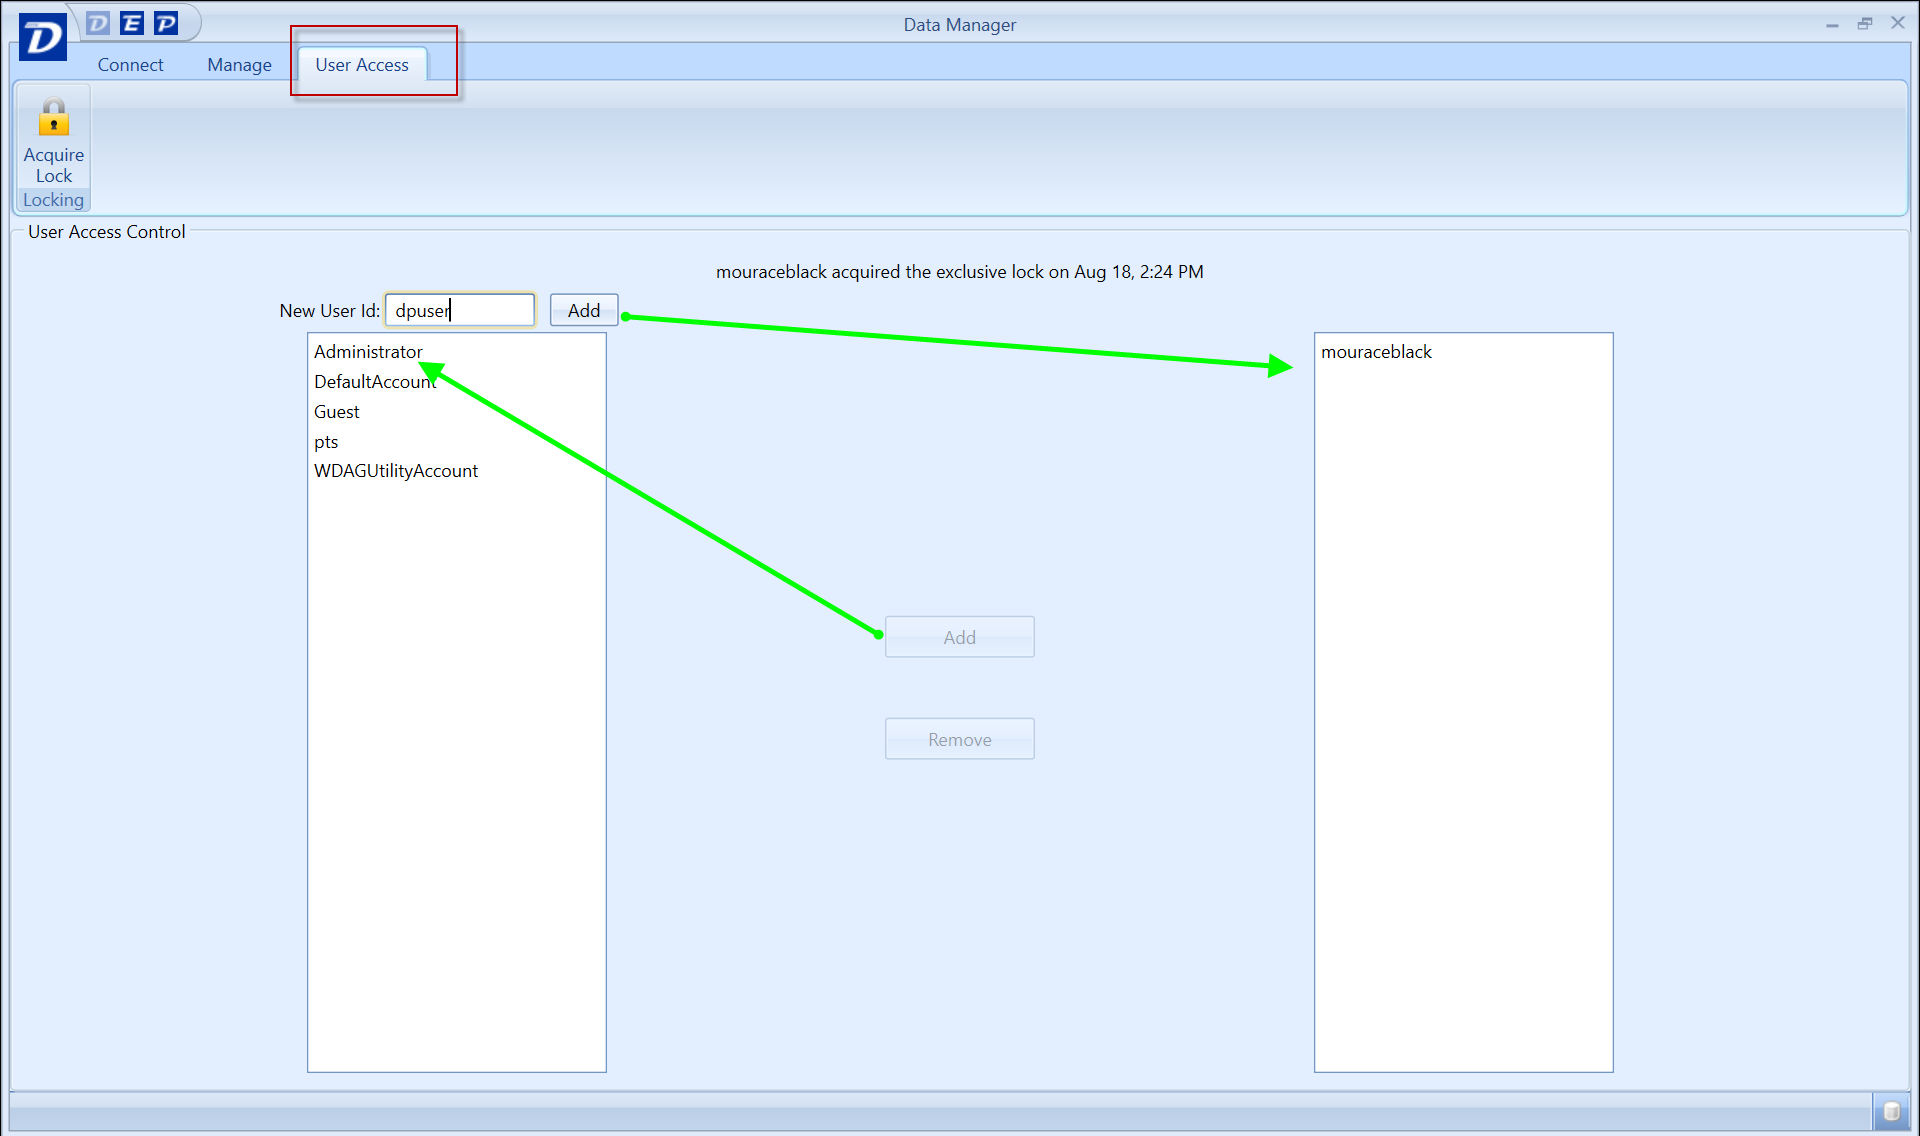
Note 3: In Data Manager, any user that is part of that Write access group will have the User Access enabled when they click on the database profile. That user can grant other users write access and it will update the dbo.User_Permissions table on the centralized server. This is done by moving their name from the list on the left to the table on the right. The user will need to reconnect their database profile in Data Manager to see the User Access tab activated and they will now have permission to edit the database.