1. Help Center
  2. DATA MANAGER
  3. General Data Manager Workflows

An Overview of Choices and How They Work With Assemblies

It is incredibly cumbersome, time-consuming, and error-prone to create assemblies with complex ideas and applications -- for example recreating MC2 Construction Systems.  The IF statement approach for controlling the behavior, although similar to that in Excel, requires numerous layers of nesting in order to create typical required functionality.  It's cost-prohibitive to create complex databases with this workflow, and it's not feasible to expect our end users to successfully manage the data after hand-off.
 
Take a look at the video below on how Choices work within an Assembly.
 

Choices are line items that will appear inside an assembly takeoff based on user-defined questions and answers. The Line Items inside a Choice are called Choice Items.

Note-Choices are only consumed inside Estimator through an assembly.

For example, the user might want to pick the type of wall material, which will determine the line items that are applied.

Inside this table, the contents of the Question column are Values that will exist inside the Assembly Takeoff window inside Estimator.

What are Choices and how they work with Assemblies in Data Manager 2-png

During the Assembly Takeoff operation inside Estimator, selecting “Brick” in the “What type of material?” drop-down will only add the “Standard Brick” line item to the assembly. If the user selects “Drywall”, then only the Choice Items associated with the Drywall value will get added to the estimate.

Adding Choices
 
The Command to Add Assembly Items will now handle both line items and choices.  Invoking the Add Assembly Item will bring up the cost component window and allow the user to select either Choices or Line Items to add to the Assembly -- this is similar to the behavior of adding a Collection Item to a Collection for the Profiler Users.
 
Within the Assembly Item grid, the Item Number column will display a Choice's Name, and the Description column will display the Choice's Description.  The Quantity, Unit Cost, and Unit columns will be empty for Choices.
 
The user can add one or more assembly item (choice or line item) to an assembly as well as the same Choice to the Assembly multiple times.
 
Removing Choices
 
The Command to Remove Assembly Items will now handle both line items and choices.  Selecting a choice in the Assembly Items grid will enable the Remove Assembly Item command.
 
Overriding Choice Item Details
 
Like line items that have been directly added to an assembly, the user can override properties of line items within a choice.  To do this, the user must use the View Details button within the assembly items grid to drill into the Choice's details.  From here, the user can continue to drill into line item details to override details of the line item -- Quantity Formula, WBS Property values, Unit of Measure, and Productivity Rates.
 

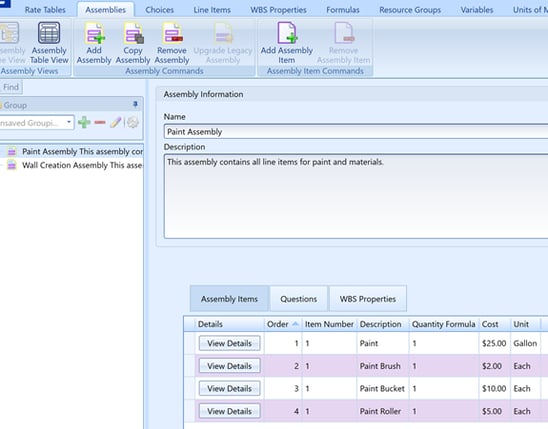
Assemblies are a group of similar line items and choices that logically go together. Cost items inside Assemblies are called Assembly Items.

We can group related items together into their own assembly:


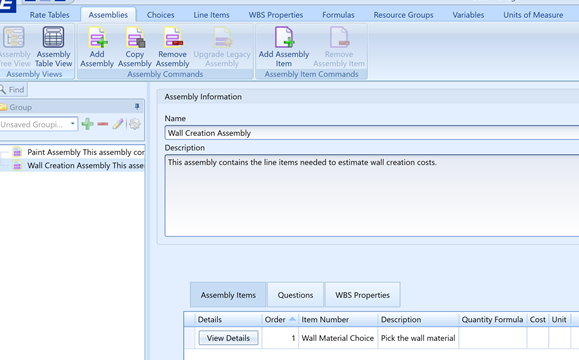
Instead of adding all material type line items to an assembly, we can simplify the Wall Creation piece by only having the Choice:

Notice that Ladder and Tape Measure line items are not included inside this list. Since it’s applicable to both Wall and Paint steps, we will omit them now and add them later. When using Estimator, the Ladder and Tape Measure line items can be applied individually through a Line Item Takeoff operation.
 
Note - Variables and Choice names cannot be the same. If you see the error below, this may be the issue. When you change the Choice name, then the "Ask when" condition may not manually update. You may have to force the refresh by clicking on the Database Profile.
 

Here is a video of typing Choices to an existing assembly