What is a white list?
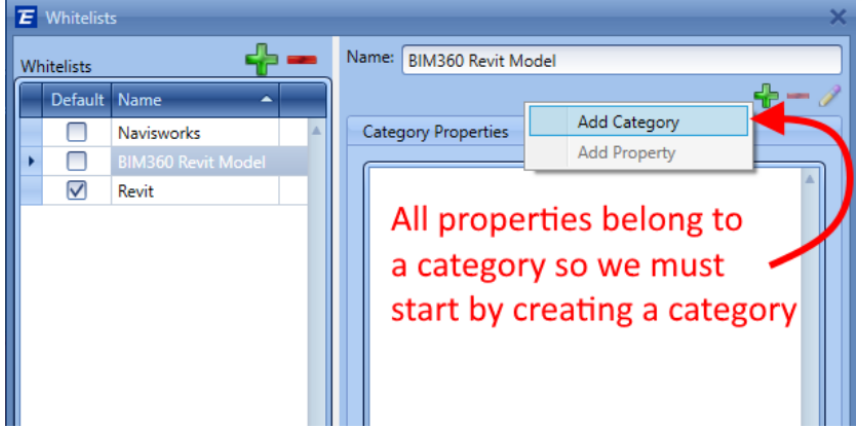
A white list in Estimator is a list of model categories and properties within those categories that Estimator needs to pull from the model.
What do you use a white list for?
Estimator locates the properties that are defined in the selected white list within the model currently being viewed and displays them as component properties that can be mapped to quantities or used to drive new quantities using formulaic properties. These properties are also added to the list of properties that you can filter by within Estimators Filter View.
How do I find the properties to put in a white list?
In a nutshell, you have to know what properties you want to obtain from a model in order to add them to the white list. It is always best to work with the model author ahead of time so that they build the information into the model from the onset in a way that you can use. If you can reach this level of coordination you will build the white list before ever receiving your first version of the model. If you are unfamiliar with what data is available in a model then one way to learn what is usable from the model is simply opening it up inside of BIM 360 (outside of Estimator), selecting the components you would like to use for quantification, and looking through its properties.
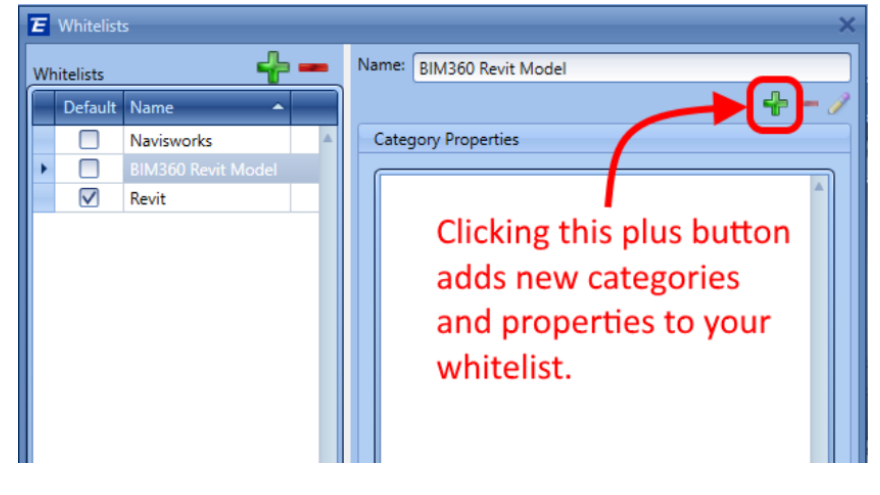
How do I use the white list tool in Estimator?
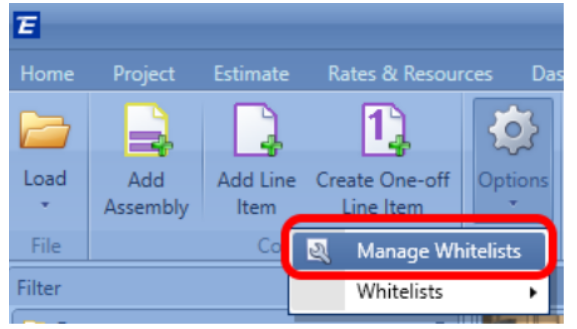
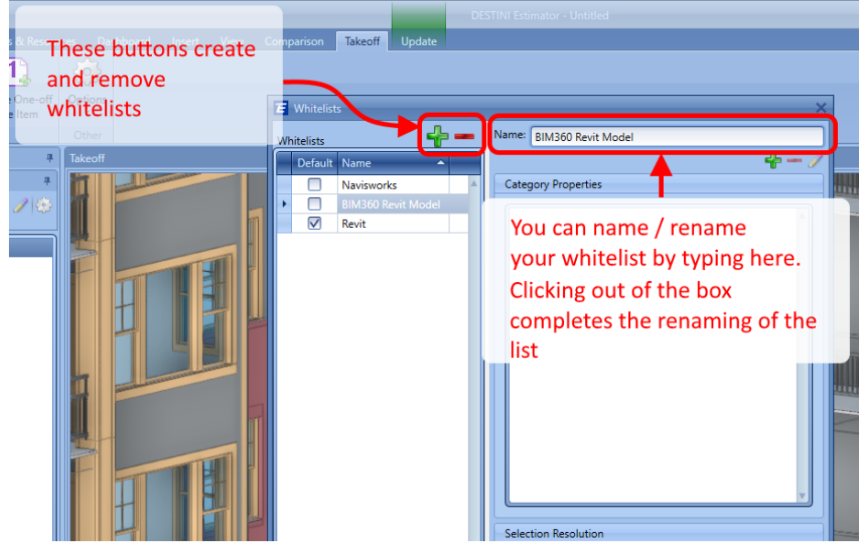
To create, remove, or modify a white list click on the Manage Whitelists button under Options in the Takeoff View.
What is Selection Resolution?
Selection resolution is your way of telling Estimator how you want it to look for information in the model. The selection resolution is specific to each individual property.
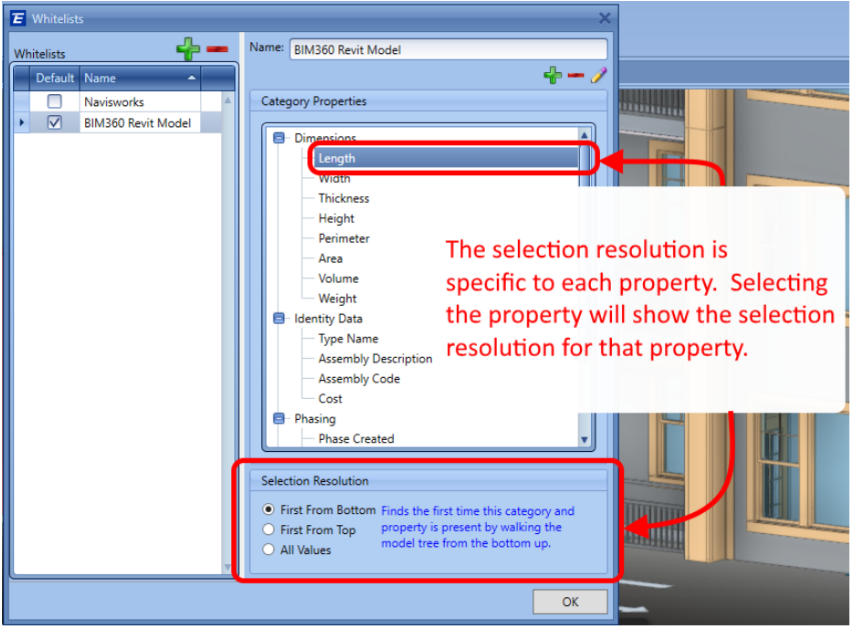
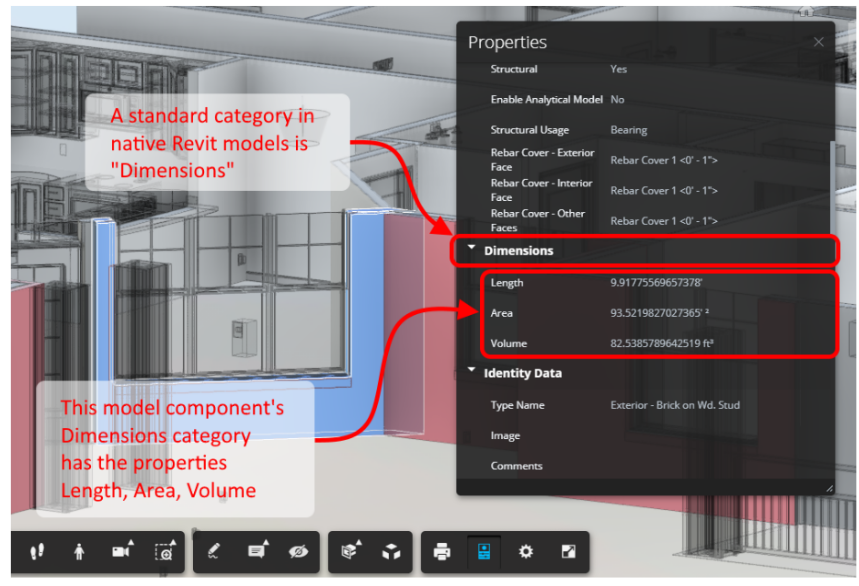
There are three possible values to choose from when specifying the selection resolution First From Bottom, First From Top, and All Values. These are the different techniques that Estimator will take when obtaining the value for that property on each component in the model. The basic idea is that each model component exists in a hierarchy like a series of folders. Each of the folders contains information on that model component at that level. For example, at the top, the folder might be the whole project, followed by subfolders containing the buildings in the project and so on all the way down until you get to the geometry representing a single model component like a door or a floor object. Setting the selection resolution to First From Bottom tells Estimator to start looking for a value for the property at the bottom and work your way up the folders until you find it. For example, start at the geometry component for the wall selected above and see if it has a category named Dimensions with a property named Length. If so, then take the value for Length at that level and assign it to the wall component. This is the default value and will be the best value for almost all of your properties.
Selecting All Values will create an individual property for each value that is encountered starting from the bottom and working its way up. In this case, if multiple folders had a category called Dimensions with a property called Length then a property would be created for each individual value that was found. These properties would be named Length1, Length2, Length3, etc... You want to select All Values for properties that are used to organize the model. One great example where you want to use this selection resolution is with the property Name in the category Item. This will recreate the layer tree available in Navisworks and is very useful when working with .nwd files in BIM360 or natively in Navisworks.
What happens when telling Estimator to use a new whitelist?
Telling Estimator to use a new whitelist will cause Estimator to re-walk the entire model and obtain the data as directed by the new whitelist. Any existing model data for this model will be removed so that there are not multiple different values for the same component which could cause large issues in understanding which quantities are driving your estimate.
Sharing Whitelist between Teams
To share a whitelist between teams follow the steps below after the file is completed.
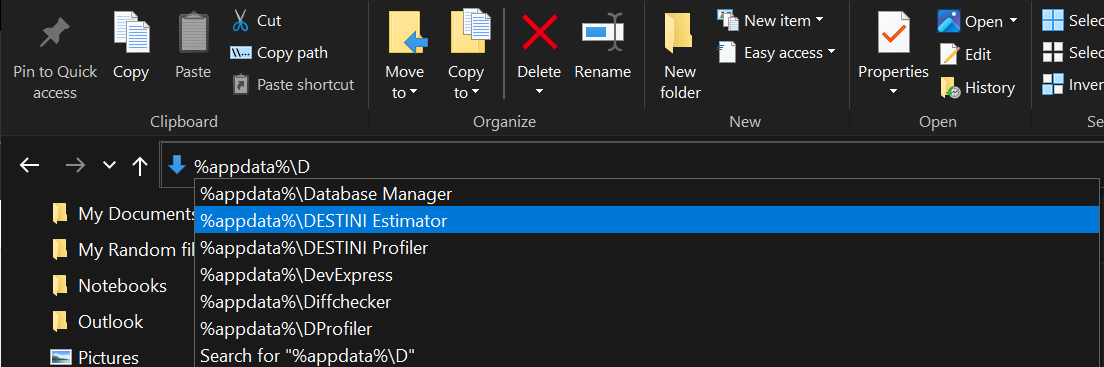
1. In File Explorer type: %appdata%\DESTINI Estimator in the navigation Window
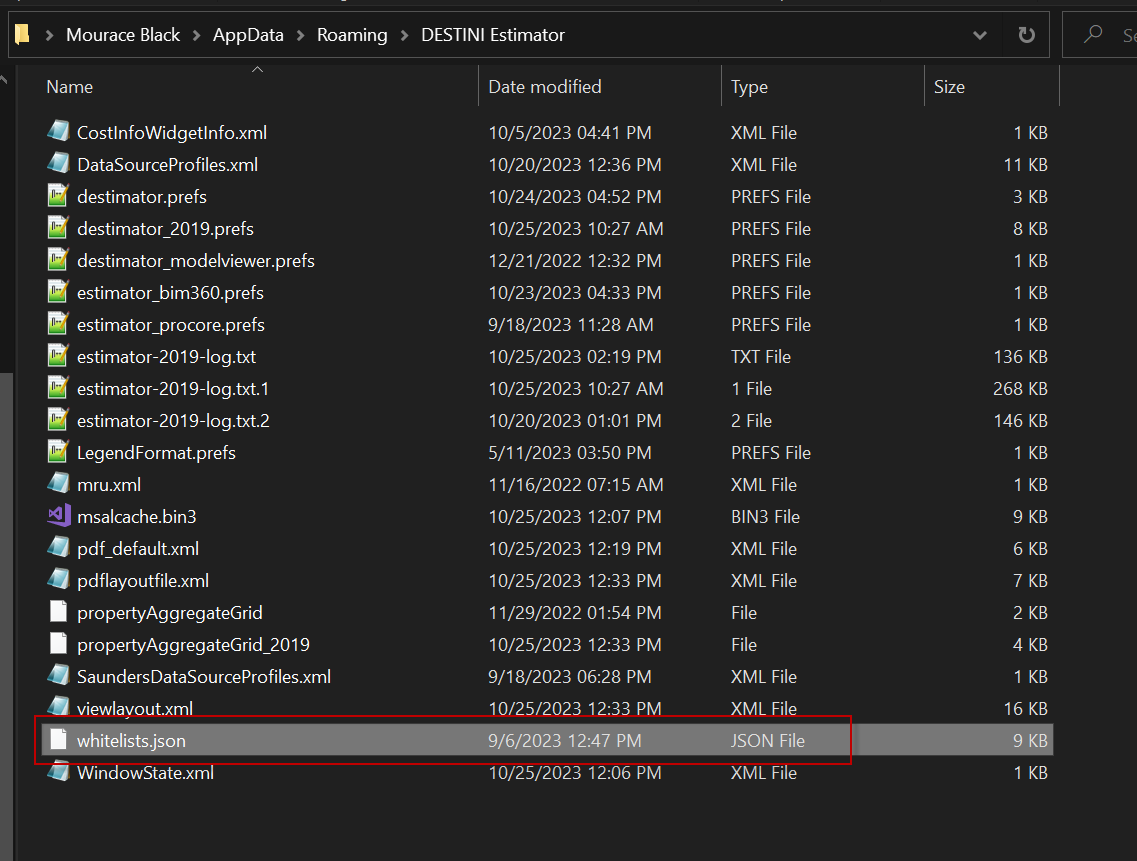
2. Copy the whitelist.json file to your Desktop and send it to the team.
3. They will need to follow step 1 to replace the new file in their Appdata\DESTINI Estimator location.