To automatically update your Power BI file in Azure requires creating a Runbook in the Automation Account. Creating a Runbook
Create a runbook in the Azure portal
- Sign in to the Azure portal.
- Search for and select Automation Accounts.
- On the Automation Accounts page, select your Automation account from the list.
- From the Automation account, select Runbooks under Process Automation to open the list of runbooks.
- Click Create a runbook.
- Name the runbook. The runbook name must start with a letter and can contain letters, numbers, underscores, and dashes.
- From the Runbook type drop-down. Select its type.
- Select the Runtime version
- Enter applicable Description
- Click Create to create the runbook.
Updating the Powershell file
Download the Powershell template from here - Powershell runbook template

In the file you want to update this four areas with your data:
1. YOURAZURESQLSERVER.windows.net
2. YOURProduction_DESTINIData
3. DBLOGIN - username mapped to your database
4. DBPASSWD - password for your database
Next, Save the file to import.
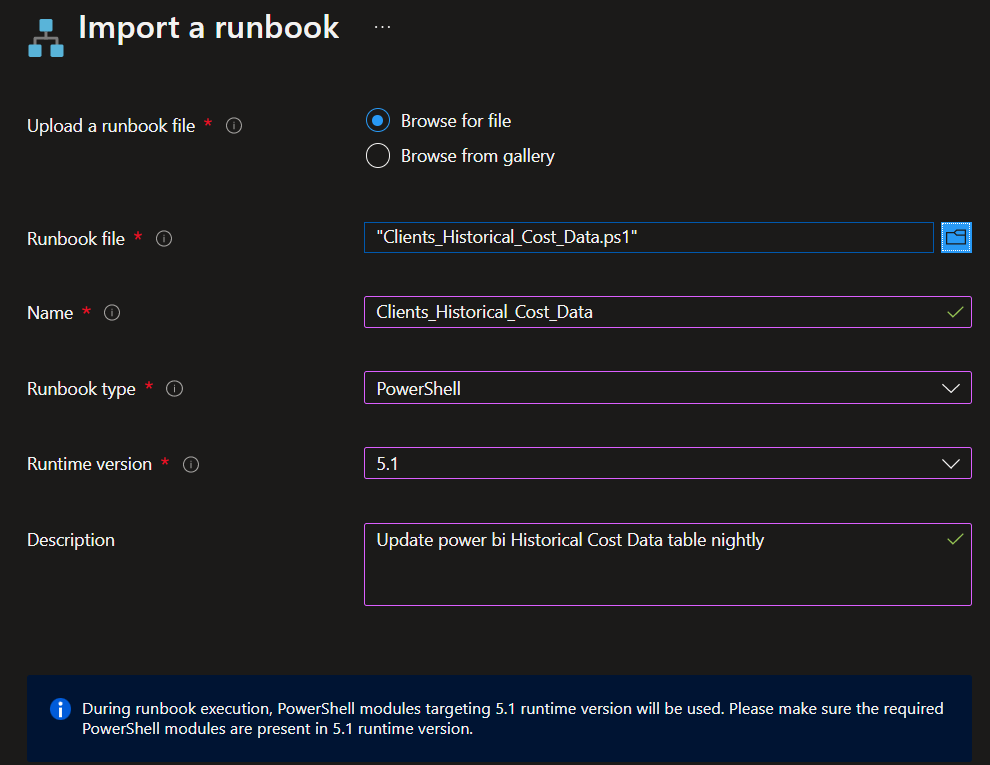
Importing your Powershell file
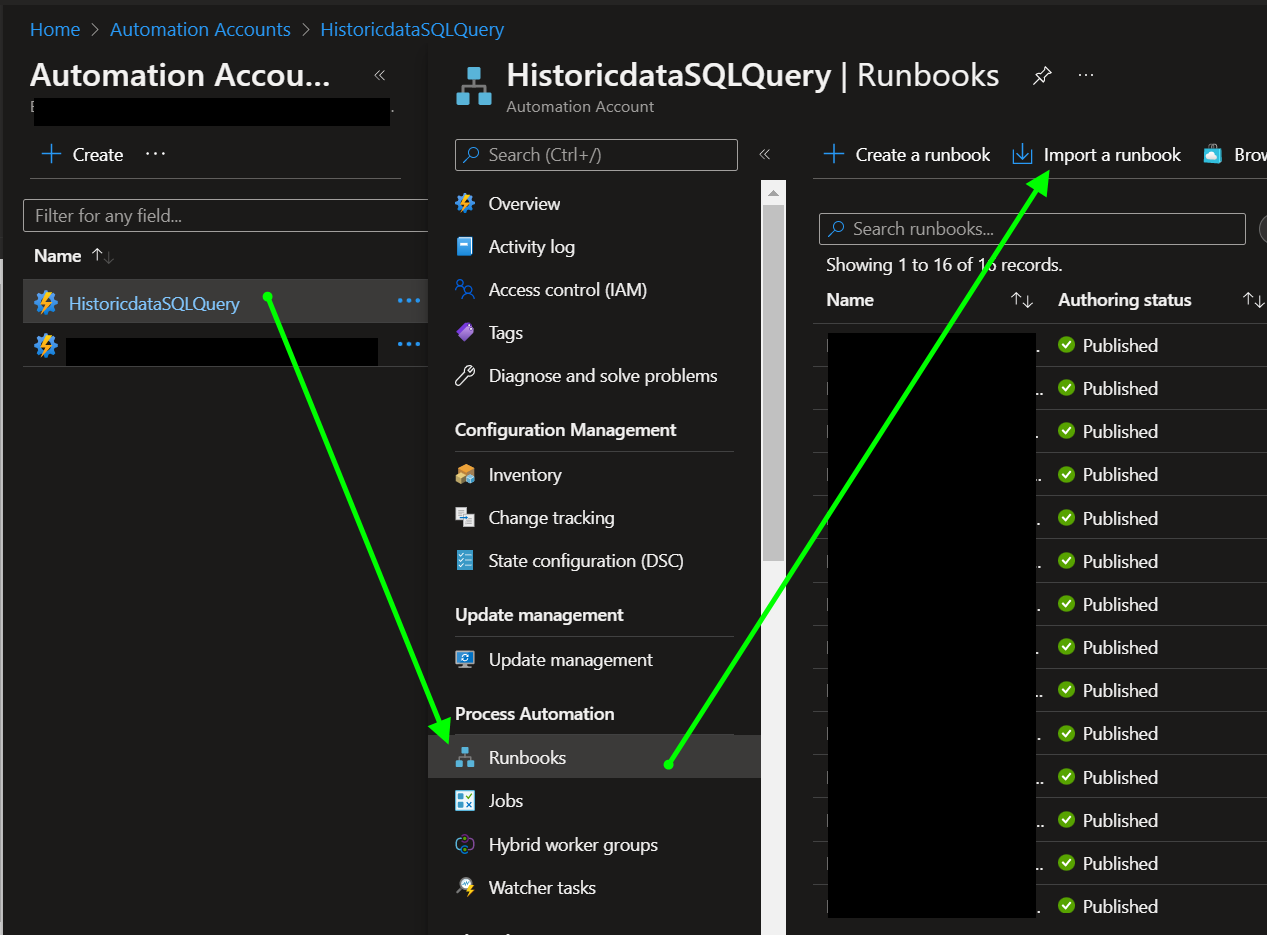
1. In your Azure portal search for Runbook and click the Import a Runbook button.
2. Fill out the data that is not populated
3. Click the publish button

4. Click on the Runbook and click on the schedule button
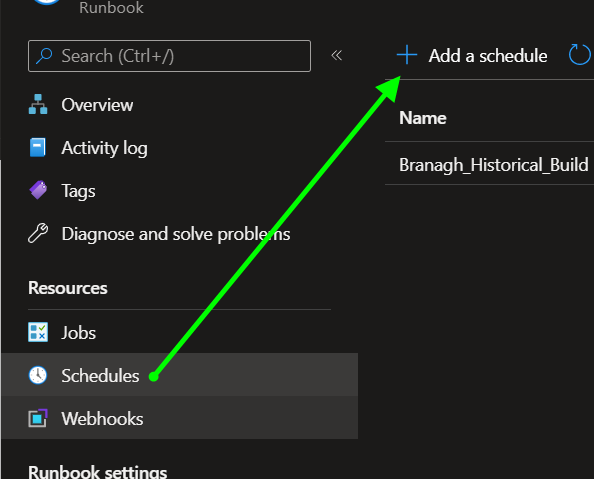
5. Click Link a schedule to your runbook and click OK

5. Click Add schedule and fill out the data similar to my info and click Create.
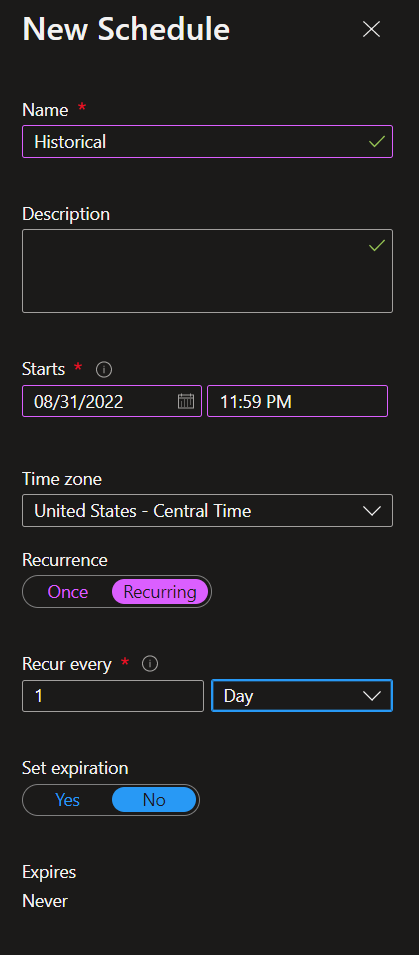
This should run at night ONLY because running during the day can hinder performance.
Make sure the Recurrence is changed to Recurring once daily.