How To Start a Takeoff Using an Assembly

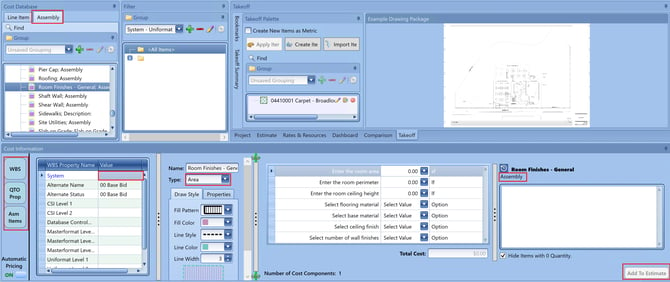
Before completing any of the steps below, make sure you have set a scale in the Takeoff View and that WBS, QTO Prop, and Asm Items are turned on (blue) in the Cost Information View.
- In the Cost Database window, click on the Assembly tab.
- Navigate to the assembly you want to use for your take-off and single click on it.
- Input the System the line items generated from your assembly should “live in” in your estimate. The system will automatically populate with the last System you selected.
- Verify the takeoff Type (area, line, count).
- If needed, rename the assembly description in the upper right corner of the Cost Information View. Renaming the assembly in this location will rename the assembly in both the Estimate View and the Takeoff Palette.
-
-
Here are the steps:
-
Group by Assembly
-
Click the Assembly header
-
Update the Assembly Name or Description in the Cost Information View
-
-
- Perform your takeoff.
- Answer all of the assembly questions.
- Click Add to Estimate.
