How To Start a Takeoff Using a Line Item

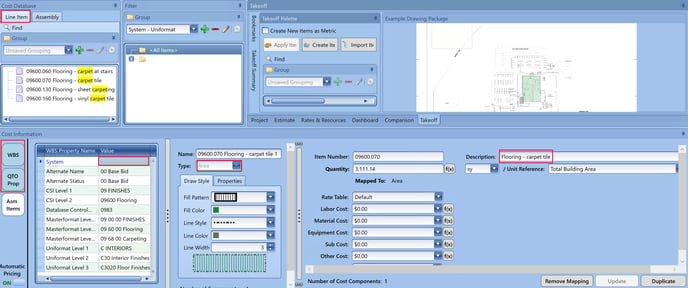
Before completing any of the steps below, make sure you have set a scale in the Takeoff View and WBS and QTO Prop are turned on (blue) in the Cost Information View.
- In the Cost Database window, click on a line item.
- Navigate to line item you want to use for your takeoff and single click it.
- Input the System your line item should “live in” in your estimate. The system will automatically populate with the last System you selected.
- Select the appropriate takeoff Type (area, line, count).
- If needed, rename the line item description (ex. Flooring - CPT-1).
- Perform your takeoff.
- There is no need to click a button after you perform your takeoff as the line item will already be in your estimate.
- Repeat steps for your next takeoff condition.