This article provides comprehensive guides, including videos and written instructions, for setting up Estimator in the Hosted environment. It is important to carefully follow each step, paying attention to the specific login credentials required.
If you encounter any difficulties or errors, solutions to common challenges can be found at the bottom of this guide in the 'Special Notes and Troubleshooting' section.
Step-by-Step Guide
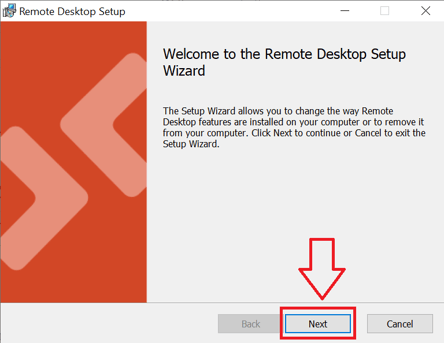
1: Download and install Microsoft Remote Desktop
- 1.1 - Click the below link to download the installer file and then navigate to your downloads folder (or the location where you chose to save the installer file).
Avoid using the version from the Microsoft Store as it is no longer supported. Instead, use the link provided below.
- 1.2 - Double-click the installer file you just downloaded to launch it. The installation is straightforward; just keep clicking on the 'Next' button until the application is installed, then click 'Finish'.
2: Log into the Remote Desktop application:
- 2.1 - Once installed, you can easily find the Remote Desktop application on your PC by searching for it in the Windows Start Menu search bar on the bottom left of your screen:

- 2.2 - Launch the Remote Desktop app. Since you'll be using Remote Desktop every time you access Estimator, it's a good idea to pin it to your Taskbar.
- To do this, RIGHT-click on the Remote Desktop icon on the Taskbar and select 'Pin to taskbar' (see below). This will keep the icon there at all times, even when the application is closed, making it easy to open in the future.

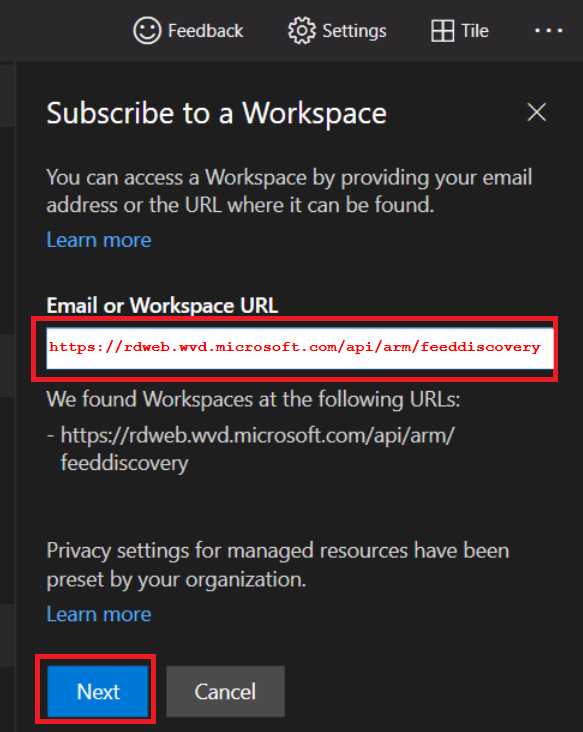
- 2.3 - In the Remote Desktop app, click on the ‘Subscribe via URL’ button.

-
2.4 - Copy and paste the following link into the Workspace URL field and click Next
https://rdweb.wvd.microsoft.com/api/arm/feeddiscovery
- 2.5 - Sign in with you Beck Tech DESTINI ID. DO NOT use your corporate email here. You were sent an email from Beck Tech Support containing your Beck email (ending @clients.beck-technology.com) and your temporary password. Use these credentials to log in here.
Note: If you see your corporate email pre-populated in the Remote Desktop login window, click on Use another account and enter the Beck GUID email as shown below

- Use the keyboard shortcut CTRL-V to paste your GUID email into the login window. Right-click-Paste doesn't work here.

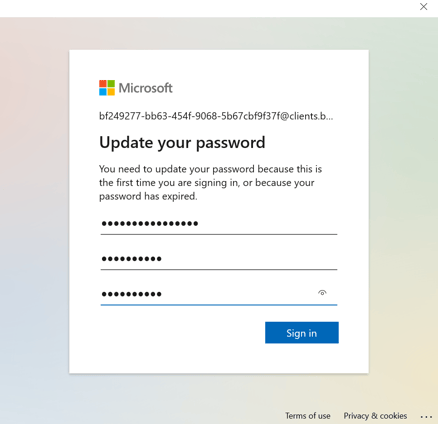
- 2.6 - On your first time logging in, you will be prompted to change your password. Please create a new password by following the prompts.
WARNING: This password will be associated with your Beck email address, and is ONLY for logging into Remote Desktop. DO NOT use your Beck email to log into the license window in Estimator. If you enter your Beck email into the license window, you will get an error.
- 2.7 - Keep a record of your GUID email and password in a secure place. They are essential to accessing Estimator and, even though you won't need to use them every day, you will inevitably need them at a later date.
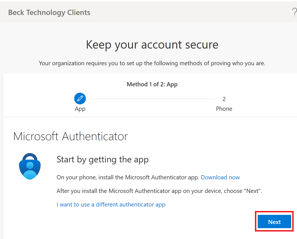
3: Set up Multi-Factor Authentication
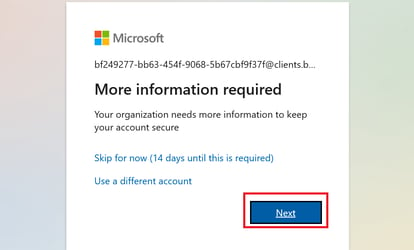
- 3.1 - The first time you log in, you will arrive at the prompt, 'More information required'. This is because you are required to set up multi-factor authentication (MFA) on your cellphone. We will be doing tasks on your both your PC and phone, as clearly marked on each step.
- 3.2 - On your PC: Click 'Next'.
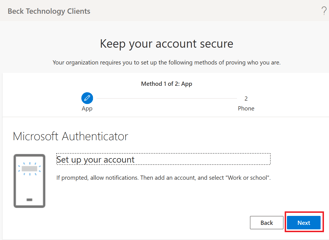
- 3.3 - On your PC: On the screens below, click 'Next', and 'Next' again:
- 3.4 - On your PC: You will arrive at the below screen with your QR Code (that black square as shown). We will need this in a moment.

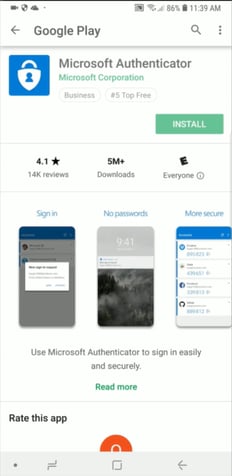
- 3.5 - On your phone: Open the App Store (iPhone) or the Google Play App Store (Android). Search for and download the free Microsoft Authenticator app. It looks like this:
-png.png?width=220&name=MicrosoftTeams-image%20(3)-png.png)
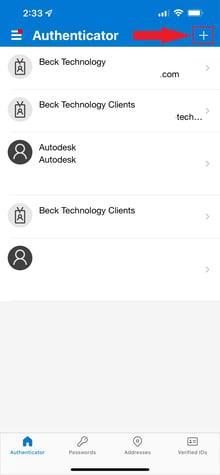
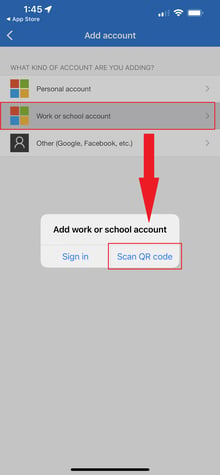
- 3.6 - On your phone: Open the Authenticator application. If this is your first time opening the Authenticator app, skip the intro guide and press the large '+' to add your first account. If you are already using the Authenticator app for other accounts, you will have to manually add a new account by pressing the '+' button on the upper-right corner of the screen. Now, select 'Work or school account' and then click on 'Scan QR Code'.
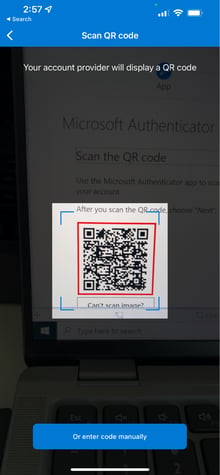
- 3.7 - On your phone: After clicking 'Scan QR Code' the app will ask for access to your phone camera. Allow it, and then point your phone camera at the QR Code on your computer screen. Line up the code with the transparent box. This will add your Beck account to your Authenticator app.
- 3.8 - On your PC: Click 'Next' to proceed from the QR code page, and then next again on the window below:
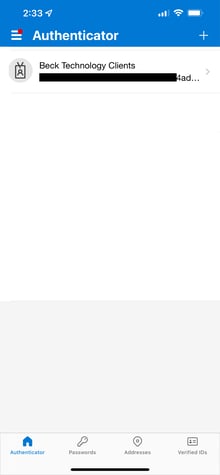
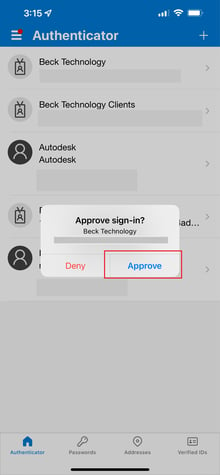
- 3.9 - It will now test to make sure the app is set up by sending a notification to your phone to approve. On your phone, click 'Approve' on the notification (you should see the notification on your phone whether or not the Authenticator app is open, but if you don't see the notification, open the Authenticator app to see it there).
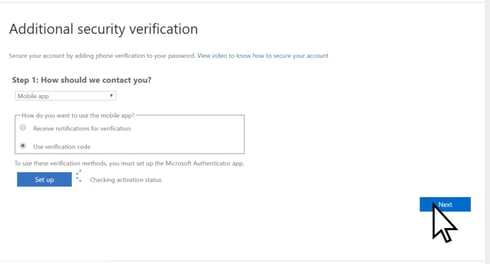
- 3.10 - On your PC: You should see that your approval on your phone is acknowledged, and you can move on to the next step. Now, we need to add your cellphone number. Enter your number in the empty box and click 'Next':
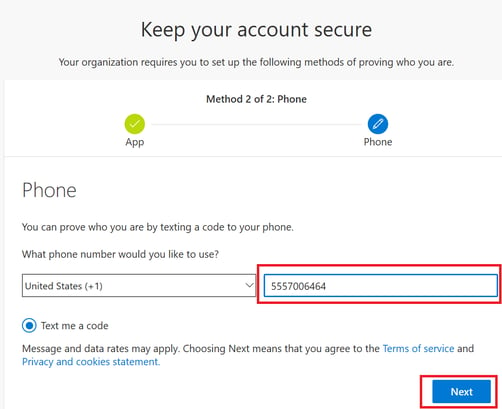
- 3.11 - You will receive a text message on your phone containing a six-digit code. Enter this code on your PC and click 'Next'. This completes the MFA setup process.
4: Launch Estimator and Sign into the License Window
- 4.1 - You should now be logged into Remote Desktop and you should see Estimator, File Explorer and, for some users, Data Manager icons in the Remote Desktop window. From now on, this is what you'll see when you open Remote Desktop.
- 4.2 - Launch Estimator by double-clicking on the appropriate icon.

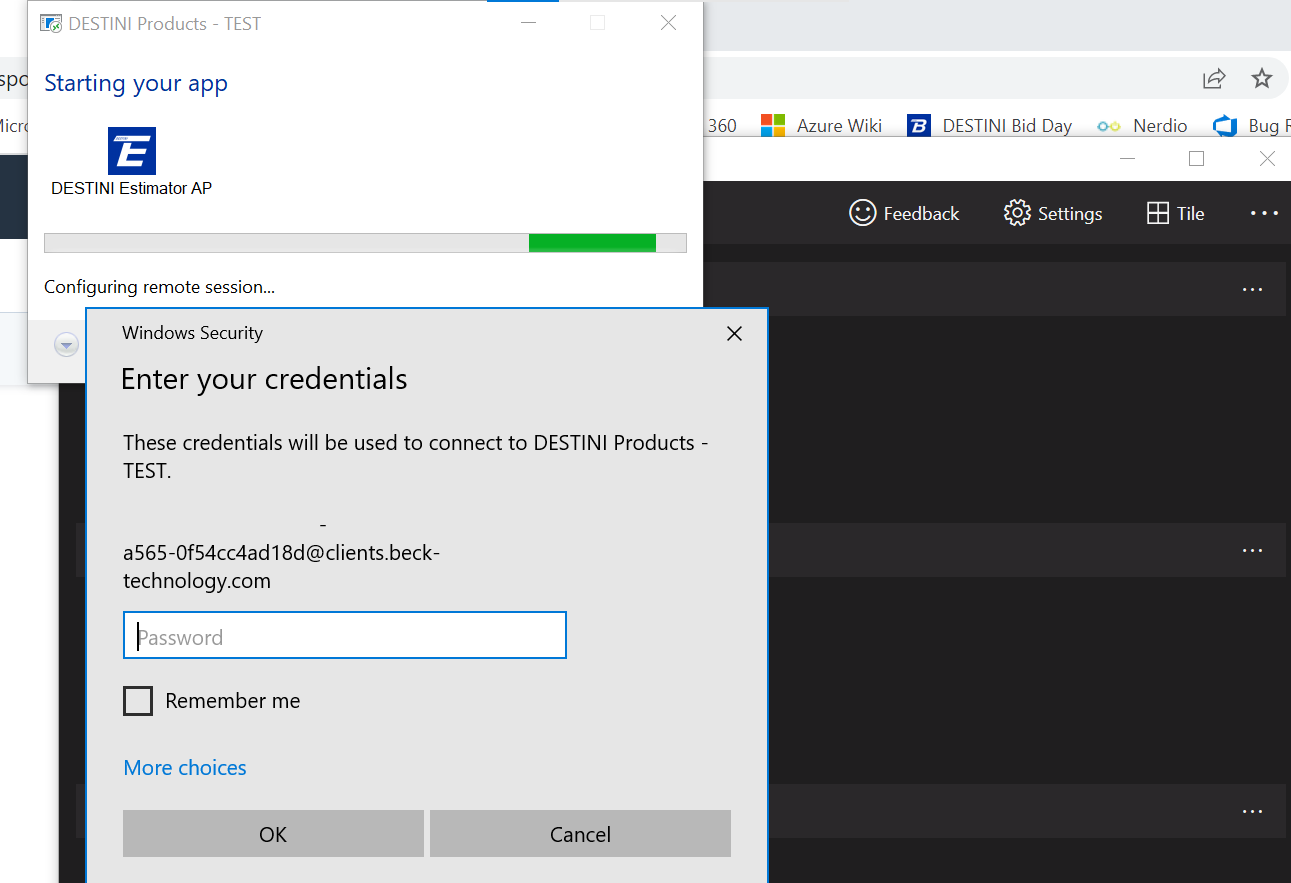
- 4.3 - The first time you launch Estimator, you may be prompted with a 'Windows Security' sign in box. Sign in here with your GUID email and the password you created in Step 2 and click "Remember Me".
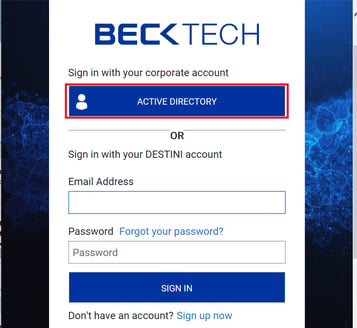
- 4.4 - Once Estimator has launched, you will see the Web License window pop up. DO NOT sign into the license with your Beck email ending ‘@clients. Beck-technology.com’. Doing so will cause an error.
- Click on ‘Active Directory’ and sign in with your regular corporate email and password (the same email and password you use to sign into your PC, or your company email).
If the Active Directory option doesn't work, use the Sign up Now option - See the instructions under 'Option 2' in the following article - Web License Access
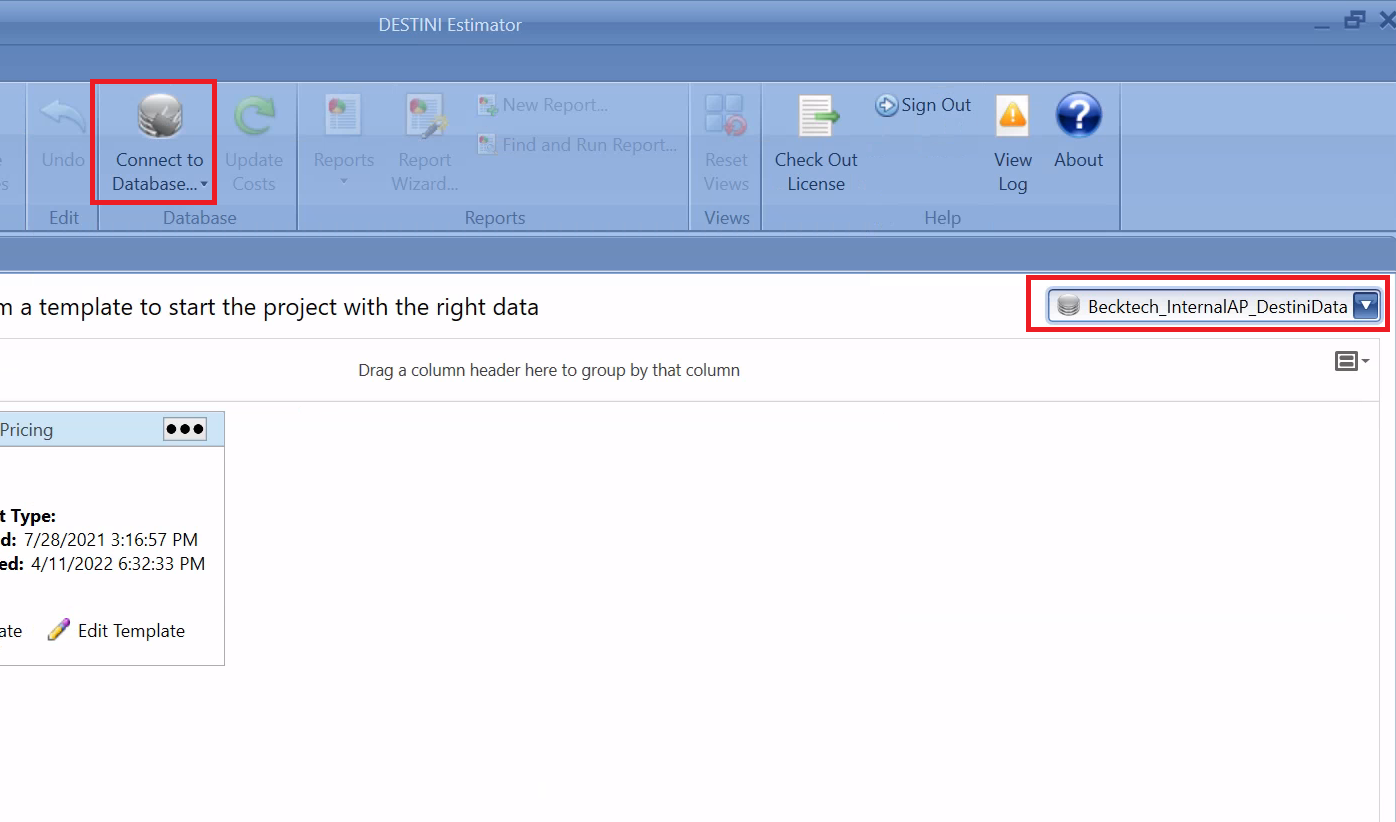
5: Connect to your Databases
• 5.1 - If this is your first time using Estimator, you will need to connect to your Cost and Estimates databases. Click on the ‘Connect to Database’ button and select your cost database, and then do the same for the estimates database via the drop-down on the right (see both highlighted in red in the screenshot on the right).
Tip: Most clients will see two databases in each list, one for training and one for production. If your company is new to Estimator, you will likely want to choose the Training databases for your training exercises. If you're a new employee at a company that already uses Estimator, please ask your manager which databases to pick.
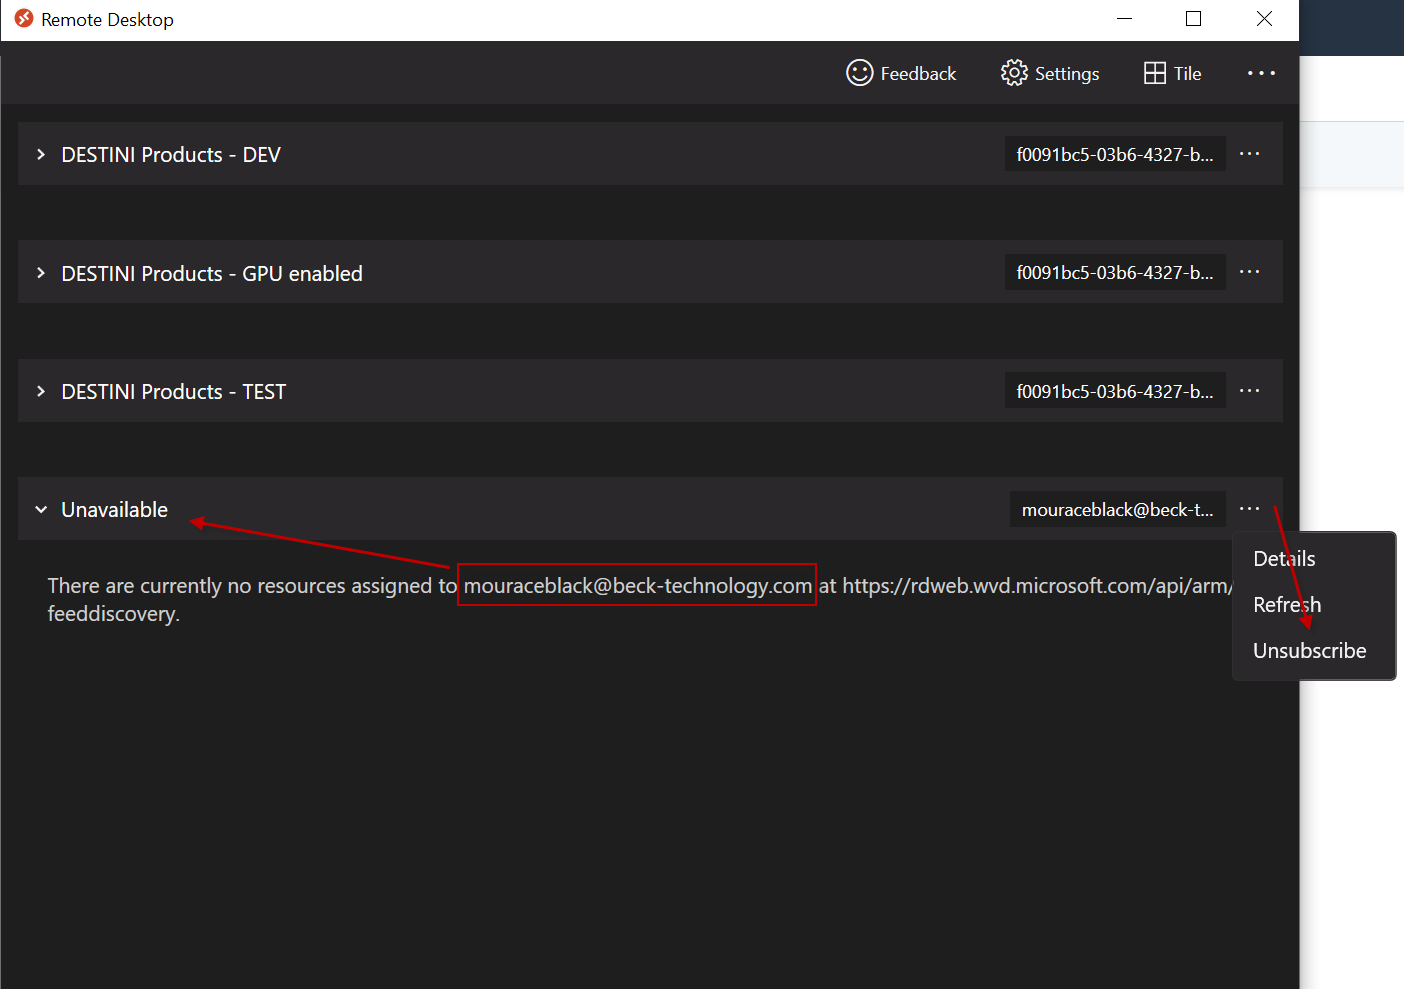
- 5.2 - Please keep a record of your Beck login credentials - that is the only way to access the applications. You cannot use your Company email to log into Remote Desktop. If you log in with your company email, you will get the Unavailable resource error, as shown below. To fix this, click the ellipsis, Unsubscribe, and carefully follow the instructions given in step 2.4.
Setup Complete
You are now setup and ready to use Estimator in the Hosted environment. If you have any questions or concerns, please reach out to Beck Tech Support and we will be happy to assist you.
Special Notes and Troubleshooting
Issue: 'There are No Resources Assigned' Error in Remote Desktop
- You cannot use your Company email to Subscribe or log into Remote Desktop. If you log into Remote Desktop with your company email, you will get the 'no available resources' error, as shown below. To fix this, click the ellipsis > Unsubscribe, and then carefully follow the instructions given in step 2.4.

Issue: There's no 'Subscribe' Button in Remote Desktop:
Oddly, Microsoft has released two slightly different versions of the Remote Desktop app. If you downloaded the version linked in this guide, you will see the 'Subscribe' button as shown in Step 2.3. If you chose to download Remote Desktop from the Microsoft Store or another source, you will not see this button.
You can still log in, but using this version of Remote Desktop comes with limitations such as not being able to use multiple monitors. If you'd like to proceed anyway, here's how:
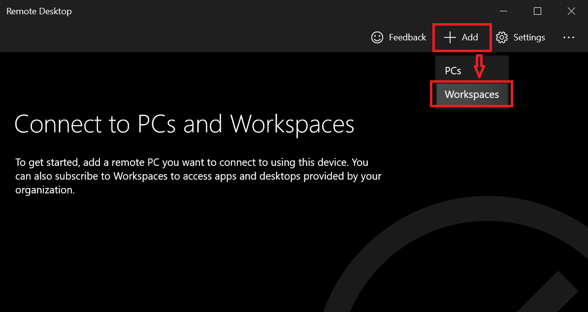
- Click on the '+Add' button, and then 'Workspaces':
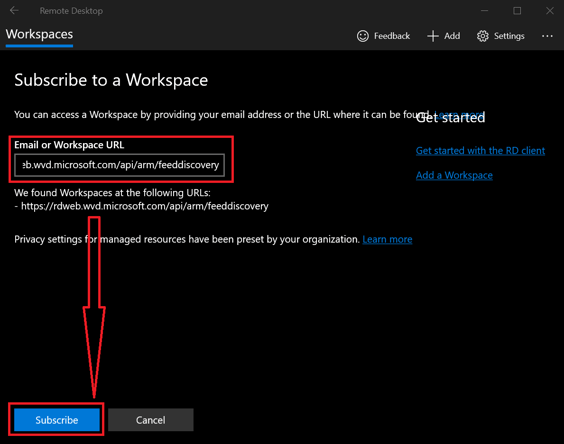
 On the below screen, copy and paste the following URL into the Workspace URL box: https://rdweb.wvd.microsoft.com/api/arm/feeddiscovery
 - Click Subscribe:
- This will take you to the Microsoft Login Window, and you can continue the normal steps above from Step 2.4.
Issue: Active Directory Login is Not Working
- If you're trying to sign into the license window via the Active Directory option and it is not working, it's possible that your company doesn't allow for Active Directory sign in.
- In this case, you will need to use the alternative Sign up Now option - See the instructions under 'Option 2' in the following article - Web License Access.
- If you're trying to sign into Active Directory with your Beck email, this will not work. Please sign in with your company email.
Accessing Estimator Hosted via a Web Browser
The Hosted environment can be accessed directly via a web browser. This can be handy if you're using a different computer and just need temporary access, or if you're on a Mac computer, but this is not the recommended way to use the DESTINI Suite permanently due to some nuanced restrictions (eg. no ability to upload files to the Hosted share drive in Estimator).
- In your web browser, go to the following page: https://rdweb.wvd.microsoft.com/arm/webclient
- Sign in with your Beck email (not your company email).
Set up Using a Mac Computer
The Remote Desktop app in the App Store will allow you to set up and connect to Estimator, but it is limited and will not allow you to utilize multiple screens.
If you are using a Mac computer, it is recommended that you use a Windows partition and use the instructions above.