Our Clients have the ability to install one of the later versions of MSQL Server Express locally, to match the centralized version of MSQL Server that is running their Production Databases. This is done by installing the local SQL Server before deploying DESTINI Data Manager and Estimator MSI or EXE.
Each silent install command is listed below along with the download link. Each silent command below will show the progress of the install, to change that to where it's not shown, change each switch from /QS /X to /Q /X (Remove the 'S' switch)
Note 1: if you are installing SQL 2014, the first thing is to check if .NET 3.5 Platform is enabled on that computer. The other MSQL versions do not require .NET 3.5 enabled.
CMD prompt SQL instance install
Here are the steps to install any of the below versions using the CMD Prompt. In the example below, we use the SQL 2019 command below after launching the CMD prompt as an Admin:

1. Type the command to get to the directory where the SQL is downloaded to, in this example, it is in the Downloads folder - cd %userprofile%\downloads
2. Next copy and paste the silent command in the CMD window and click Enter. It will show the progress until complete.
SQL 2016
Here is the SQL 2016 download link
Here is the silent install command
SQLEXPRADV_x64_ENU_2016.EXE /QS /X:"C:\Temp\SQLEXPRADV_x64_ENU_13.0.5026.0" /ACTION=Install /FEATURES=SQLEngine,Conn,FullText /INSTANCENAME=BECKTECHNOLOGY /SQLSVCSTARTUPTYPE=AUTOMATIC /SECURITYMODE=SQL /SAPWD=B3ckt3ch!B3ckt3ch! /SQLSVCACCOUNT="NT AUTHORITY\SYSTEM" /ADDCURRENTUSERASSQLADMIN="True" /TCPENABLED=1 /NPENABLED=1 /IACCEPTSQLSERVERLICENSETERMS
SQL 2017
Here is the SQL 2017 download link
Here is the silent install command
SQLEXPRADV_x64_ENU_2017.exe /QS /X:"C:\Temp\SQLEXPRADV_x64_ENU_14.0.3335.7" /ACTION=Install /FEATURES=SQLEngine,Conn,FullText /INSTANCENAME=BECKTECHNOLOGY /SQLSVCSTARTUPTYPE=AUTOMATIC /SECURITYMODE=SQL /SAPWD=B3ckt3ch!B3ckt3ch! /SQLSVCACCOUNT="NT AUTHORITY\SYSTEM" /ADDCURRENTUSERASSQLADMIN="True" /TCPENABLED=1 /NPENABLED=1 /IACCEPTSQLSERVERLICENSETERMS
SQL 2019
Here is the SQL 2019 download link
Here is the silent install command
SQLEXPRADV_x64_ENU_2019.exe /QS /X:"C:\Temp\SQLEXPRADV_x64_ENU_15.0.4063.15" /ACTION=Install /FEATURES=SQLEngine,Conn,FullText /INSTANCENAME=BECKTECHNOLOGY /SQLSVCSTARTUPTYPE=AUTOMATIC /SECURITYMODE=SQL /SAPWD=B3ckt3ch!B3ckt3ch! /SQLSVCACCOUNT="NT AUTHORITY\SYSTEM" /ADDCURRENTUSERASSQLADMIN="True" /TCPENABLED=1 /NPENABLED=1 /IACCEPTSQLSERVERLICENSETERMS
Here are the steps to set up a 2019 SQL instance manually
These steps will guide you through the process of manually creating a New SQL-named instance. These steps will set up an MSSQL Local BECTECHNOLOGY instance.
Note 3: You can set up your own naming convention for a centralized server, however as mentioned, if you are installing on a user's PC you have to use the BECKTECHNOLOGY instance name.
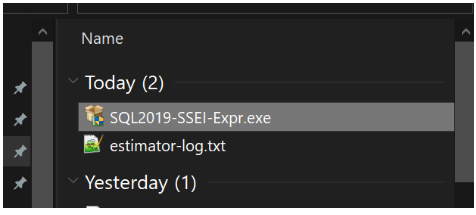
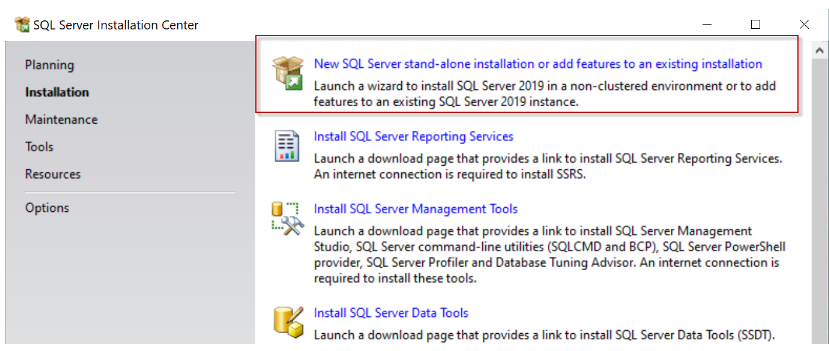
1. Click on the SQL download to extract the SETUP.
2. Click the Download Media button
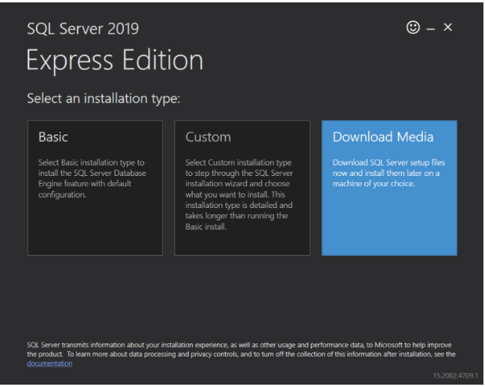
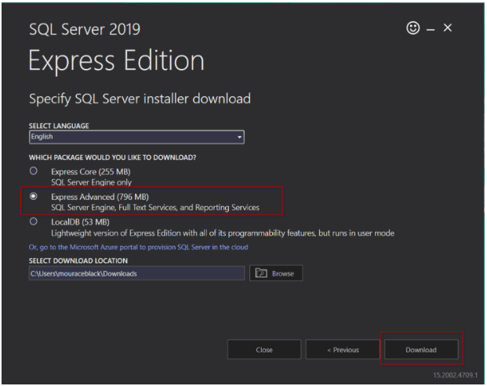
3. Select the Express Advanced button and then click Download
4. Run the SETUP.EXE button in the Extracted folder and select the New SQL Server stand-alone
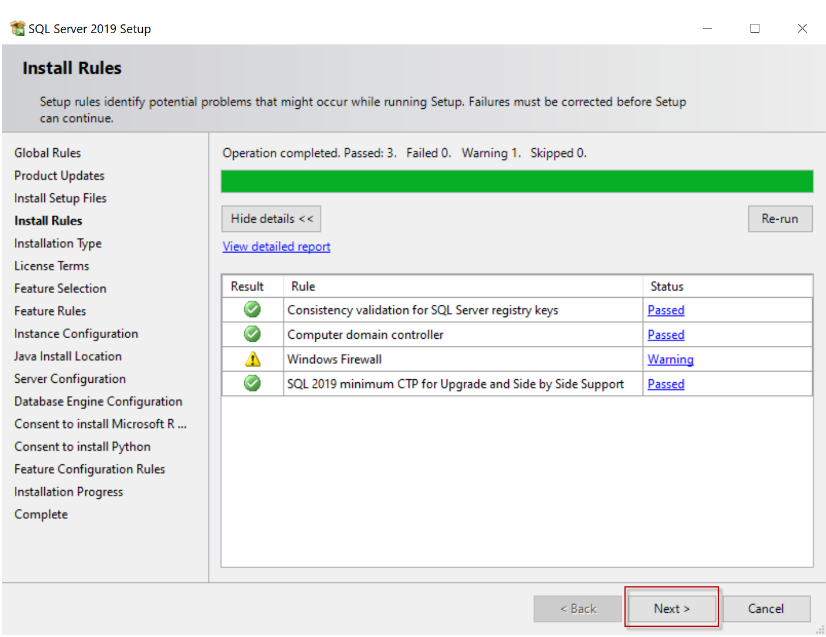
5. Click Next to bypass the Install Rules
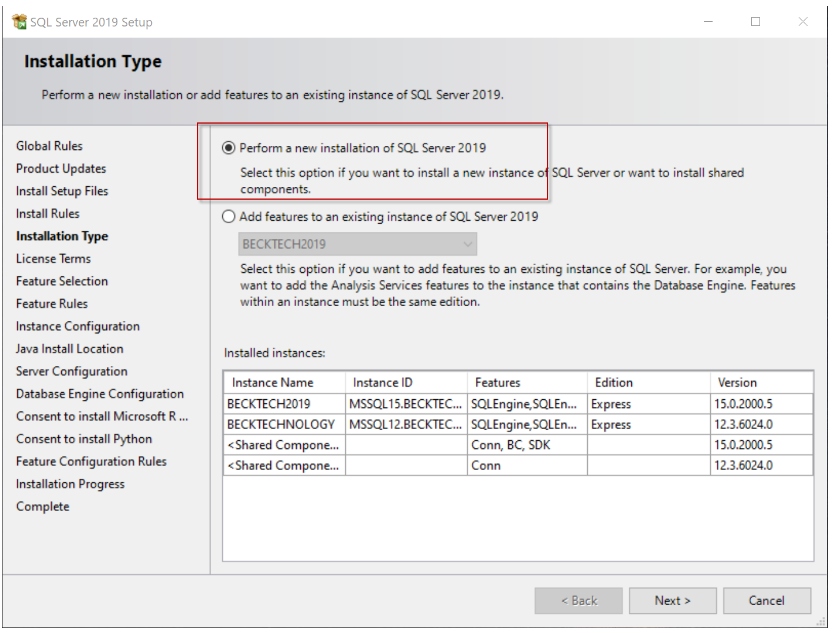
6. Select Perform a new installation and click Next > Accept the License and click Next.
7. Select the highlighted features and click Next

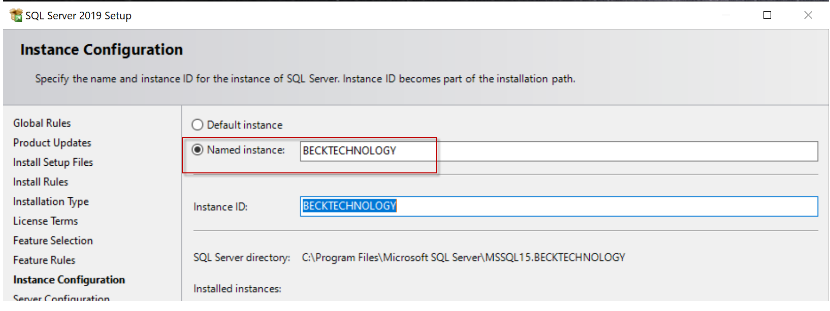
8. Add BECKTECHNOLOGY to the Instance Name and press Tab, then Next
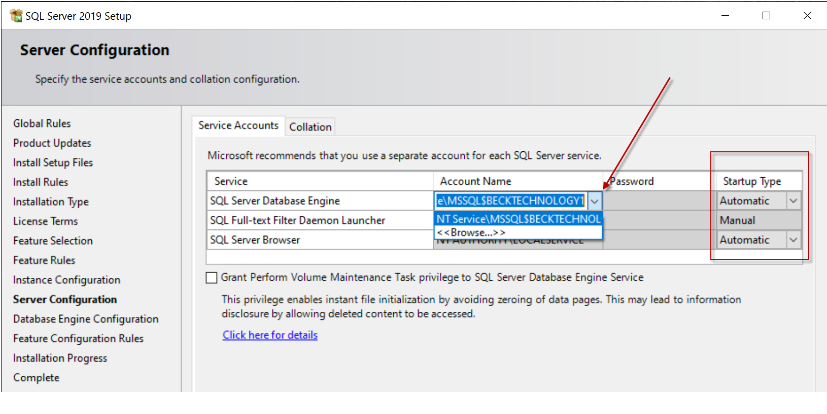
9. Make sure the Startup Types are set the same as the image below. Next, click the drop-down in SQL Server Account Name field and click Browse.
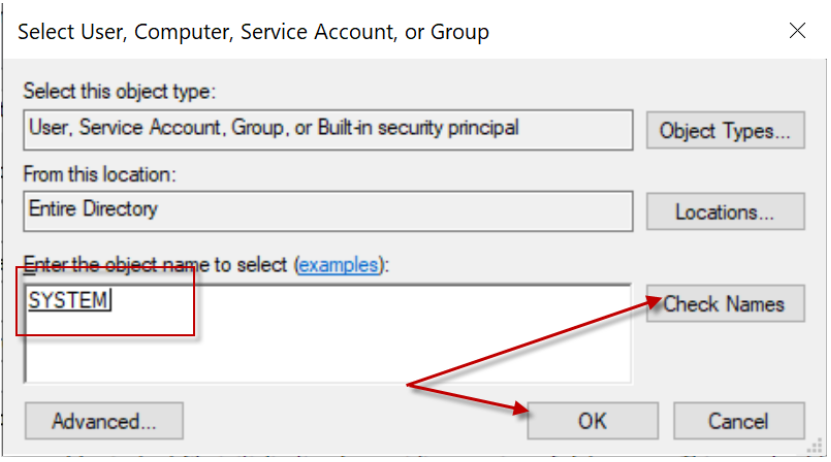
10. Type SYSTEM in the object name field > Check Name > OK - then click Next
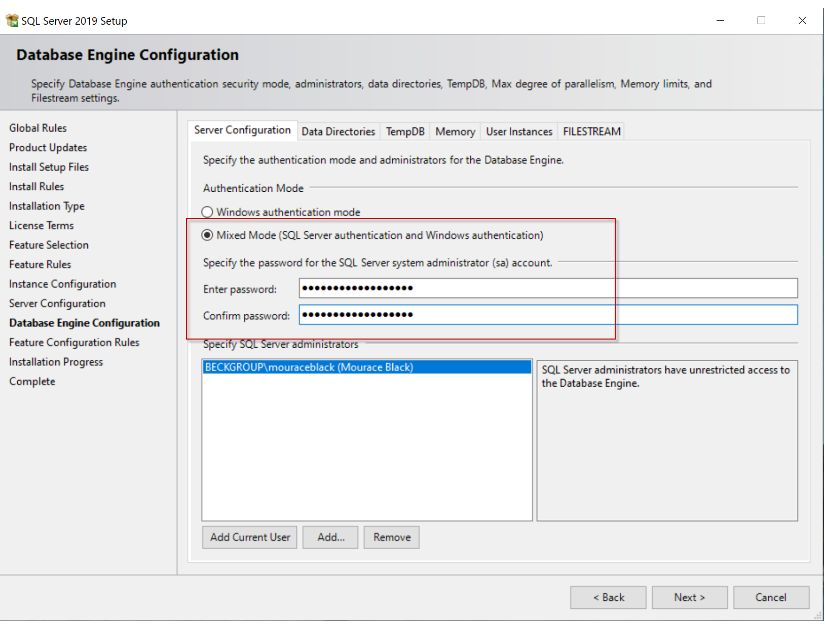
11. Select the Mixed Mode Authentication and enter the password B3ckt3ch!B3ckt3ch! in both slots and click Next to install the application.
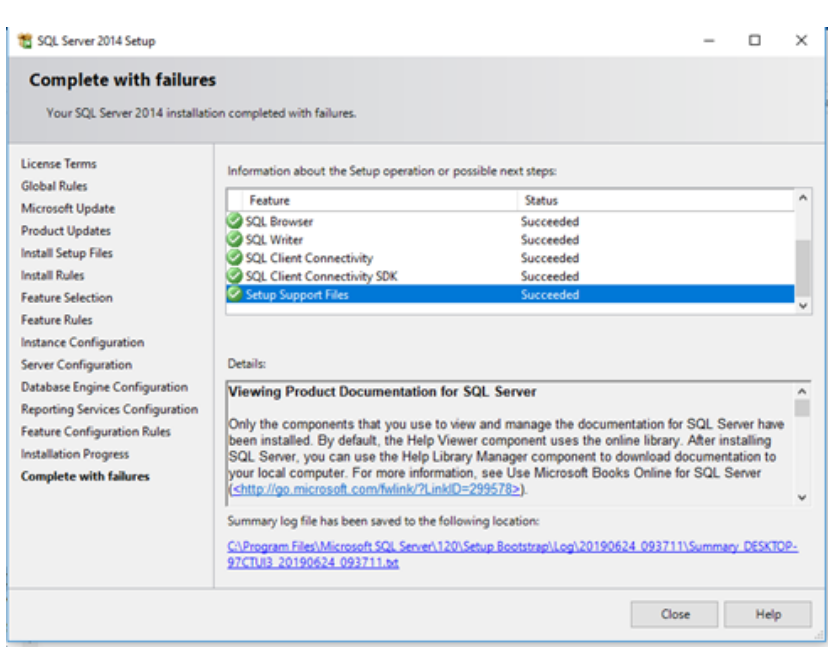
12. You will see the complete screen below, press Close to complete the setup.
The info below is ONLY for an On-Prem SQL Centralized Server setup.
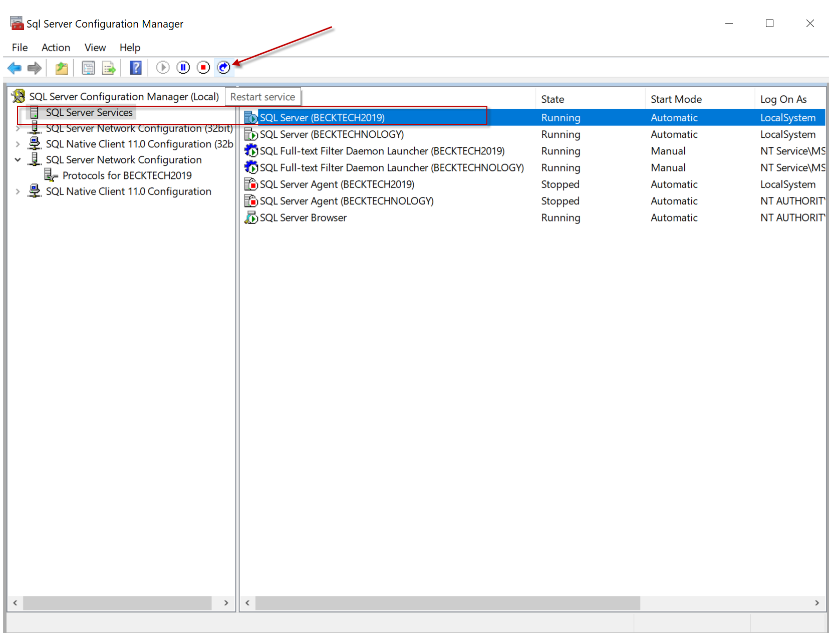
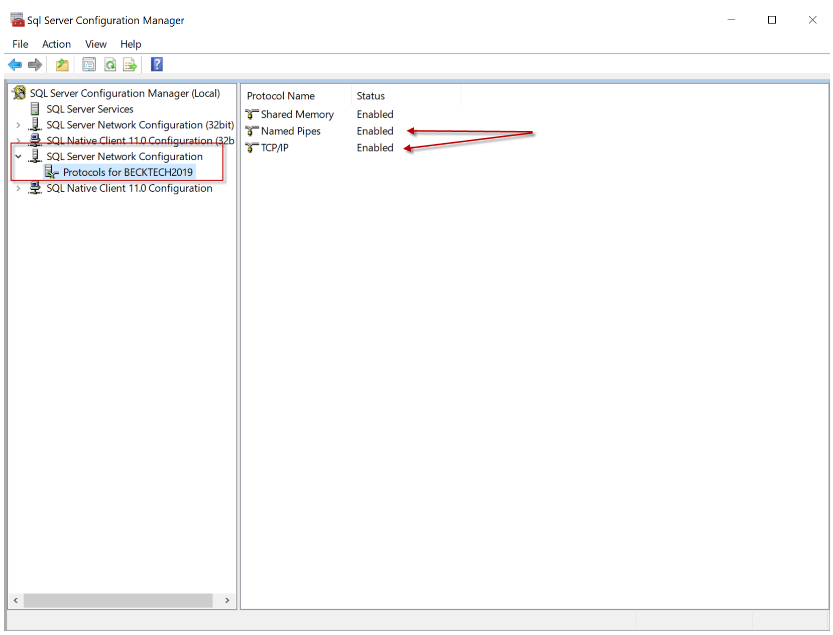
Note 4: If you forgot to set the Startup Types in Step 9 above, then those can be changed by going to the SQL Configuration Manager for that instance and ensuring your TCP/IP and Named Pipes are enabled.
If these are not enabled they could cause the below error:
603 ERROR Beck.Sql.cSqlHelper [(null)] - System.Data.SqlClient.SqlException (0x80131904): A network-related or instance-specific error occurred while establishing a connection to SQL Server. The server was not found or was not accessible. Verify that the instance name is correct and that SQL Server is configured to allow remote connections. (provider: SQL Network Interfaces, error: 26 - Error Locating Server/Instance Specified)
Click on the SQL Server Servies and Restart the SQL Server