How to Restore/Replace or Back up a Database using SQL Management Studio
SQL Server Management Option
Restore a backup database
To restore your database, do the following:
-
Launch SQL Server Management Studio (SSMS) and connect to your SQL Server instance.
-
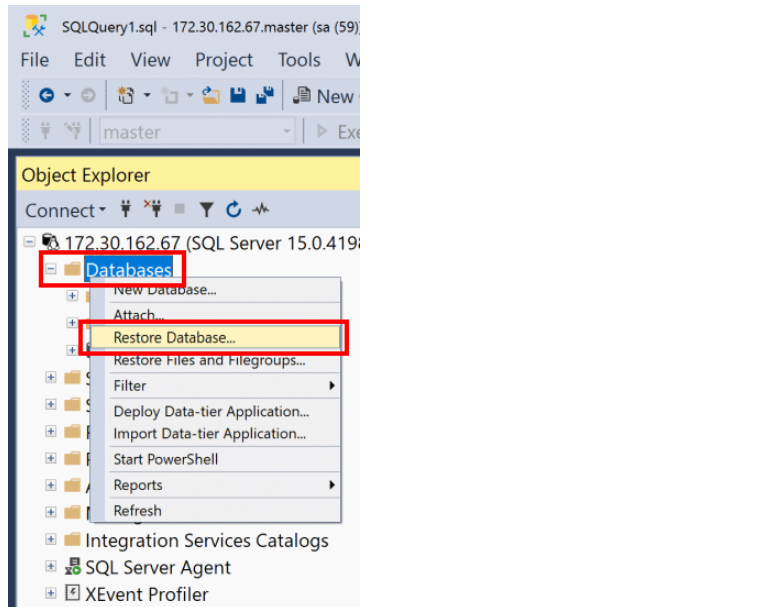
Right-click the Databases node in Object Explorer and select Restore Database...
-
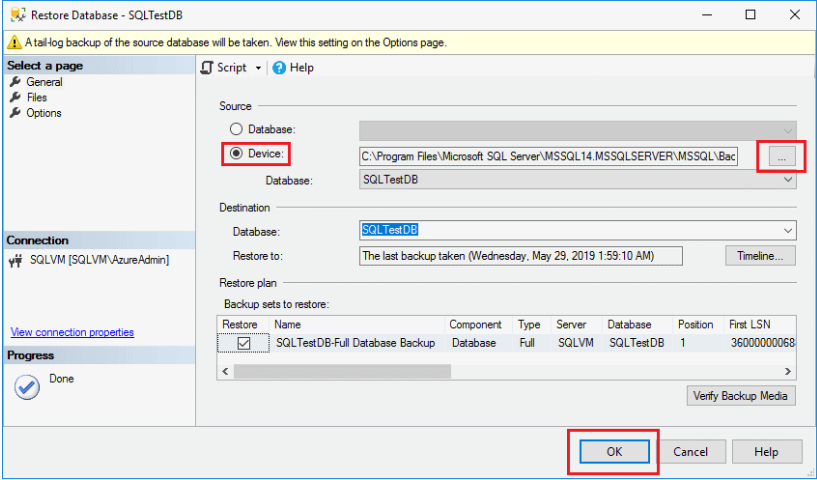
Select Device: from the Source tab and then select the ellipses (...) to locate your backup file.
-
Select Add and navigate to where your .bak file is located. Select the .bak file and then select OK.
-
Select OK to close the Select backup devices dialog box.
-
Select OK to restore the backup of your database.
Replacing a database bak file with Overwrite
If you are overwriting the database with a new one, then click the Options page and check the "Overwrite with existing database (WITH REPLACE)" then click OK.
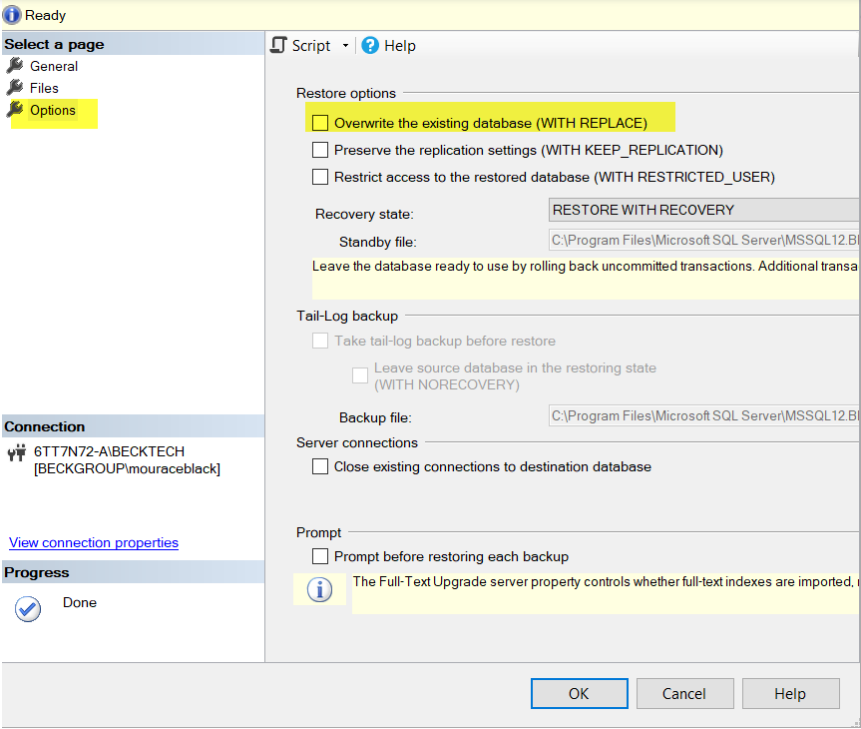
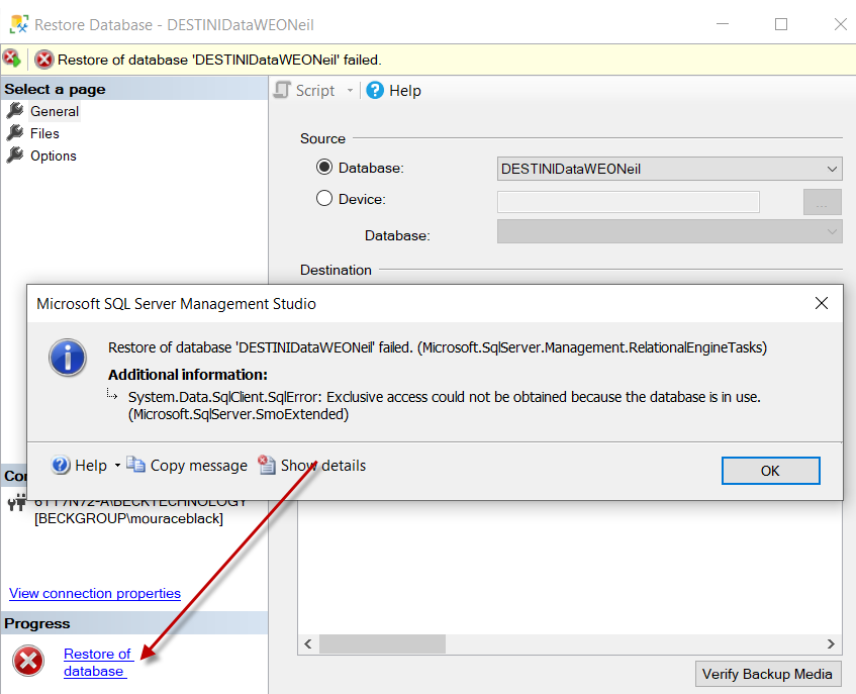
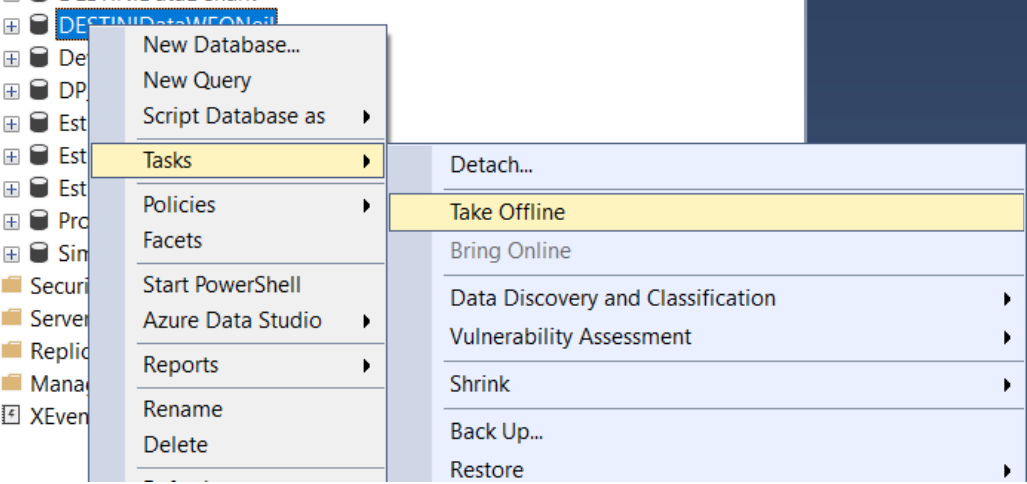
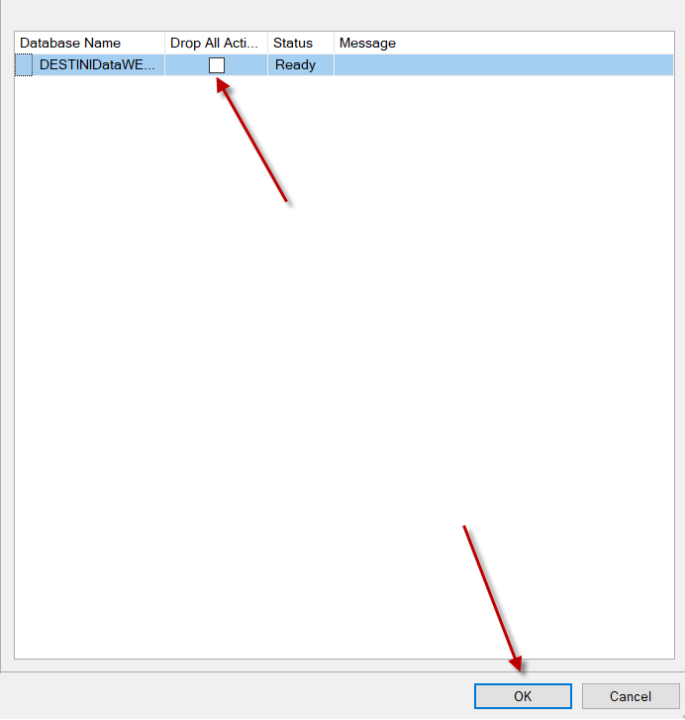
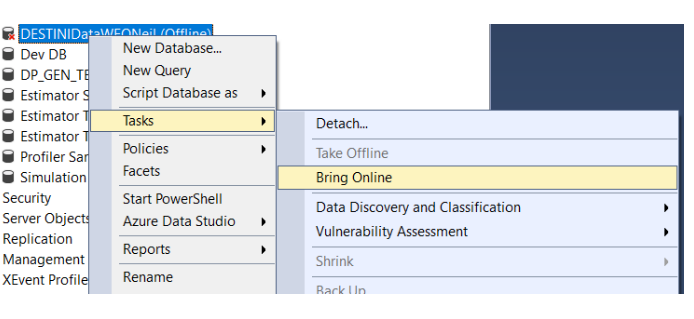
Note: If you get an error overwriting a database, then more than likely there are still users connected to the database and the database will need to be taken offline and then back online.
Mapping Login Credentials to the database.
Making a backup
To take a backup of your database, do the following:
- Launch SQL Server Management Studio (SSMS) and connect to your SQL Server instance.
- Expand the Databases node in Object Explorer.
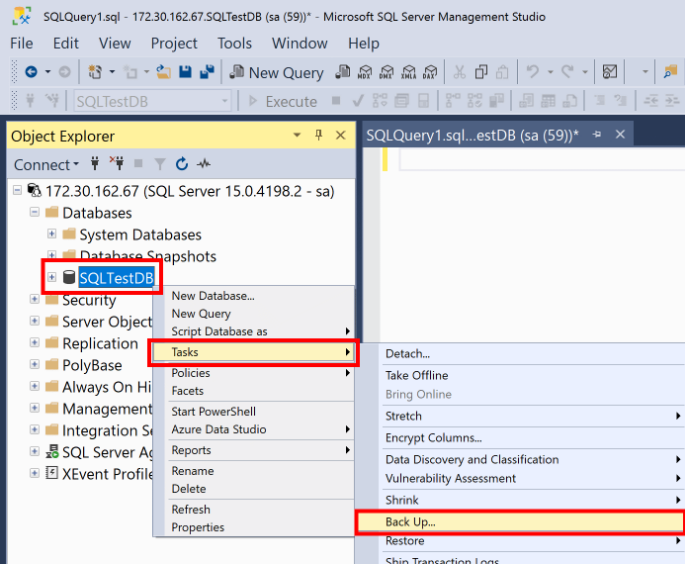
- Right-click the database, hover over Tasks and select Back up...
- Under Destination, confirm the path for your backup is correct. If you need to change this, select Remove to remove the existing path, and then Add to type in a new path. You can use the ellipses to navigate to a specific file.
- Select OK to take a backup of your database.
