This document is a high-level view of how to utilize our import and export spreadsheet features from within Estimator. If you are importing from another system, then use this article link for the proper steps.
In this document, we’ll show you how to get the most out of the two features.
Export Spreadsheet Feature
- How to export an estimate
- Export from Estimate View
- What’s in my exported spreadsheet?
Import Spreadsheet Feature
- Good importing practice
- Where do I get started?
- Choosing the data you want to import
- Mapping Line Item and WBS properties
- Finish Importing
- Common struggles
- How to Copy between Estimator 2018 and Team Estimator
Export | Import Cons:
- Filer View Grouping does not import.
- Highlight Rules do not import.
- Assemblies are not imported, but the Line Items are.
- Line Items lose their mapping with 2D takeoff conditions.
- Project View sheets are not imported and there are NO tagged links.
- The Dashboard does not import, but a dashboard can be opened and added.
Exporting
How to export an estimate
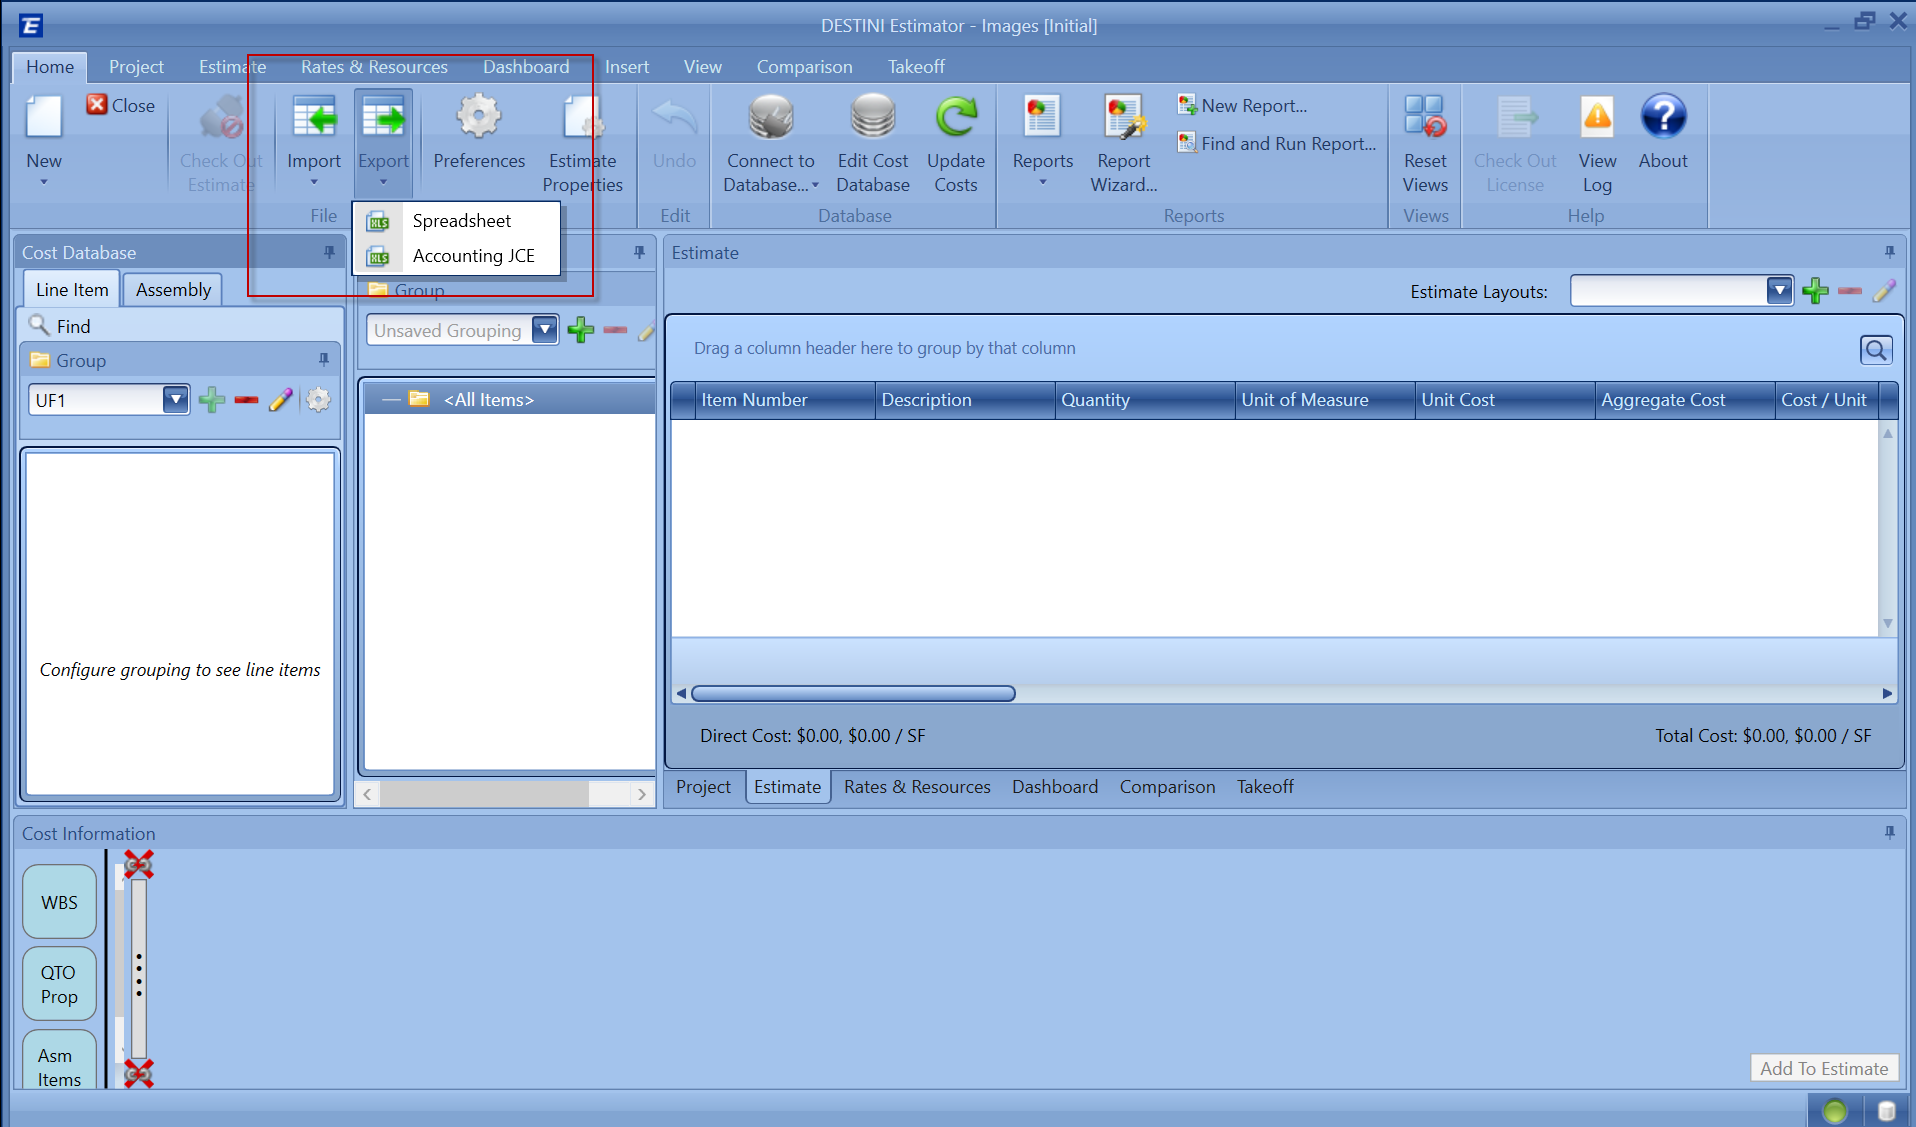
Exporting an estimate to a spreadsheet is easy! Our goal for this export feature was to get your estimated data into a spreadsheet. Once you’ve got your estimate where you're ready to export, simply navigate to the Home Tab and select the Export button on the top ribbon. You’ll see a couple of options (Spreadsheet = Estimator file export, Accounting JCE = Procore file export) and select the Spreadsheet option.
Once you clicked on the spreadsheet option your file explorer should appear asking which file you’d like to export to. After selecting which file you’d like to export to and have clicked the save button in your file explorer. Estimator will now begin exporting your estimate to the desired spreadsheet. Once Estimator is finished you should see a dialog window letting you know your export has been completed.
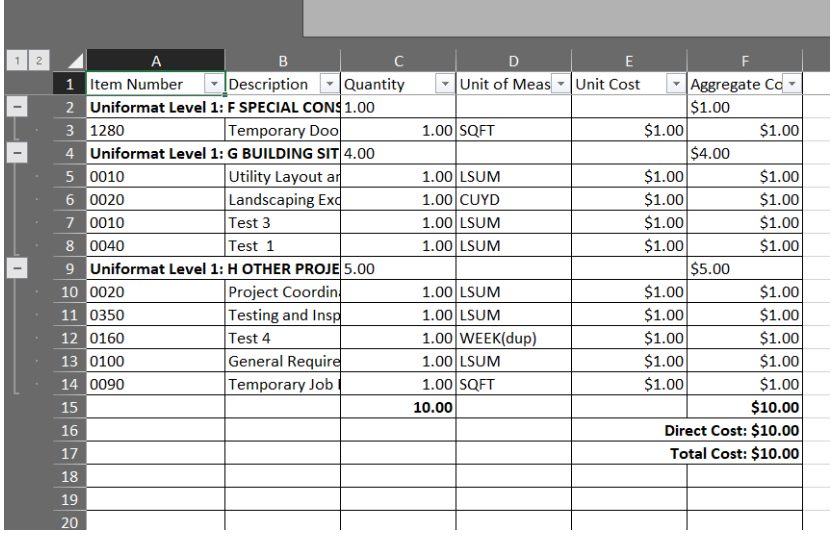
What’s in my exported Spreadsheet?
Everything that has been created inside the estimate. There are several tabs that indicate where the data that's been exported. Below is a high-level list of what those tabs are
- Line Items
- WBS Properties
- Fees, Fee criteria, Bonds
- Estimate Properties, Estimate Properties Values
- Rate Tables, Rate table Markups
- Resources, Resource Markups
- QTO Models, Model items, Model item properties
- Embedded PDF data, Scale data
- 2D Shapes, Cutouts, Segments
- Takeoff Palette items and images
- Group model items and associated costs
- Project Plugin data
- Estimate layouts
Some of these tabs in the spreadsheet rely on data from other tabs in the spreadsheet. For example Fees. The Fees tab relies on the Fee Criteria and Bond Steps tabs to correctly import custom fees and bonds into Estimator.
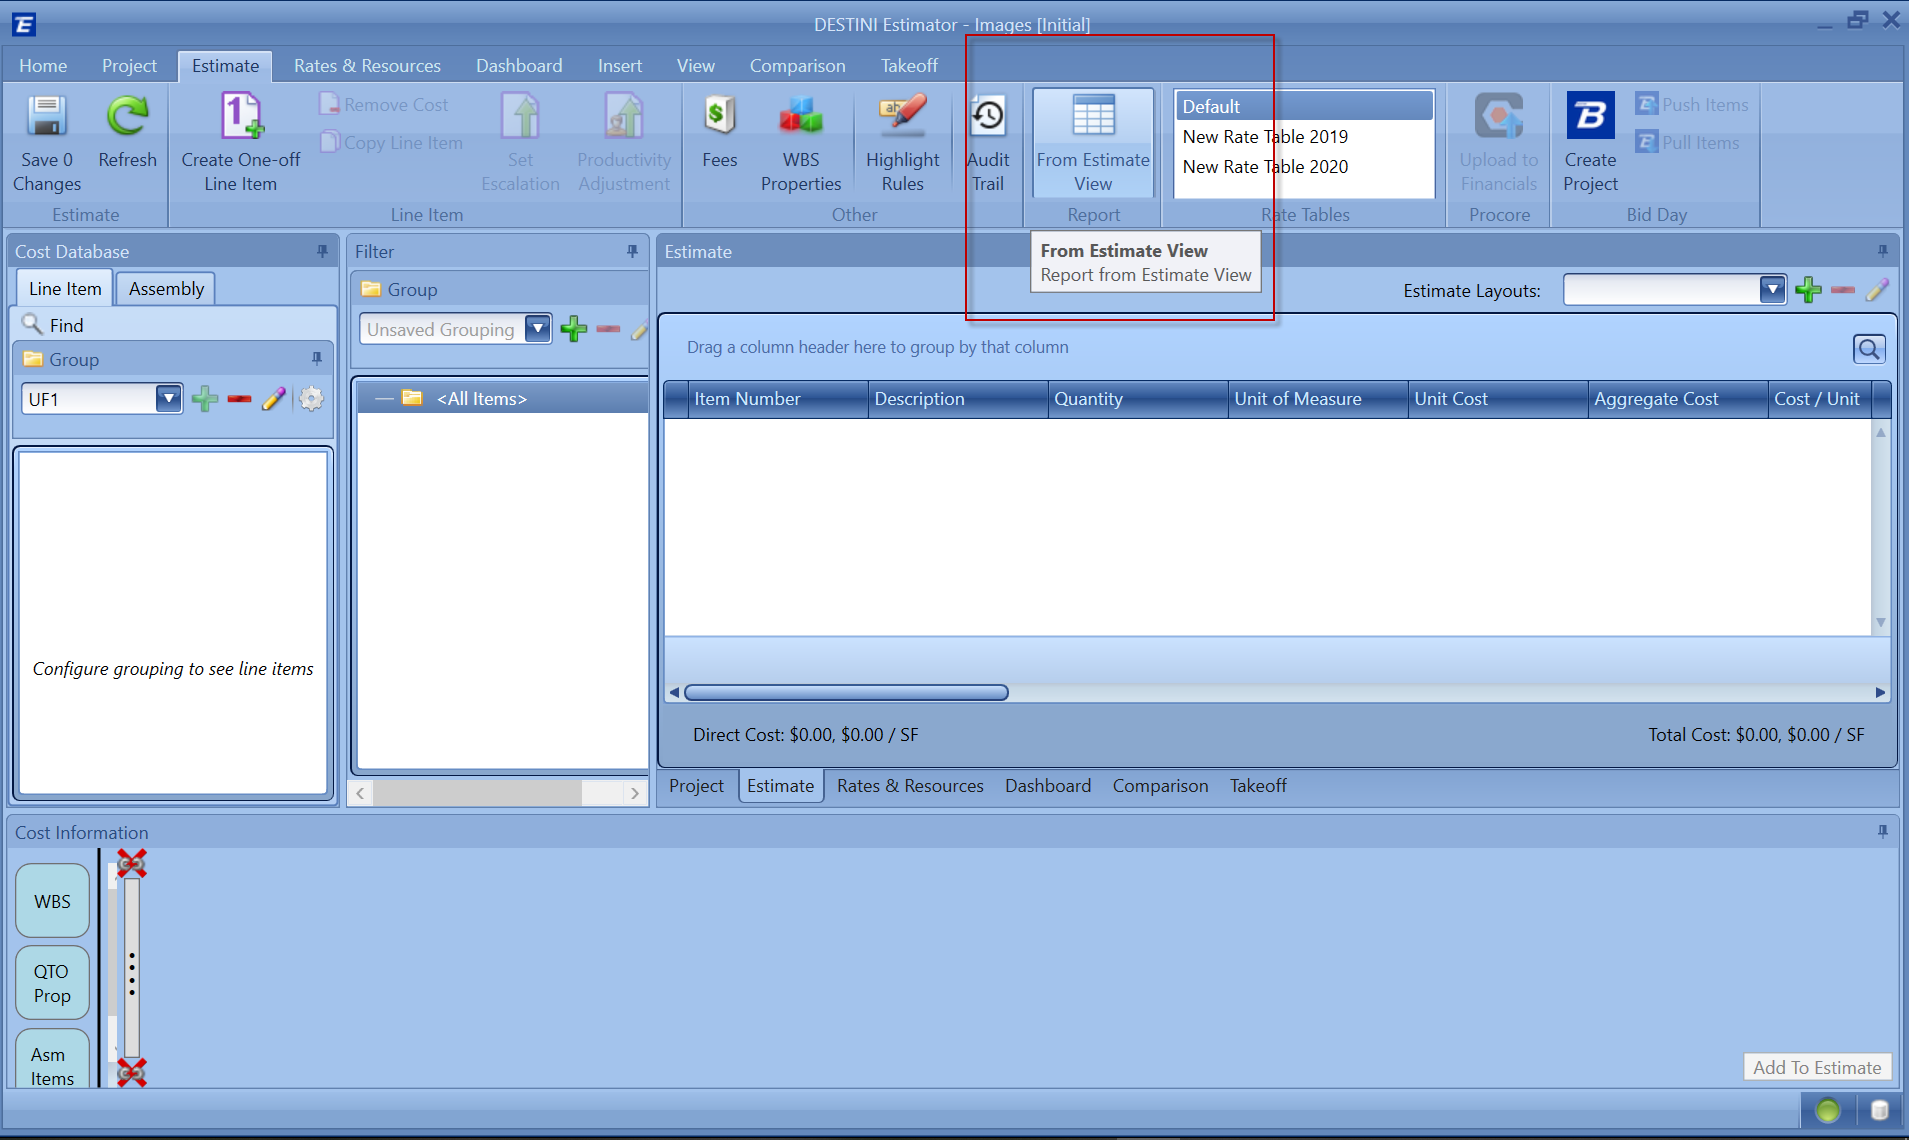
Export from Estimate View
Another method to export to Excel is export From Estimate View. In this method, you add all the columns and layout that you want and export the estimate, and save the file
In the exported file you will see the layout is similar to how the estimate view is with the Uniformat Level group header.
Importing
Good importing practice.
Our importing process views your current estimate as close to the truth. The import process is designed to help you add data to your current estimate. Below is a list of good practice habits that are sure to make the import process as seamless as possible.
- If the data already exists within the current estimate, that data will not be imported into the current estimate.
- Keep your data uniquely named. In most cases, Estimator views your data uniquely by its name. Things like Rate Tables Names, Markups, and Project Sheet Names are all examples of defaulted names within Estimator. Keeping them unique in your spreadsheet is good practice.
- In cost mapping, there are several things that can influence a line item’s cost. Labor, Formulas, and Escalations are examples of what can make up a Line Items cost. Ensuring you’ve mapped the correct columns is a great example of good practice.
Where do I get started?
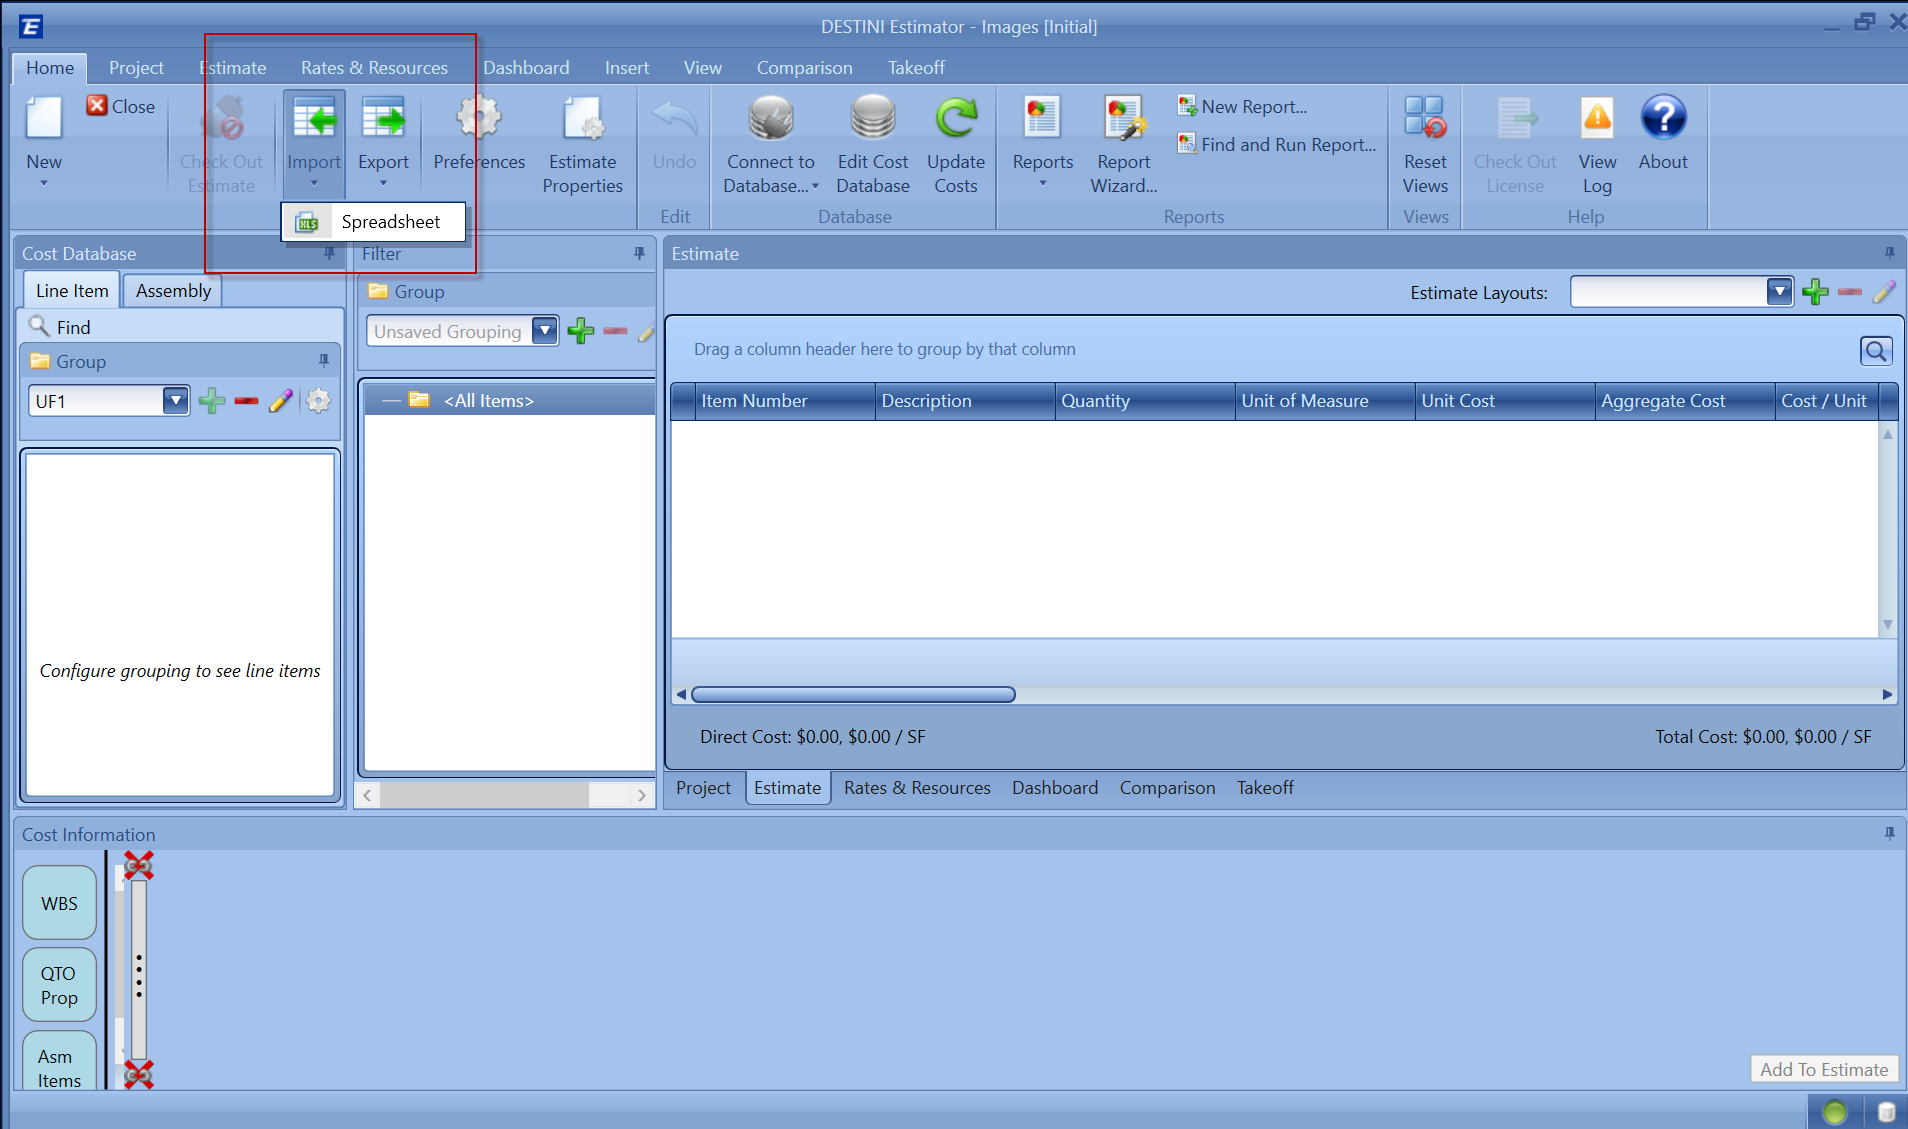
The goal of our import feature is to get data from one estimate to another estimate, seamlessly. That means that Estimator is looking for specific columns and their values to be in particular formats so that everything may be created correctly. To get started with the import feature, be sure you’ve recently exported your estimate. Once you’ve got your most up-to-date spreadsheet ready to go, navigate to the Home Tab and select the Import option on the top ribbon.
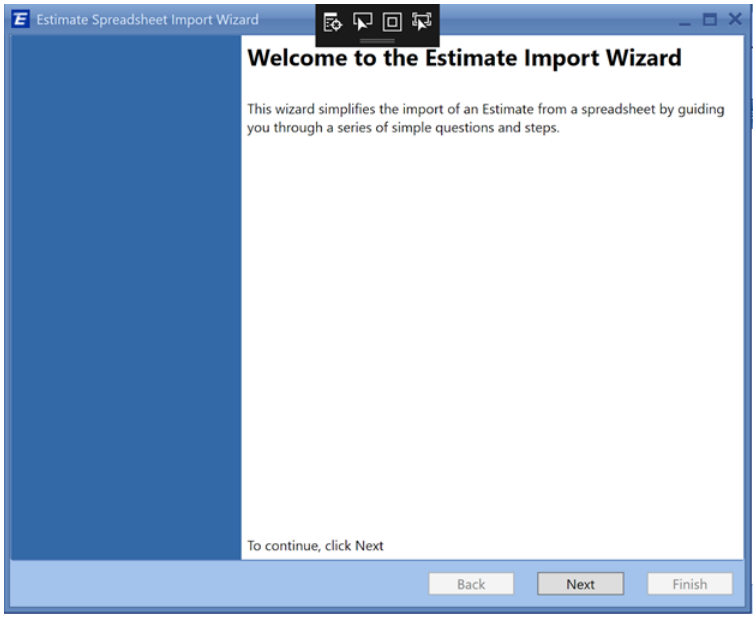
Once you’ve selected to import. The estimate import wizard will appear.
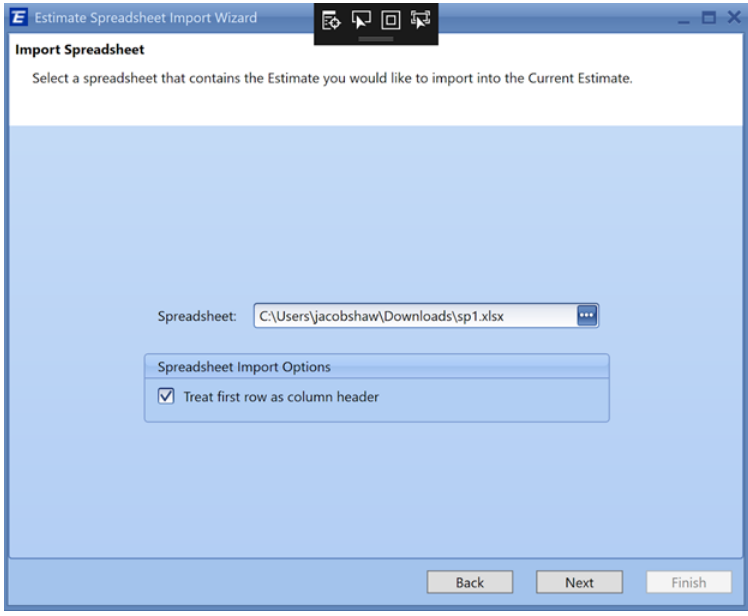
After you've clicked Next you will be prompted to select the desired spreadsheet for import. There is also a second option here to treat the first row as the column header. When checked, the import feature reads the first row of your line items spreadsheet as the header values. This way, when mapping the values of a line item, you end up with Notes -> Notes instead of Notes -> AA.
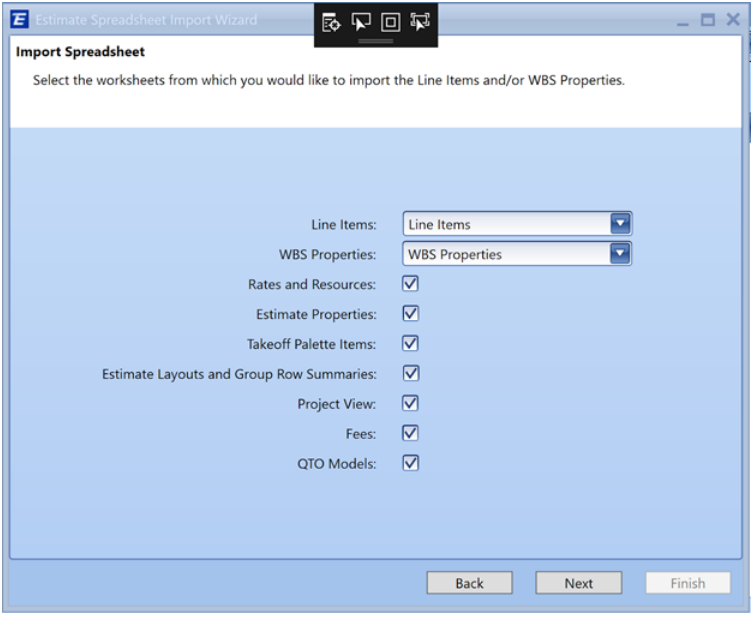
Choosing the data you want to import
Once you continue on after selecting the desired spreadsheet to import. Options for selecting what you would like to import are next. Line Items and WBS properties are dropdown options because you may have your own Line Items and WBS properties sheets you‘d like to import from instead of our predefined ones from our export feature. If you do not wish to import Line Items or WBS properties, then selecting the --None-- option will not bring in Line Items or WBS properties. All other options on this part of the wizard are checkboxes. If the workbook contains these sheets then by default, they are checked and will be imported. If you do not wish to import these items then uncheck the boxes you don’t want to import and these items will not be brought in as part of our import process.
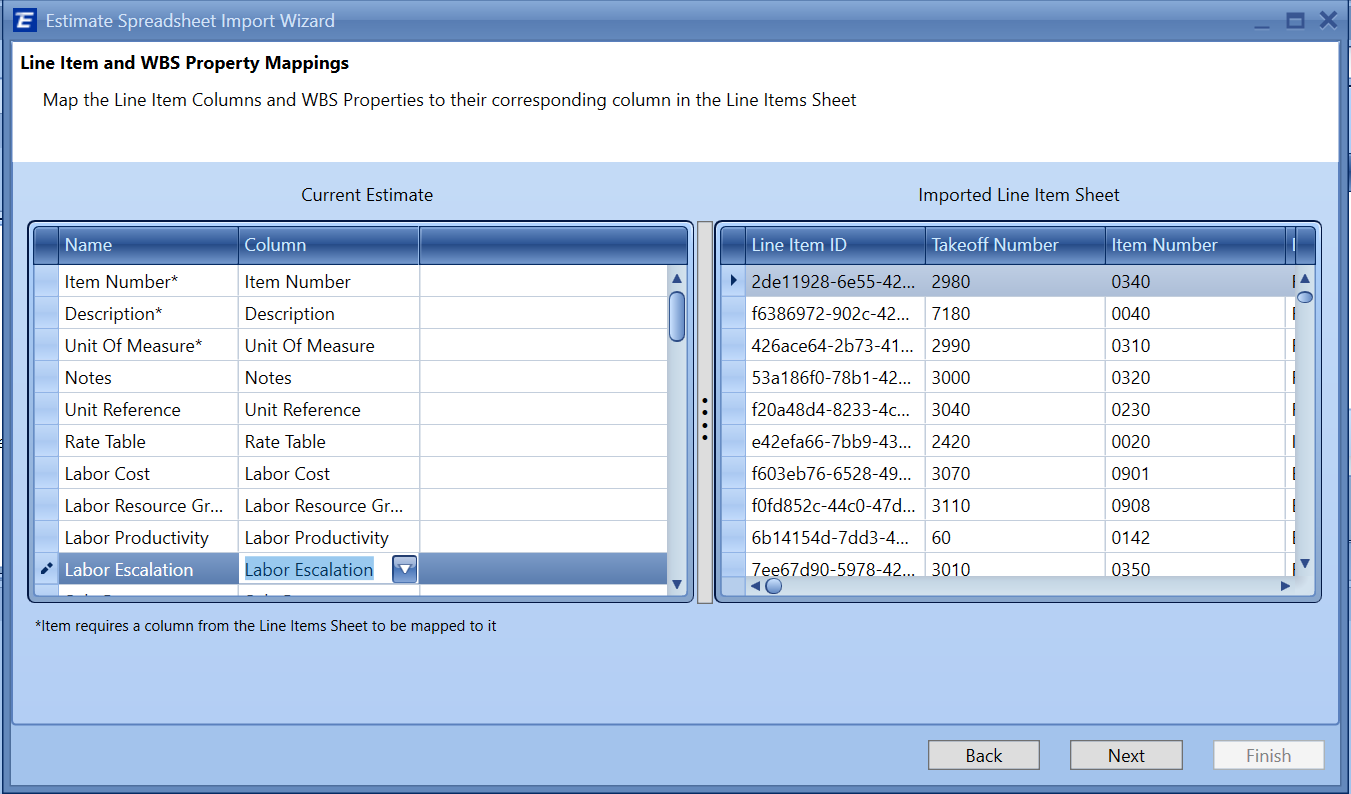
Mapping Line Items and WBS Properties
Once you’ve decided which data you would like to bring into your estimate, it's now time to map the Line Item columns and WBS properties to their corresponding columns from your spreadsheet. Here you will see two containers. On the left are the current estimate’s line-item columns. On the right are the line items rows and columns from the spreadsheet you are importing. In short, the goal here is to specify which columns on a line item inside Estimator you want to associate with your line items from your spreadsheet. Item Number, Description, and Unit of Measure are all required to import a line item from your spreadsheet. This means your spreadsheet must contain these three values in order for a line item to be imported. The columns do not have to be named the same. As long as you define these values and map them to the correct columns, Estimator will import the line items. Unmapped columns will not bring in that data. Below you can see I’ve only mapped two additional columns that are not required.
Notes and Unit Reference
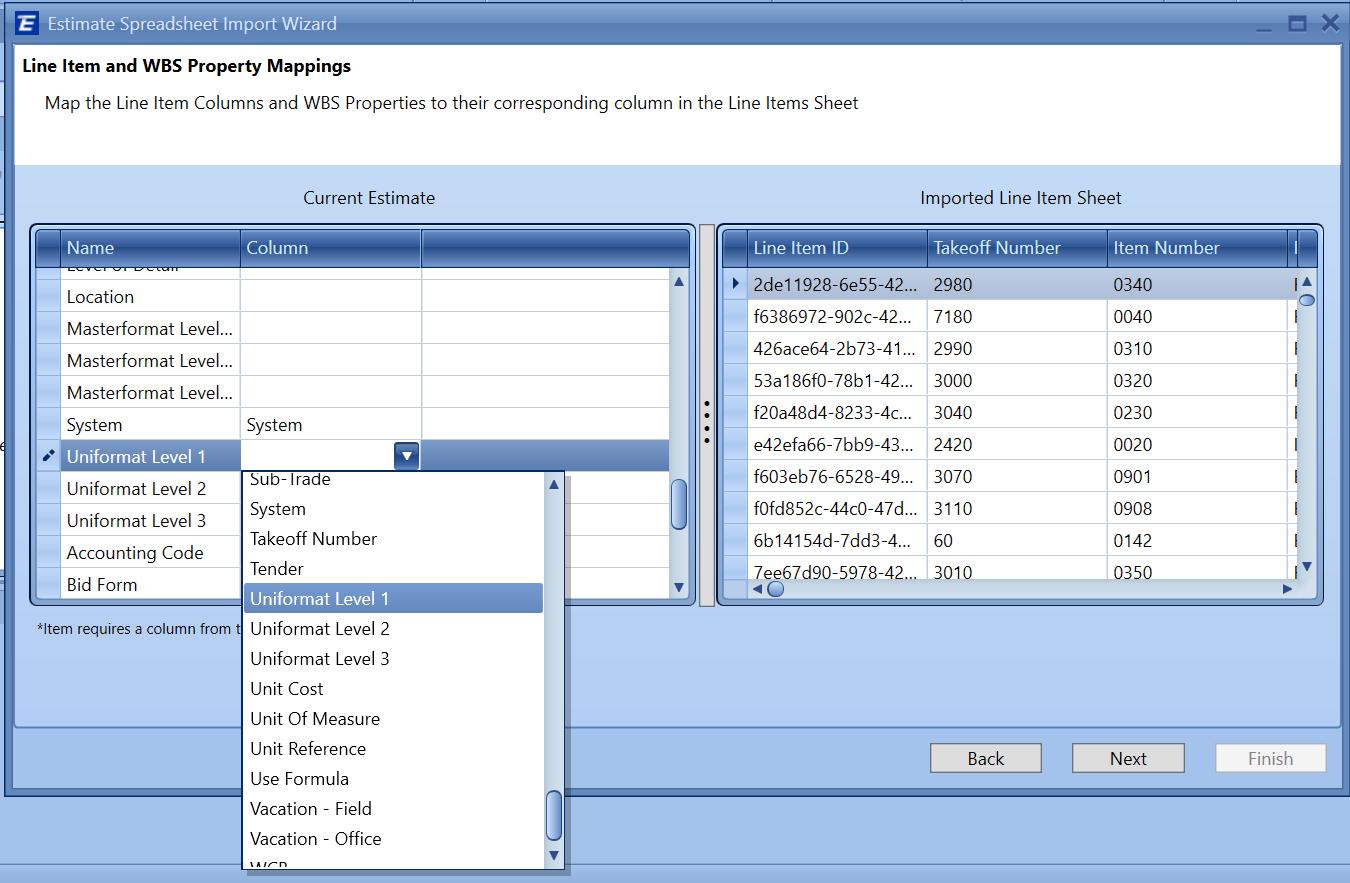
Let’s go further! In the example below I’m going to map a couple of WBS properties as well. Uniformat Level 2 and Uniformat Level 3 are both values my estimate needs from my spreadsheet, so let's bring them in. When selecting the dropdown for the estimate line item container, the options that appear are the columns from the spreadsheet. Simply map the column that contains the value needed, to the estimate’s line items property, and click Next.
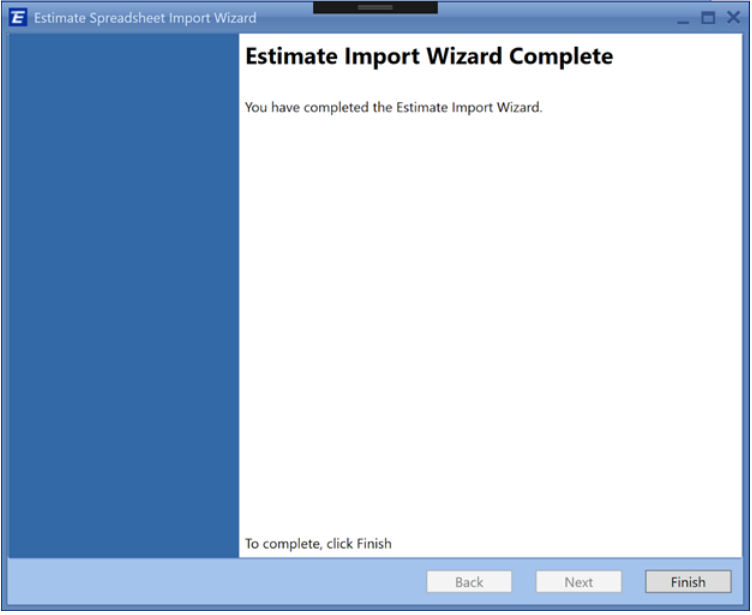
Finish importing
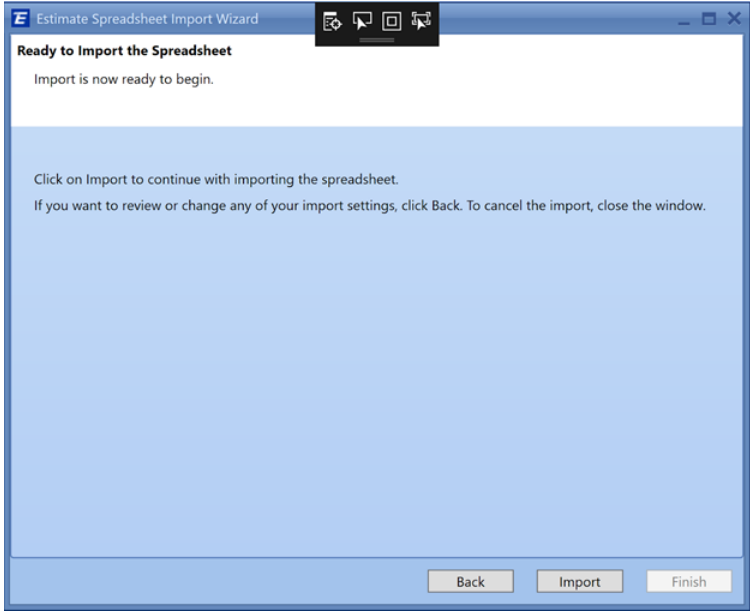
At this point, you will see the ready-to-import page. This is the last confirmation page before the import process begins. If you want to review or change any of your import configurations, simply click Back and do so at this time. You also have the ability to cancel your import at any time by selecting the ‘X’ in the top right of the import dialog window. When you're all set and ready to import, click the Import button.
WOOHOO! You’ve now completed your import! Feels good huh?!
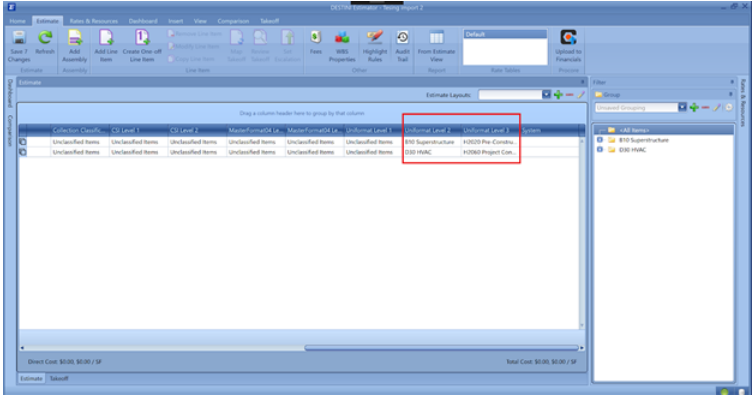
Awesome, now let’s take a look and see our WBS properties on the imported line items we decided to map. As you can see the Uniformat Level 2 and Uniformat Level 3 WBS properties contain the values from our imported spreadsheet. Because these line items did not exist in our estimate previously and were both unique. Estimator was able to successfully import the line items with the data we deemed necessary.
Common struggles
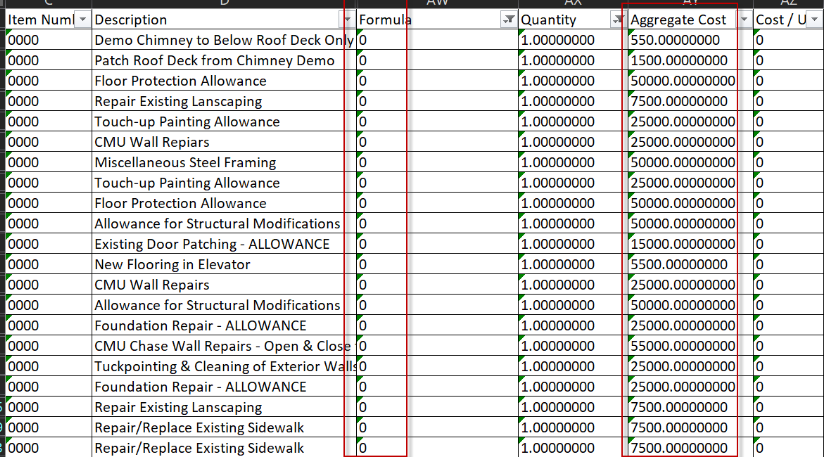
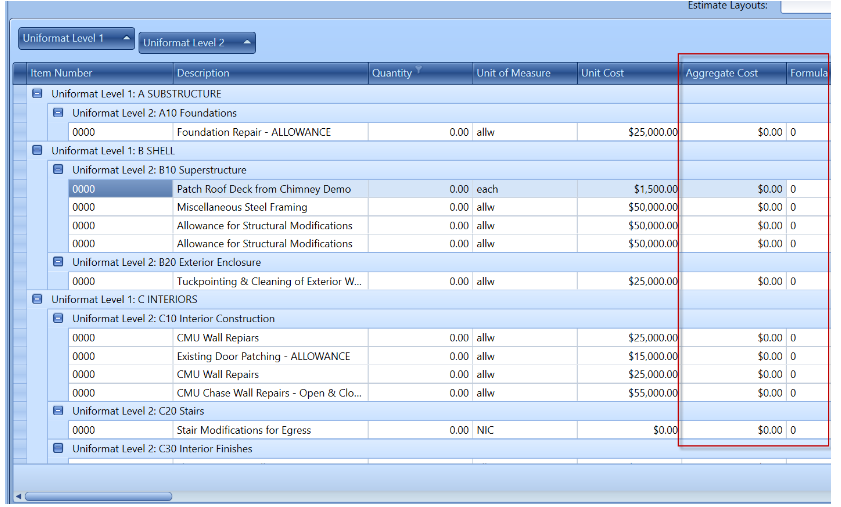
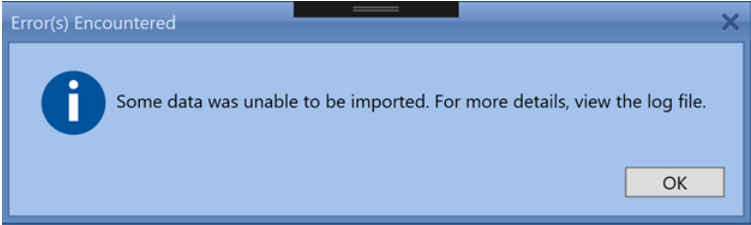
It is common that you might see another dialog window appear suggesting that some data was unable to import. You may often see this because when working within a new estimate, Estimator has already created some of these properties by default and the import may not need to import them. Examples of this are things like Total Building Area, Total Site Area, and Project Type located in the Project Tab.
Another common struggle is the total not matching, especially when you check the Use Formulas column. In that case, you have to go into the spreadsheet and any item with a Formula of zero, with a quantity of 1 will need to have the Formulas updated to 1 or those fields will be imported without any Cost.