Note - To use windows authentication requires that each user is added to the Active Directory group that contains all the users that will have access to the application.
Similar to the cost database profiles, you have to create the DESTINIData profile for your "Jobs" database as well. This is done only in Estimator using the Data Source Wizard. The video below shows the step on how to create these profiles.
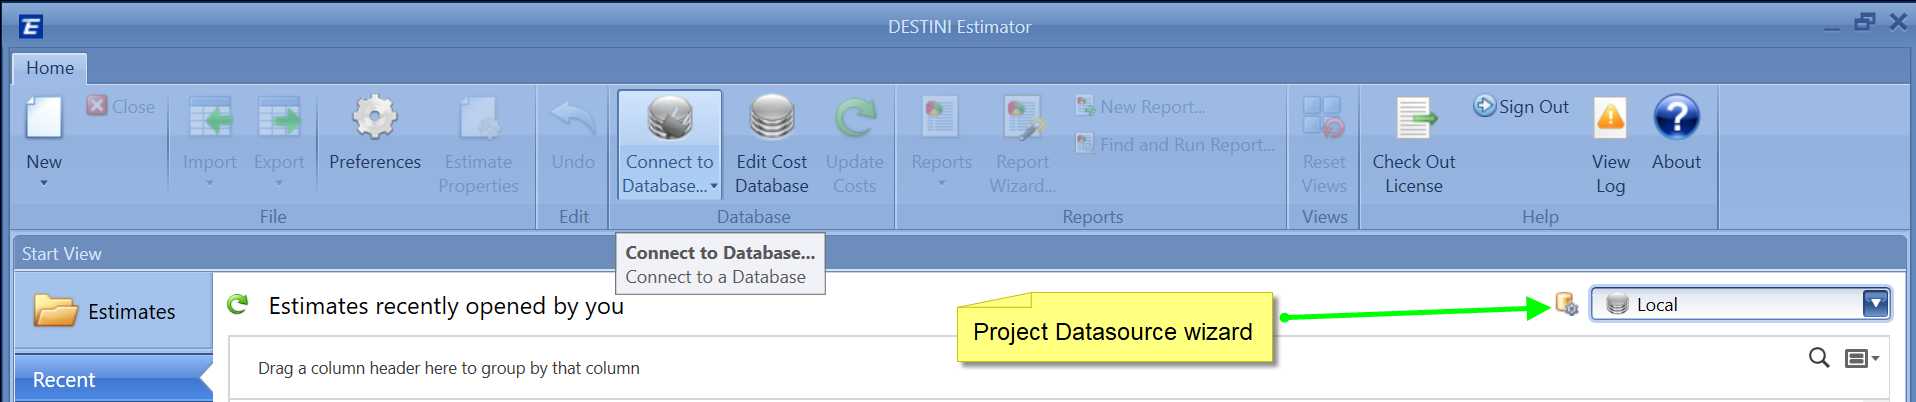
- Open Estimator
- In the upper right corner, click on the Barrel/Gear icon (next to the drop-down that says local)
- This opens the Data Source Wizard – click Next
- Click Create a New Data Source Profile – click Next
- In Profile Name, clear what’s there and put in your database name (eg: Becktech Estimates Database) – click Next
- In the new window enter the Server name – if sent in an email, copy/paste it into the Server line - ( eg: COMPUTERNAME\INSTANCENAME)
- Click the upper Refresh button
- Adds Database to lower window
- Click on the added database in the lower window
- Click Next, then Finish
That should complete the setup of the Data Source Profile.
Note 1: Users will connect to the centralized "Estimates" database using windows authentication.
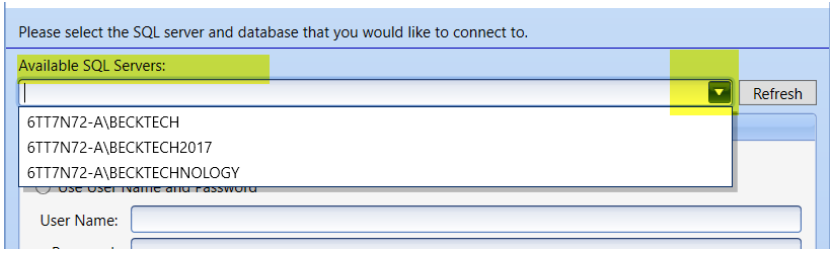
Note 2: On the Local computer, Users can find the name of their server by clicking the drop-down arrow on the Available SQL Server and select their SQL Server from the list. If nothing is populated, then they can enter .\becktechnology in that field and then press the bottom Refresh.
Local SQL Credentials to view the "Jobs" databases
Your local database profile should already be connected automatically. However, if it didn't then you can use the SQL credentials below to create a profile.
User Name - "dpuser" and Password - "becktech"
Or "SA" and password "B3ckt3ch!B3ckt3ch!"
If you are still having issues, please contact support@beck-technology.com for assistance.
To create a Cost Database Profile please click this link - Cost Database Profile Creation
Modifying a Database Profile
Here are the steps:
1. Click the Database Connection Wizard and click Next
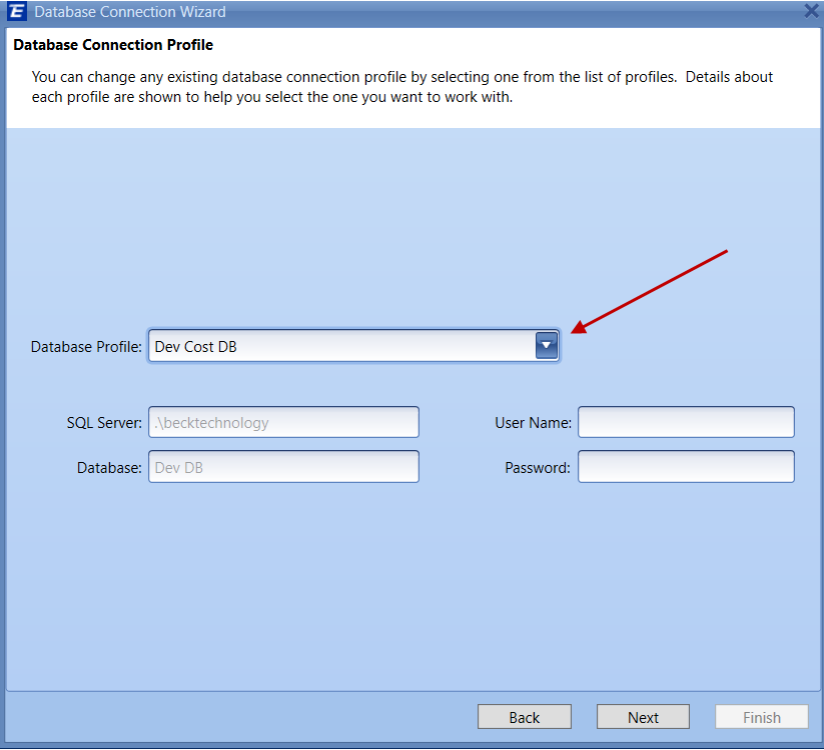
2. Click Modify and Existing Database connection Profiler and Next
3. Click the Database Profile Dropdown and select the name of the Profile you are modifying - Pay close attention to the information below especially the SQL Server name
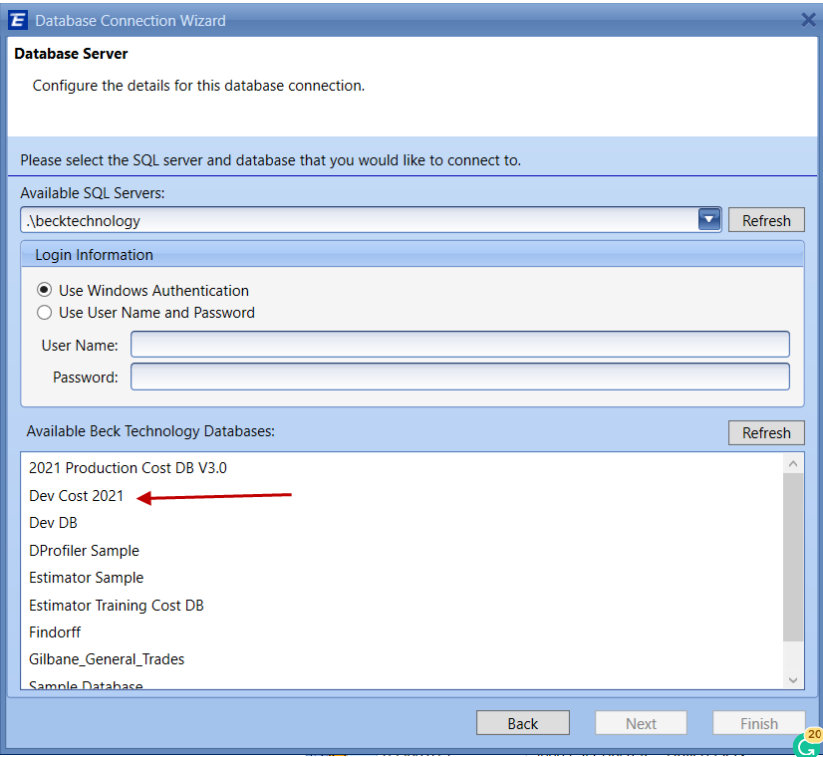
4. Click Next, until you get to the screen below, enter the server name and then click the top REFRESH.
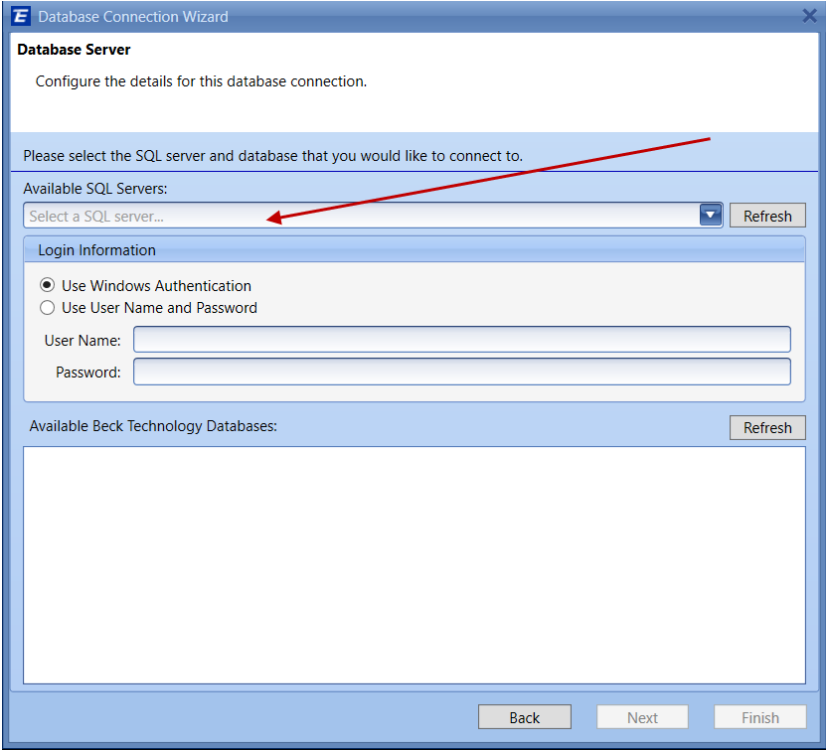
5. Select the name of your database from the Available Database section, then Next, and then Finish.