One of the big challenges with using Azure databases in Estimator is that the Estimator wizard cannot read Azure databases, so going through the wizard will not reveal the database.
To get around that, we have developed a specialized wizard where users can enter the information for the database server and it will create the profiles.
Note: One file can be created and deploy to each user profile file location, Support will show you how this works.
Here is how to use the wizard
1. Download the wizard from this link and double click to launch --- Estimator Profile Builder
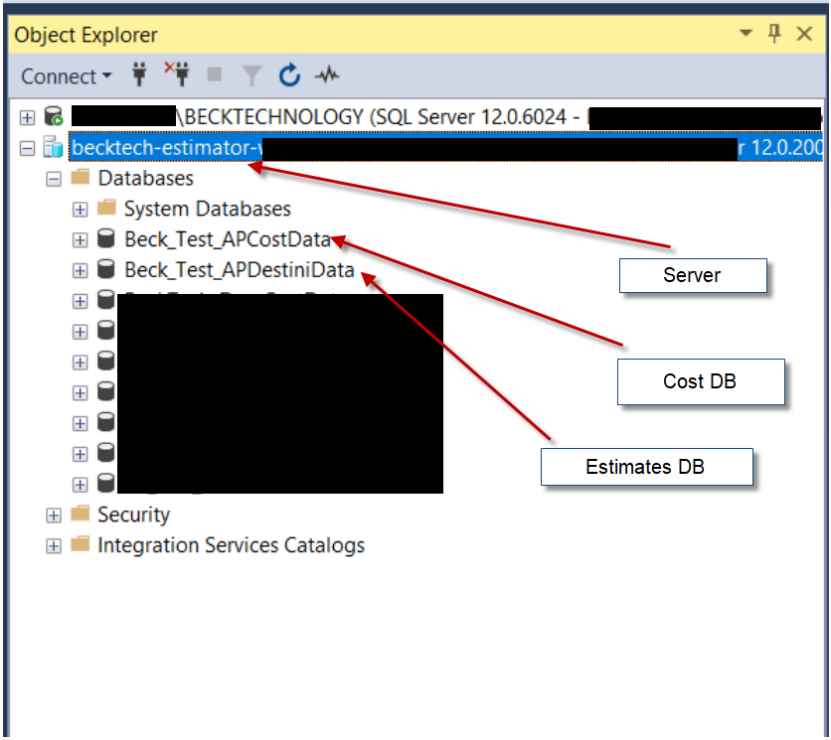
2. Using the Server information fill out the wizard in this order
3. Click the plus and fill out the data as shown below - If using Windows Active Directory, then leave the User Name and Password fields blank.
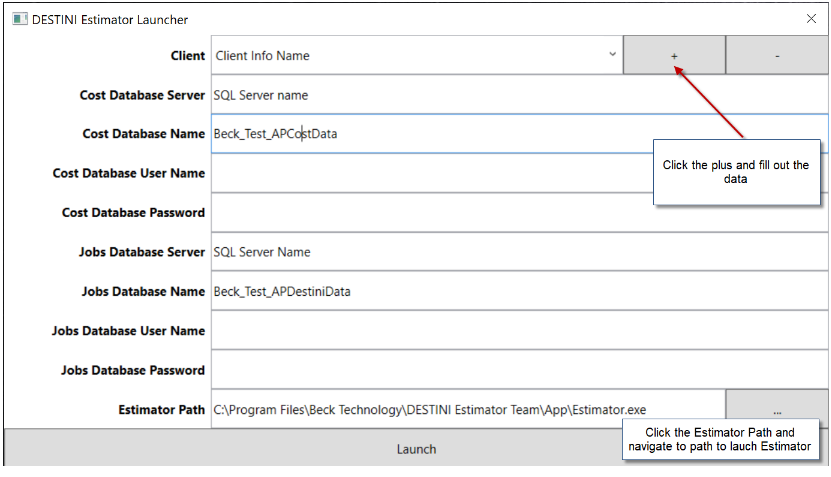
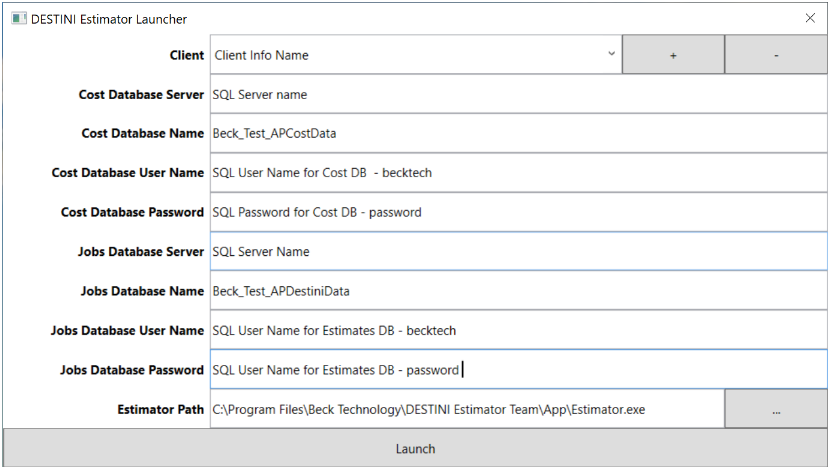
Image below is for using SQL Credentials:
4. Once the information is filled out, click the Launch button to open Estimator.
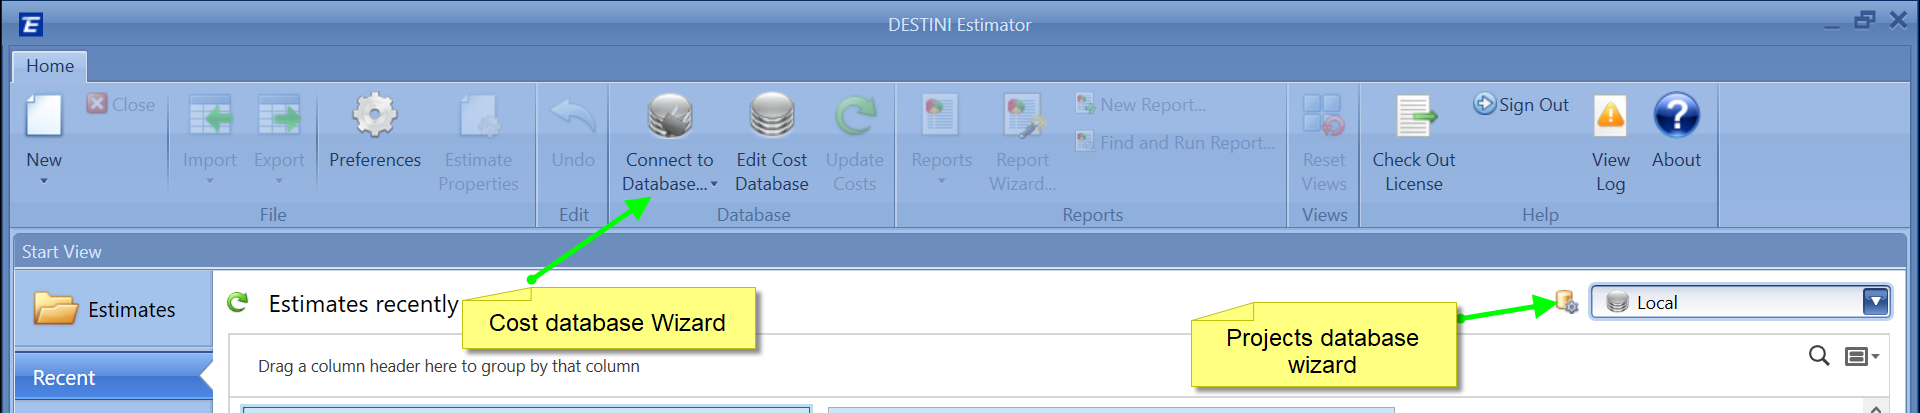
After launching the application follow the arrows below to click on the drop-down and select your Cost and Estimates databases profiles
Copying Cost Database XML Profiles
Very Important - You may need to add another database profile for each respective database. To do that you will follow the steps below:
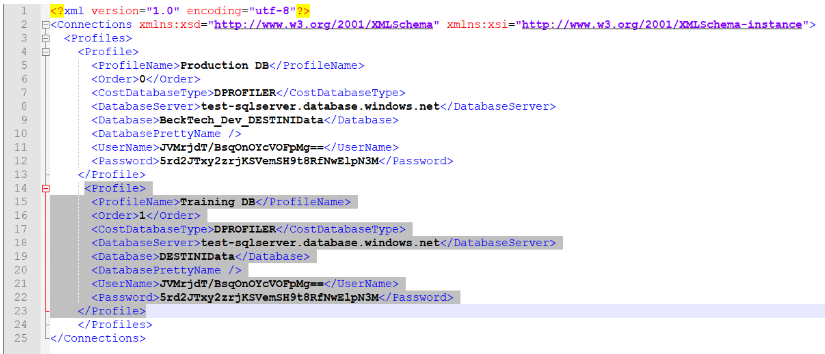
1. Estimates Database - Go to the folder - C:\Users\LOCALUSERNAME\AppData\Roaming\DESTINI Estimator and edit the DataSourceProfiles.xml.
<Profile>
<ProfileName>Production Estimate DB</ProfileName>
<Order>0</Order>
<CostDatabaseType>DPROFILER</CostDatabaseType>
<DatabaseServer>YOURSQLSERVERNAME</DatabaseServer>
<Database>DESTINIData-Production</Database>
<DatabasePrettyName />
<UserName>bEEUBgGe/czW/3rFJax4YQ==</UserName>
<Password>PQT5El6kpZEvQK4w503yDA==</Password>
</Profile>
2. Copy and paste the info above between the Profiles to Profiles section so it looks similar to mine below for 2 database profiles. Update the highlighted gray section to match the new database profile.
If you are making a copy of a database that you were already using then you only need to update the database name.
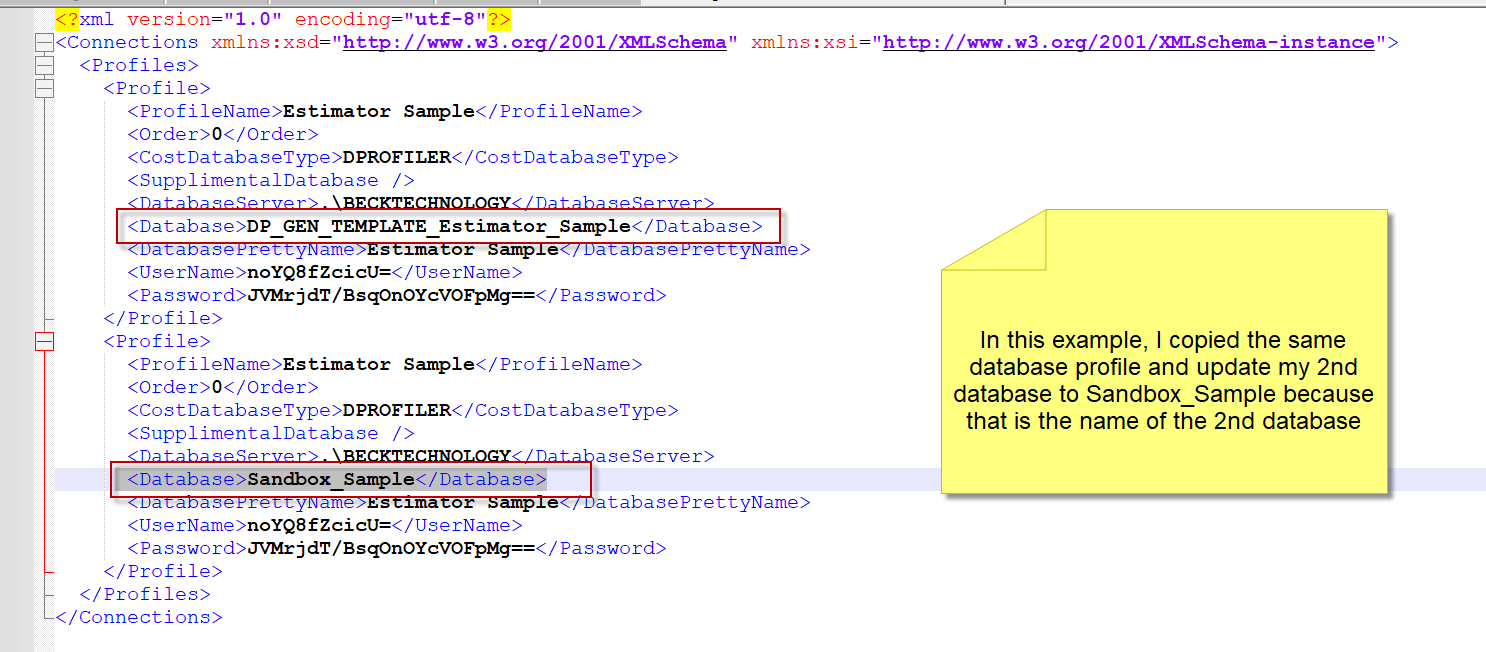
If the login credentials are different between databases, then you have to use to tool above to generate the right login credentials string and paste it into the UserName and Password section.
4. Save the file and add it to each user's folder to replace the one that is currently there.

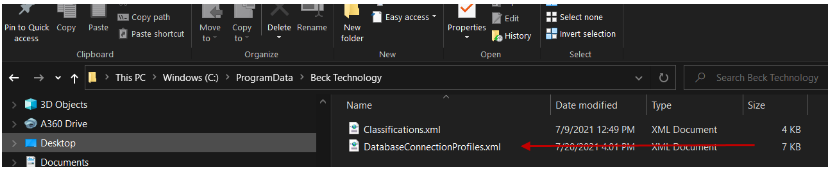
3. The Cost Database - The cost database folder is located in - C:\ProgramData\Beck Technology and it is called DatabaseConnectionProfiles.xml.
4. Follow step 2 above to update the Cost Database profiles and replace them in each user's folder.