How To Add Properties Fields to the Template Start Page in Estimator
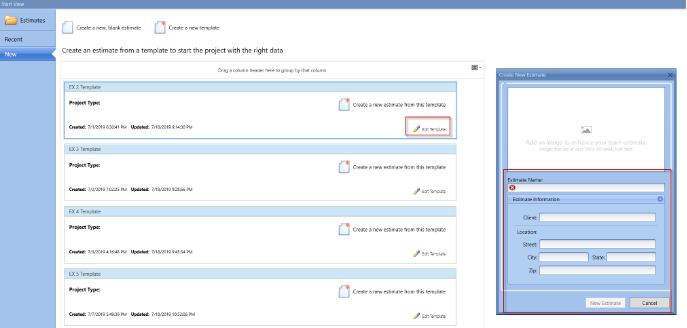
To add Properties fields to the start page of an estimate follow the steps below:
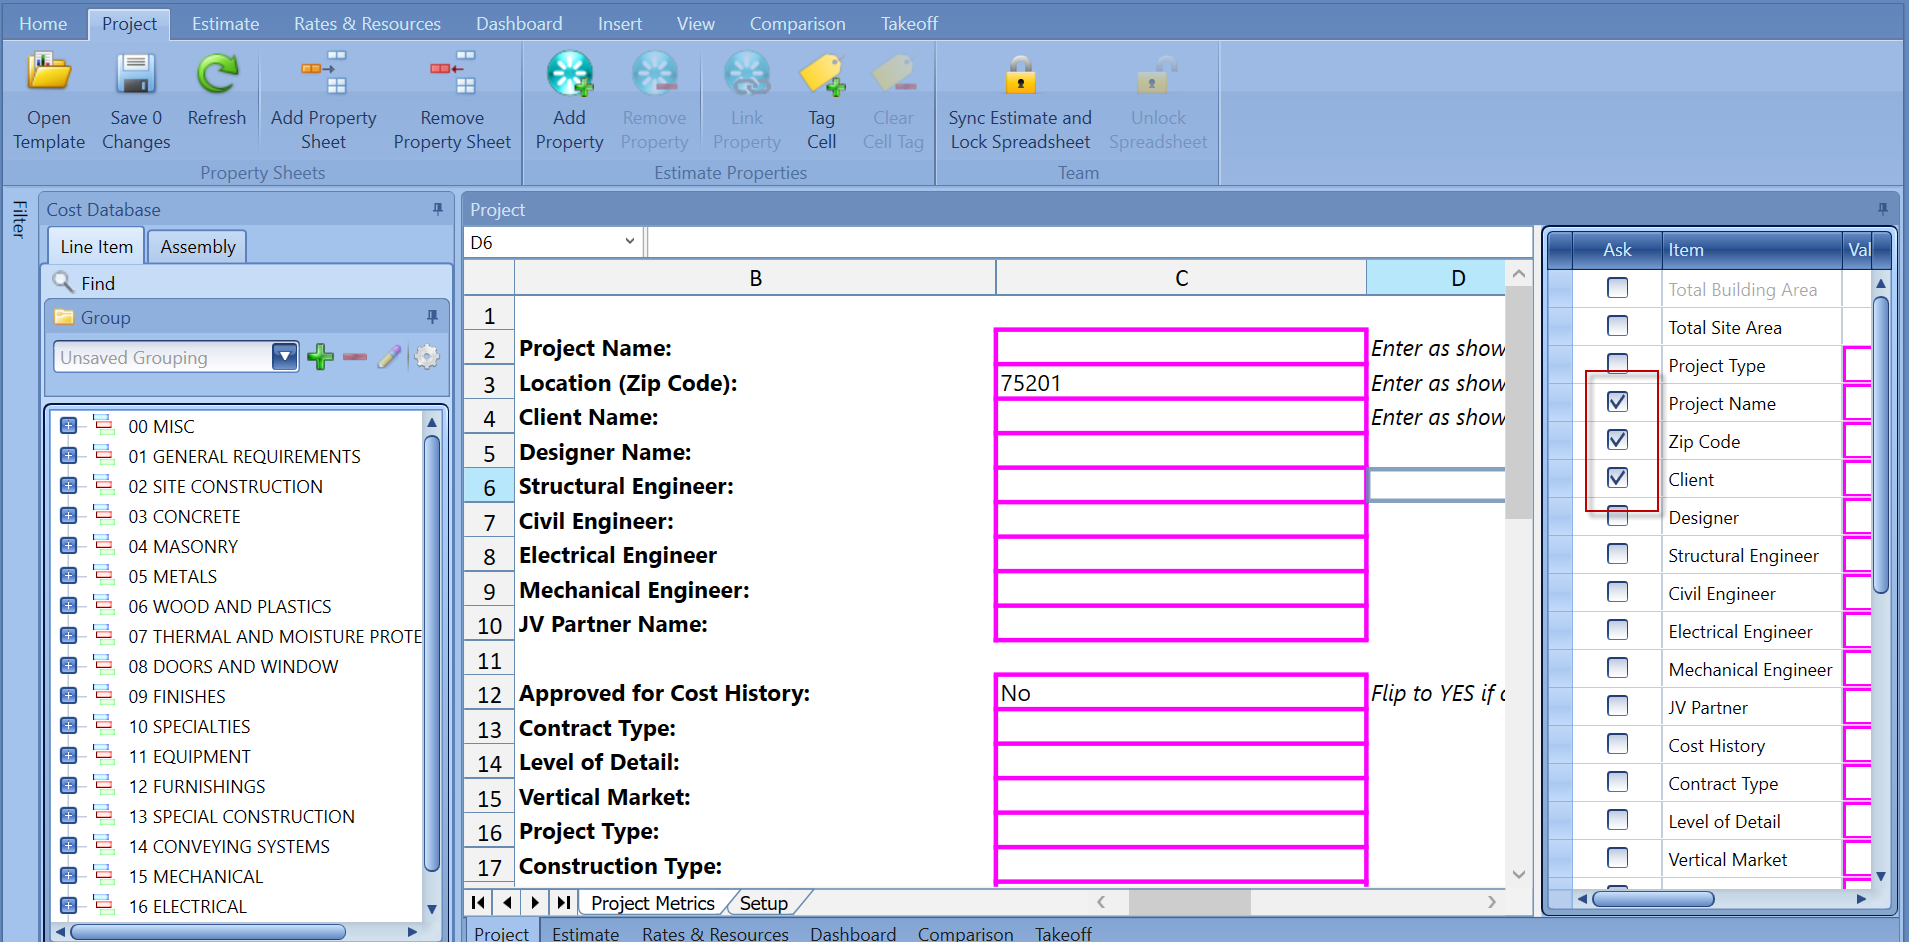
1. Click the Edit Template > Project tab

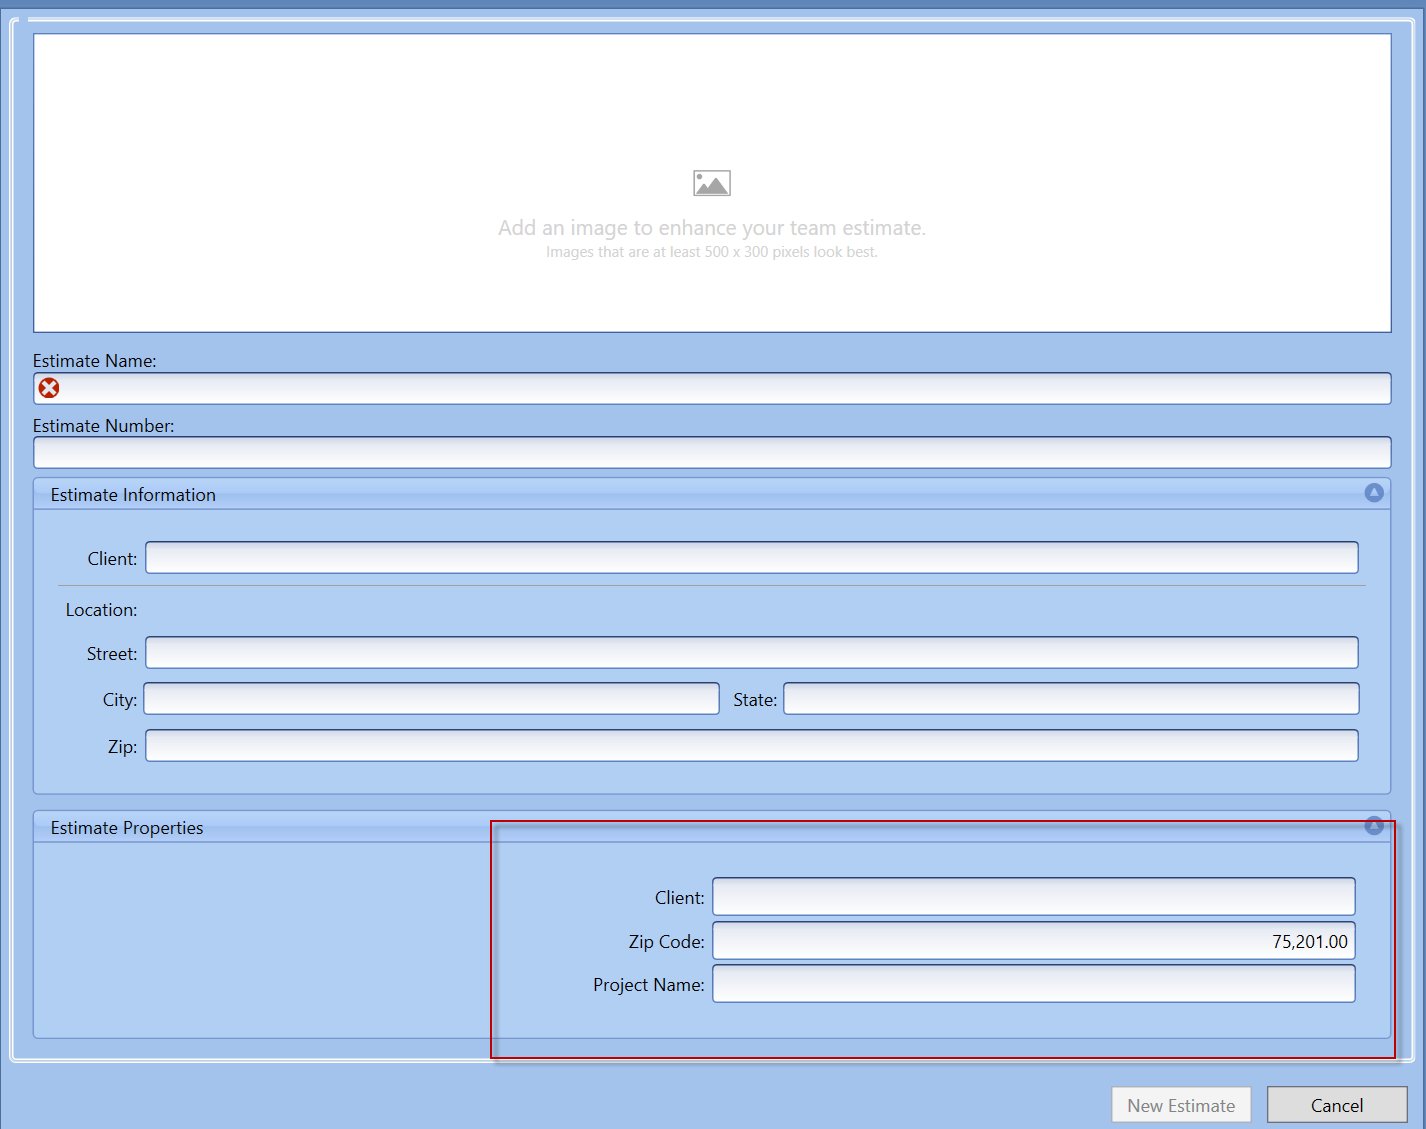
2. In the Project tab, click Add Property. Add the properties that you want and you can click the ellipsis to add multiple values that can be selected from the drop-down. Click the ASK to have the information appears in the Start New Estimate window. Close the template and go to the start page to create a New Estimate from that template.

Note: Currently, only the Estimate Name is required, all other fields are non-mandatory and there is no way to make them mandatory at this point.
3. When you click Create new from a template, the Estimate Properties that had the checkmarks are now available for the Estimator to fill out information prior to starting the Estimate

Very Important: The Order that the Properties are displayed is from bottom to top, if you notice between the images above Client name is 1st in the list, yet it's the last box checked in the Properties tab.