- Help Center
- DESTINI ESTIMATOR
- General Estimator User Tips
-
GETTING STARTED: LICENSING, SETUP, INSTALLS
-
DESTINI ESTIMATOR
- Basic Estimator Workflows
- 2D Takeoff - Basic Workflows and Procore
- Advanced 2D Takeoff & PDF Management
- 3D Takeoff - BIM360
- Dashboards
- General Estimator User Tips
- Hosted-Specific Estimator Workflows
- Project Tab
- Self Perform - Rates and Resources
- Fees
- WBS Properties
- Import / Export Workflows
- Formula and Quantity Topics
- Troubleshooting
-
DATA MANAGER
-
DESTINI BID DAY
-
REPORTING & ANALYTICS
-
PRODUCT UPDATES
-
IN PLANNING
-
IN DEVELOPMENT
-
PRE-PRODUCTION
How To Add an Image to an Estimate
There a two methods of adding an image to Estimator
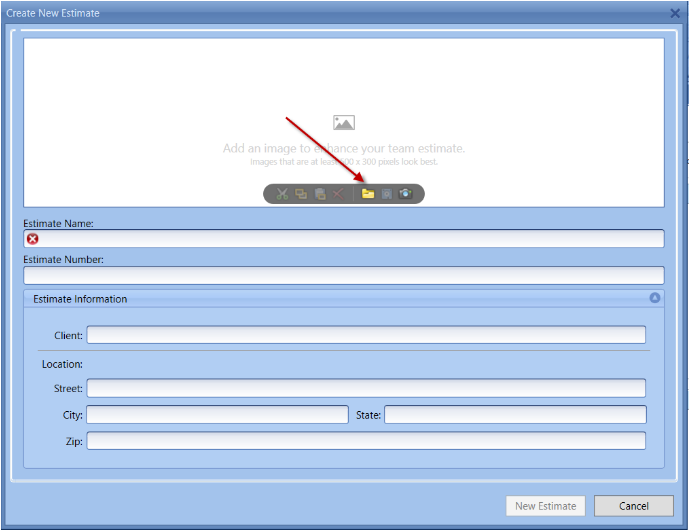
1. When a user clicks New > Estimate, the image can be added by clicking the folder and navigating to the image location.
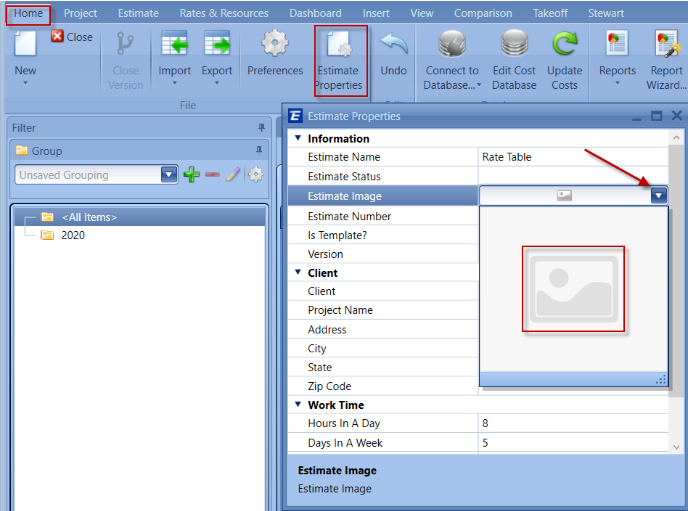
2. The image can also be added from inside the Estimate. In the Home tab, > Estimates Properties > Estimate Image, click the drop-down and click the blank image. Locate the image from the file folder and click OK