How To Use Highlight Rules
Highlight rules can be very beneficial when reviewing an estimate in Estimate View. Standard highlight rules are included in the Training database template for Zero Quantity and Zero Dollar. Custom highlights may be created while working in an Estimate on the fly, or may be helpful in a company specific template.
Follow these steps to make edits:
- Go to the Estimate View
- Click on the Highlight Rules button in the ribbon
- Add rules by clicking the + sign in the left pane
- Set up the parameters in the right pane.
- Type in a Name.
- Choose a Color.
- Set the Criteria.
- Click the + sign
- Choose a Property
- Choose a Comparison Method
- Type in a Value
- Adjust the order of the rules in the left pane using the up and down arrows.
Highlight rules apply from the top of the list to the bottom. For instance, if a line item has zero quantity and zero cost, then the highlight rule that takes precedence will be Zero Quantity. Once the line item has quantity, the next rule will be employed which is Zero Cost. As each condition is met, the next highlight rule will take center stage.
Zero Quantity
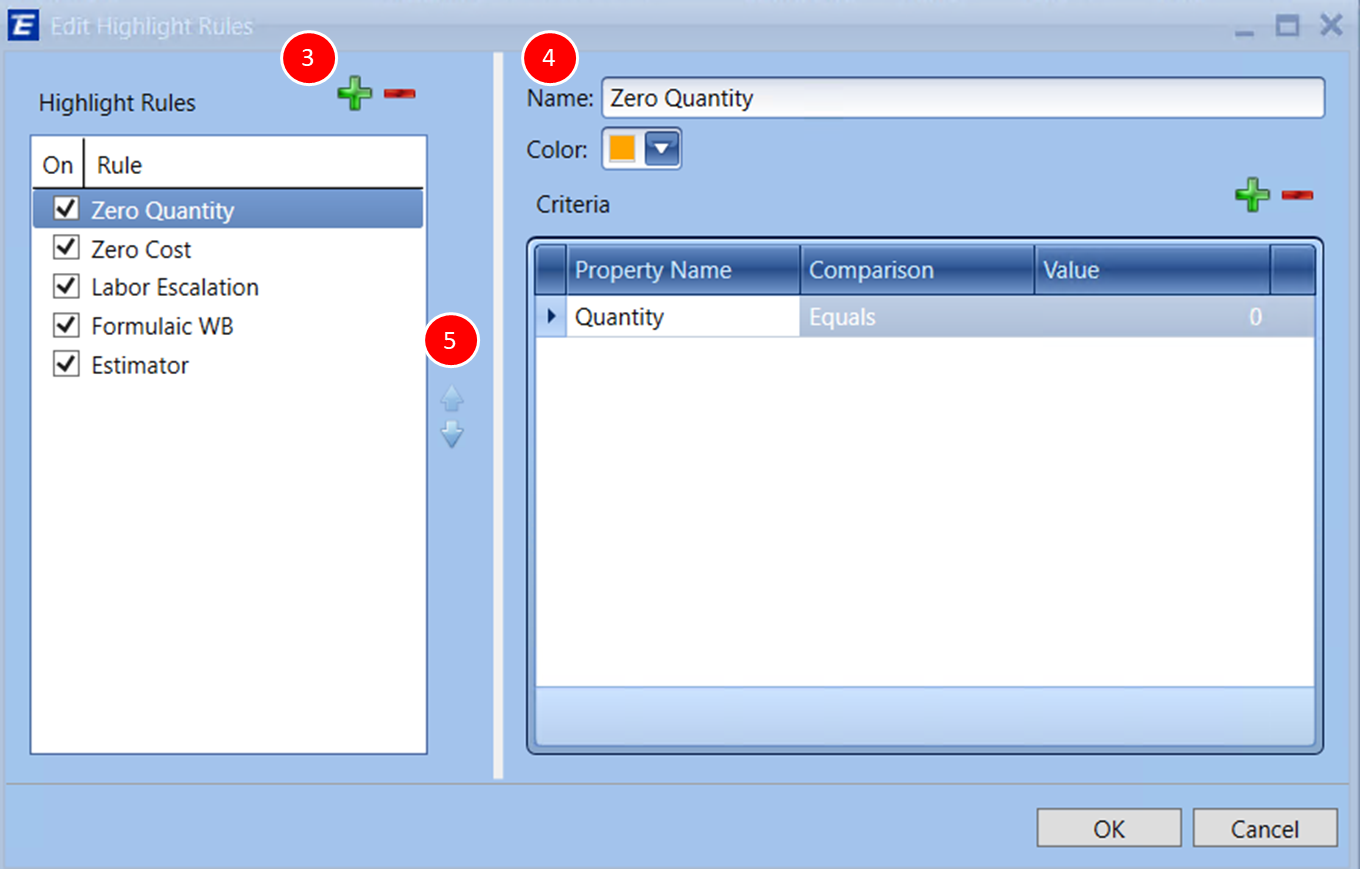
Zero Quantity in Estimate View

Zero Cost in Estimate View after Zero Quantity is false
The rule changes the color of the highlight from orange to red once the condition of Quantity equals zero is false.
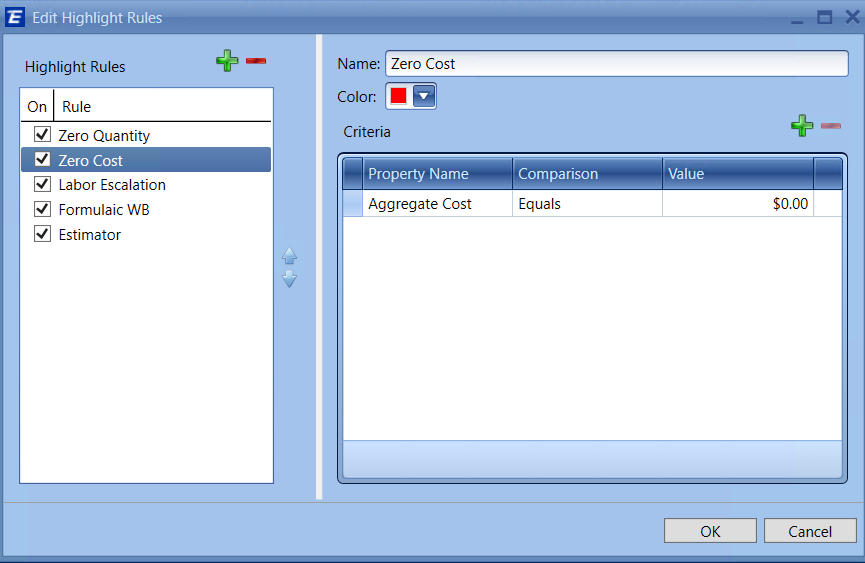

The highlight shows up in the row header to the left of the row information.
Other Suggestions
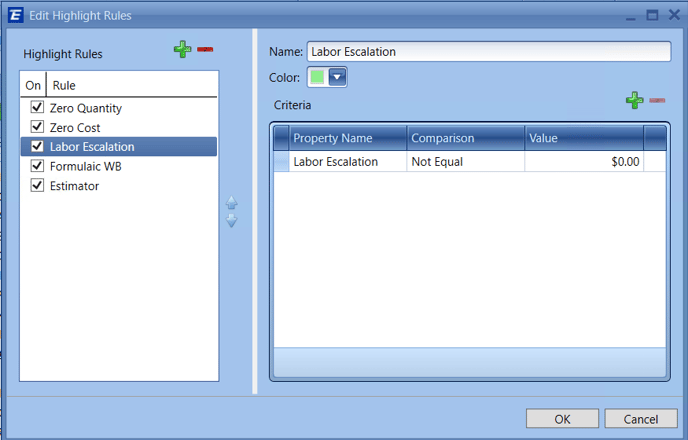
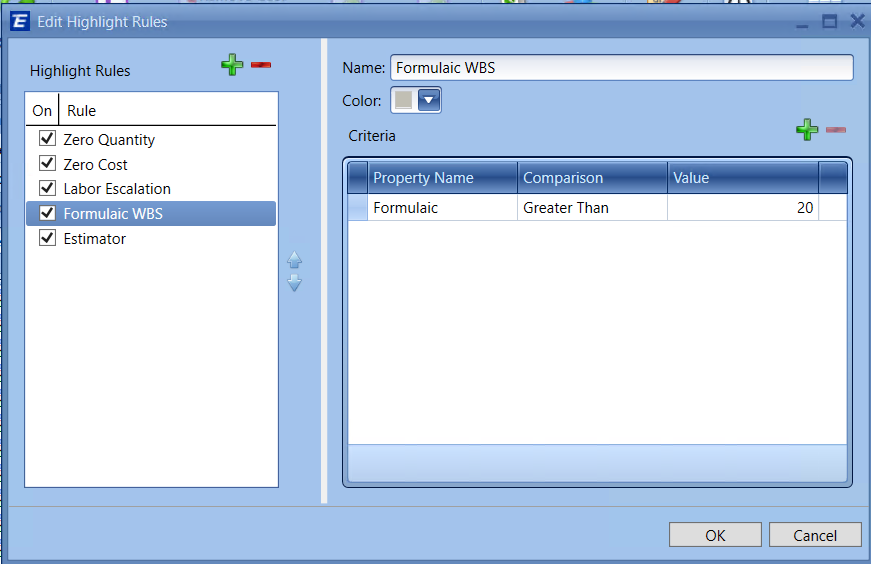
Other criteria that our users have pointed out as being helpful include Cost Category escalations (Labor Escalation, Material Escalation, Equipment Escalation, Sub Escalation, Other Escalation), Estimator Name, and Formulaic WBS Properties.
The Highlight Rules might look something like this:
Labor Escalation
Formulaic WBS
Estimator Name
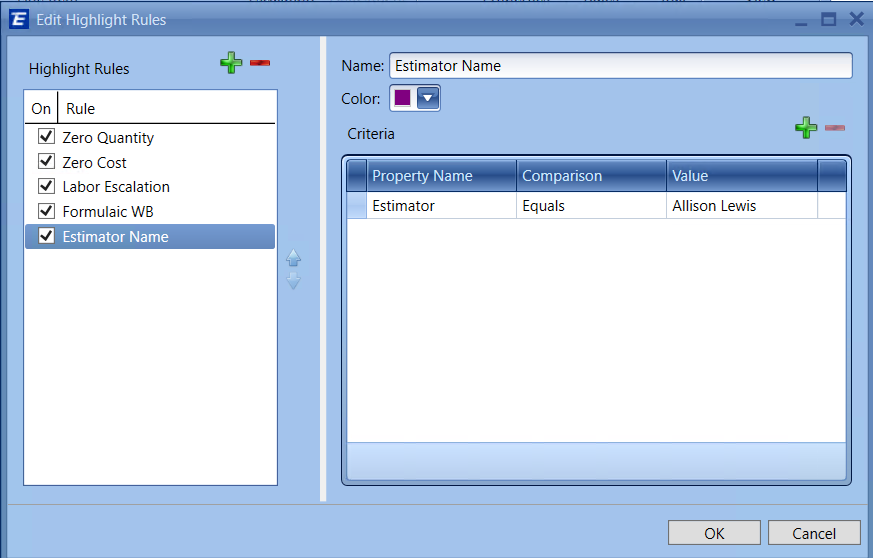
The key to using Highlight Rules is proper order and appropriate criteria. If those two things are setup correctly, then it should be smooth sailing!
Let us know how you are using Highlight Rules in our Community!
Do you have ideas for other training topics? Please share with us here.