This article is aimed at individuals looking to enhance the clarity and structure of their reports by incorporating page breaks. We will provide two simple methods for adding page breaks between Level 1 Groupings in your Detail Report.
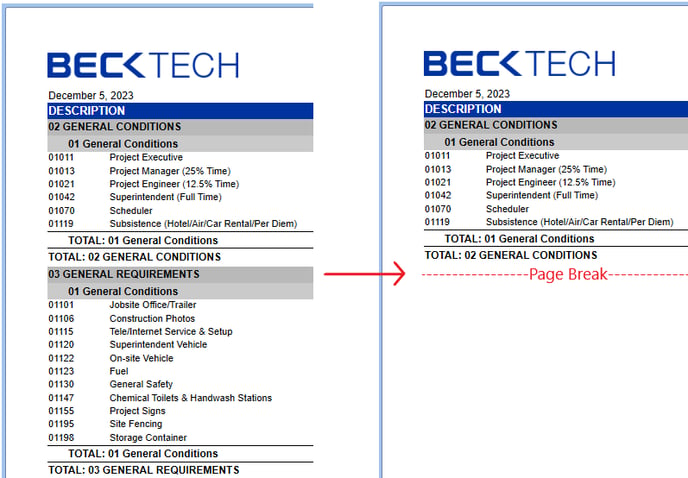 Before and After Inserting Page Break
Quick Links
4-Minute Video
Getting Started
1. Open the report inside the End User Report Designer
Method 1: Quick and Easy Page Breaks
1. Select the GroupFooter band that contains the Total WBS1Group row
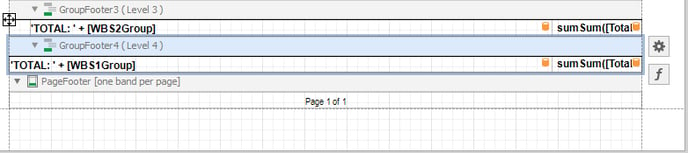 The selected GroupFooter4 band is outlined with a blue box.
2. Click the ⚙️ (Gear) icon that appears on the right of that field.
3. Inside the Page Break drop-down, select "After the Band, Except for the Last Entry"
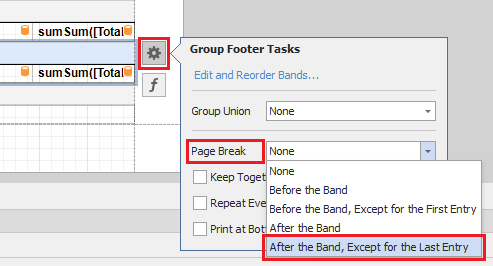 GroupFooter band's Page Break property
Use the option "After the Band, Except for the Last Entry" to avoid empty pages in your report.
4. Save and run your report
Method 2: Conditional Page Breaks
1. Navigate to the Field List panel on the right side of the screen
2. Right-click Parameters and click Add Parameter
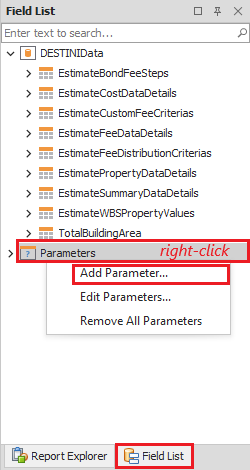 Field List panel on the right side of the screen
3. Setup a new Yes/No parameter:
a. Set a behind-the-scenes Name such as Level1PageBreak
b. Set a user-facing Description such as "Level 1 Page Break"
The Description field is the user-facing label for the parameter's Name. The Name field is used to reference this parameter within other sections of the End User Report Designer.
c. Set the Type = Boolean
d. Use the Default Value drop-down to select your preferred starting value
e. Click OK
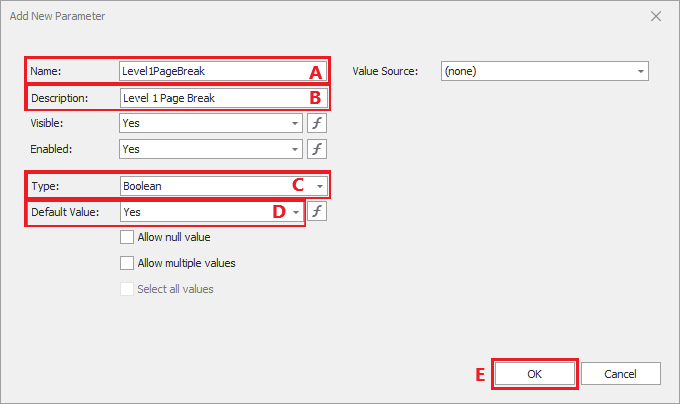 "Level 1 Page Break" is the user-facing label for the Level1PageBreak parameter.
4. Inside the Report Designer, select the GroupFooter band that contains the Total WBS1Group row
5. (Optional) Move the bottom edge downward (this will provide more space for placing your Page Break)
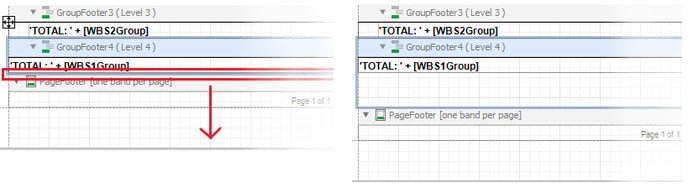 Before and After expanding the band containing the Total WBS1Group row
6. Navigate to the Toolbox on the left side of the screen
7. Add a Page Break by dragging and dropping it into the GroupFooter band
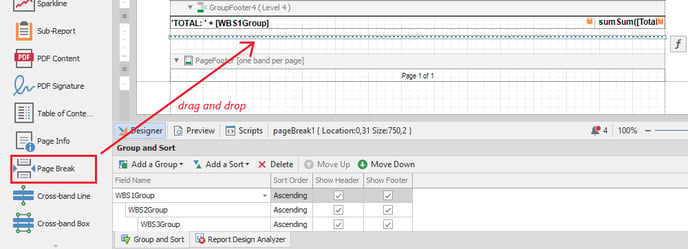 Drag and drop the Page Break from the Toolbox on the left to the Designer in the middle.
8. Inside the GroupFooter band, select the Page Break control, move vertically as needed, and click the ƒ (function) button on the right side of the Page Break
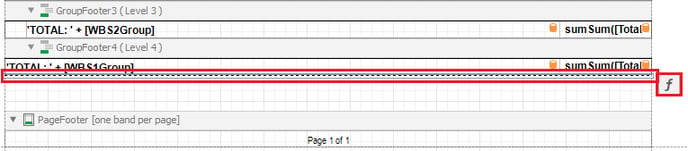 The Page Break control appears as a dotted line inside the Designer.
9. Inside the resulting Expression Editor window, set the Page Break's visibility:
a. On the left side of the window, select Visible
b. In the bottom-left panel, select Fields
c. In the bottom-middle panel, select Parameters
d. Inside the same panel, double-click on the Name of your new parameter (for example, Level1PageBreak)
e. Click OK
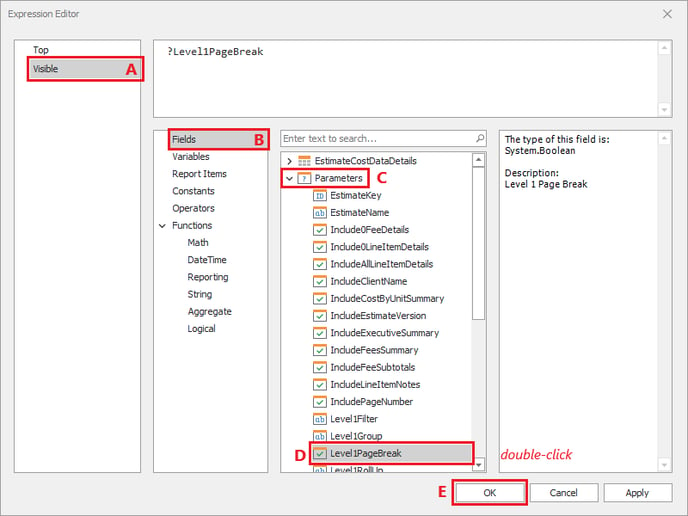 The Page Break's Visible property is based on the Yes/No value for the Level1PageBreak parameter
10. Save the report
11. Run the report and using the Parameters Panel on the left side of the screen, toggle the new Level 1 Page Break parameter as needed.
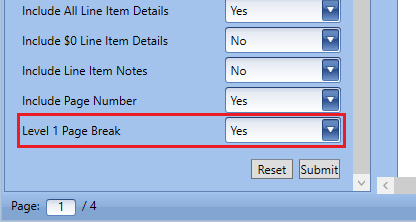 "Level 1 Page Break" is the user-facing label for the Level1PageBreak parameter inside the Parameters Panel.
Want more content? Let us know by filling out our Training Ideas Submission Form