How to Add a New Field To the Report
This article aims to assist individuals in customizing their current reports to better align with their business requirements.
We will guide you step-by-step on how to add a new field to a custom report by adding the client's address information to your Standard Report.
 New Field inside Report Preview
Quick Links:
2-Minute Video
Steps
1. Open the report inside the End User Report Designer
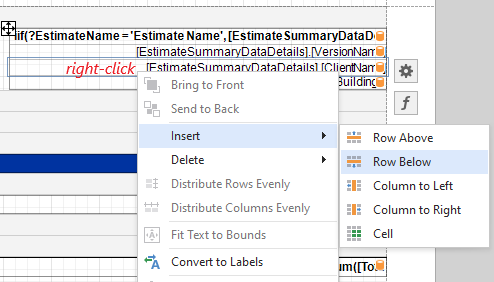
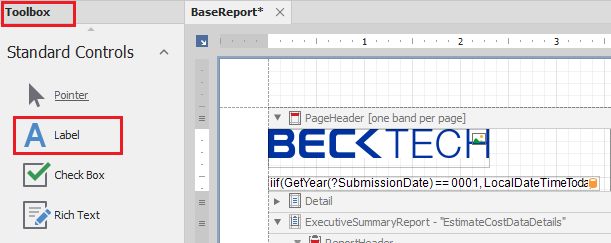
2. Add a new field using one of the following methods:
a. Insert row or column

b. Add a label from the Toolbox by dragging and dropping it into the Report Designer

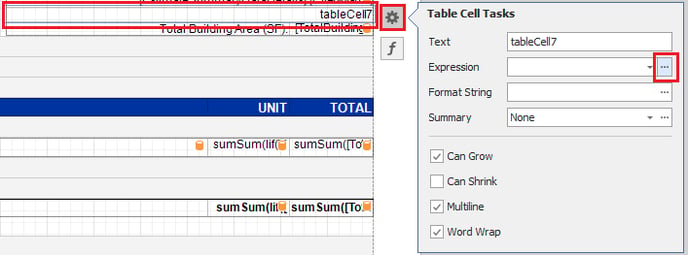
3. Select the added field and click the Gear Icon
![]()
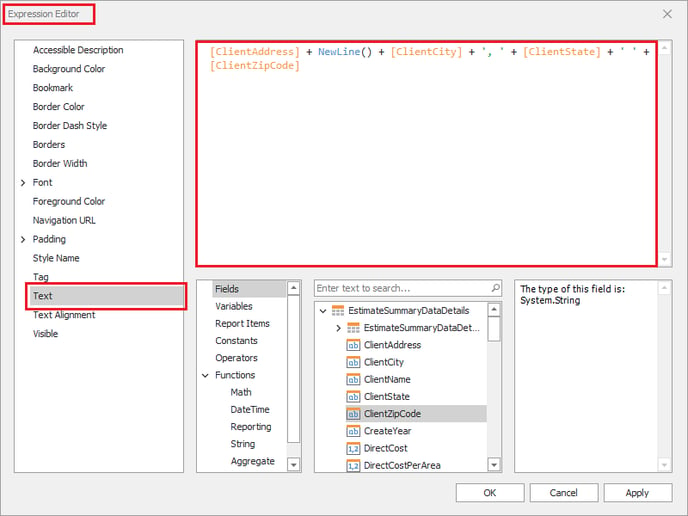
4. Open the Expression Editor

5. Inside the Text section, set an expression using the available fields and operations in the bottom panel.

6. Click OK
7. Save and run the report
Want more content? Let us know by filling out our Training Ideas Submission Form