Estimator Cloud provides flexibility in how fees are calculated and applied to line items. Using the Custom Cost Basis feature, you can set custom fee criteria to adjust the application of fees to specific sets of line items, ensuring greater control and accuracy. This guide will walk you through the process of setting up and using the Custom Cost Basis.
Add a Fee
- Open the Fee Editor.
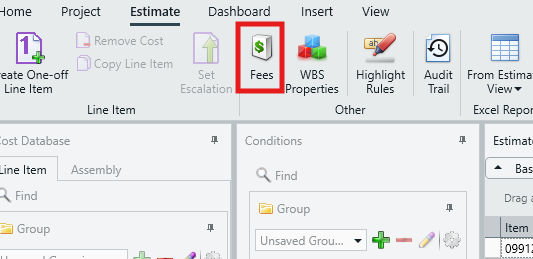
- Add a fee to your estimate and select a fee type. More instructions regarding adding and setting up fees can be found in the following article: An Overview of Fees and the Fee Editor.
- Note that the Custom Cost Basis is not applicable to the Lump Sum fee type. This workflow will only apply to the following fee types:
- Percent
- Bond
- Per Value
- Click into the Cost Basis column and select Custom.
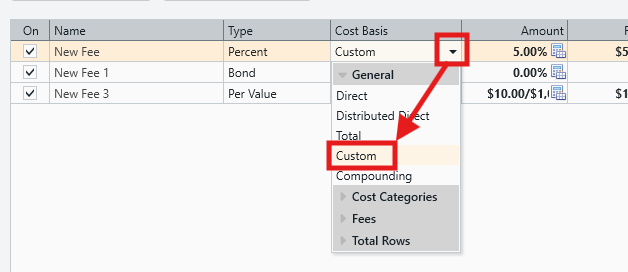
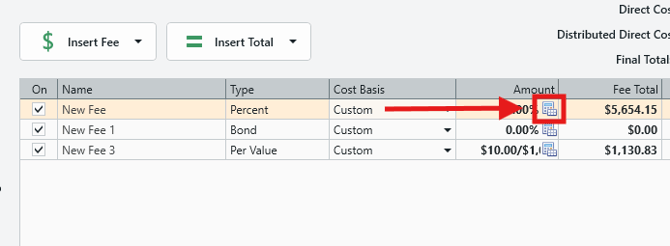
- When Custom is selected, you will see a Calculator icon appear in the Amount column. Click on the Calculator icon.
IMPORTANT: A Note About Bond and Per Value Fees
BEFORE selecting the Custom Cost Basis option:- By default, Bond fees use the Calculator icon in the Amount column to access the Bond Editor.

- By default, Per Value fees use a Dollar symbol in the Amount Column to access the Per Value editor.

However, AFTER selecting the Custom Cost Basis option:
- The Calculator symbol in the Amount column instead opens the window to edit custom fee criteria.
Therefore, when using a Custom Cost Basis for either of these fee types, to access the Bond Editor (Bond fee) or the Per Value editor (Per Value fee), you must:
- Click the Calculator symbol to access the custom criteria window.
- Click the Dollar symbol as indicated below to access the Bond Editor (Bond fee) or the Per Value editor (Per Value fee).
Configure Your Custom Cost Basis
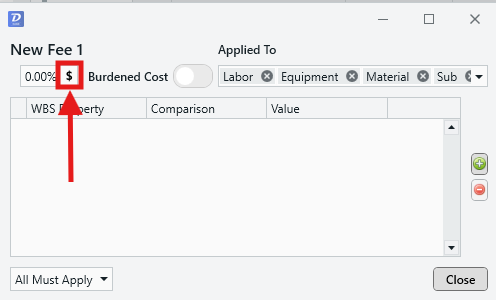
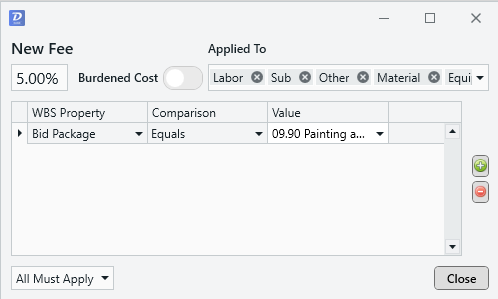
- Clicking the Calculator icon opens a new window where you can define custom fee criteria, specifying which line items the fee should be applied to. Think of these criteria as filters that narrow down which line items the fee will be calculated on.

- Click the + button to add a criteria. You can add as many criteria as you like.
- Note: If you don’t have any criteria, it will default to calculating on all line items.
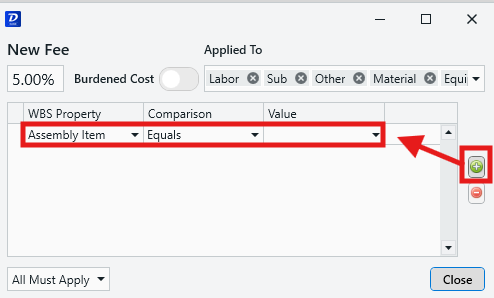
- Configure your criteria via the following columns:
- WBS Property: Select the category of line items that you want this fee to apply to.
- Comparison: Select the comparison operator – Equals, Not Equal, and Contains.
- Value: Enter the value to be compared. Click the dropdown to see a list of all values associated with the chosen WBS Property.

- Other options to consider:
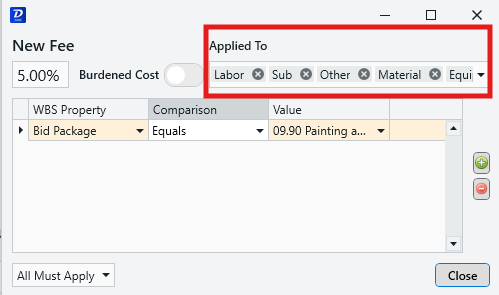
- Applied to: Set which cost categories (Labor, Equipment, Material, Sub, Other) that the fee will be applied to.
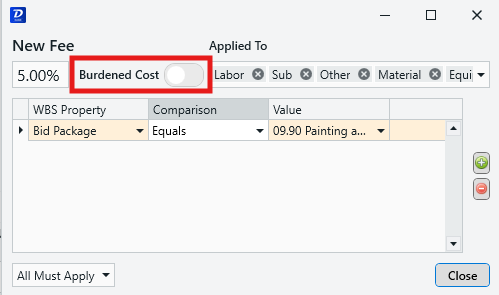
- Burdened Cost toggle: Select whether to calculate the fee on burdened or aggregate costs.
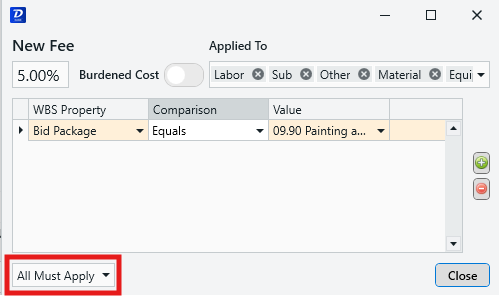
- Set the criteria rules: When you have multiple criteria in the list, it is important to set how these criteria are applied in this dropdown:
- All Must Apply: The fee is only distributed to line items that meet all of the listed criteria. Use this setting for a more restricted distribution method.
- Any Can Apply: The fee will be distributed to line items that meet any of the listed criteria. This is useful if you have several separate conditions that you'd like to specify for distribution.
- Applied to: Set which cost categories (Labor, Equipment, Material, Sub, Other) that the fee will be applied to.
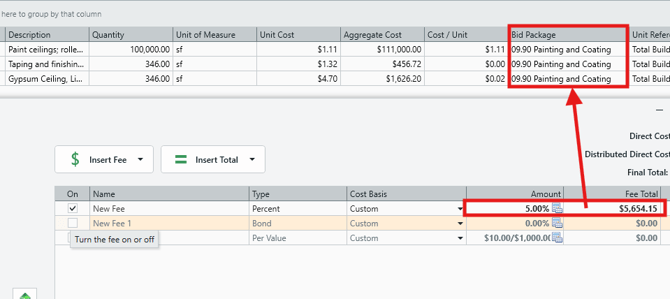
- In the below example, we have configured our fee to calculate against line items that are in the '09.90 Painting and Coating' Bid Package.
- Click Close.
- You will immediately see the resulting calculation of the fee on the applicable line items.
- If the fee cannot be applied to any line items, a yellow warning icon will appear in the Amount column.
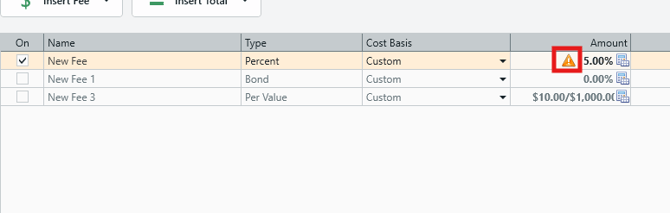
- If you see this warning, review your custom criteria, looking out for:
- Conflicting criteria used with the All Must Apply option set.
- Values provided in the Value column are selected via the dropdown (manually typing a Value may result in invalid data).
- You have at least one Cost Category in the Applied To field.
NOTE: If you are configuring an estimate template that does not contain any line items, you may see several warnings like this. In many cases, this simply indicates that the estimate is currently blank.
Useful Links:
Submit Your Suggestions to Help Improve This Article