
Styles provide a simple way to apply your company’s branding to reports. Each control in a standard report uses a default style, but you can configure WBS Headers to use different colors at runtime. This describes how to use parameters and styles to change report coloring.
To get started, the following section describes how to create a new style that represents a new WBS Header color. The example uses gray and blue backgrounds.
For more information about Styles, see Change Fonts and Colors in Your Report With the Styles Editor.
Create a New Style for a WBS Header Color
- Open an estimate in DESTINI Cloud: Estimator.
- Navigate to Home > New Report. Report Designer opens.
- Click File > Open.
- Navigate to the folder with the report template file (.repx) you want to modify.
- Click the .repx file to open it.
- Locate Report Explorer on the right side of your screen. Right-click Styles and select Edit Styles. The Styles Editor opens.
- In the Styles Editor, click WBS1Header on the left.
- Click Clone a style in the top left corner of the window.
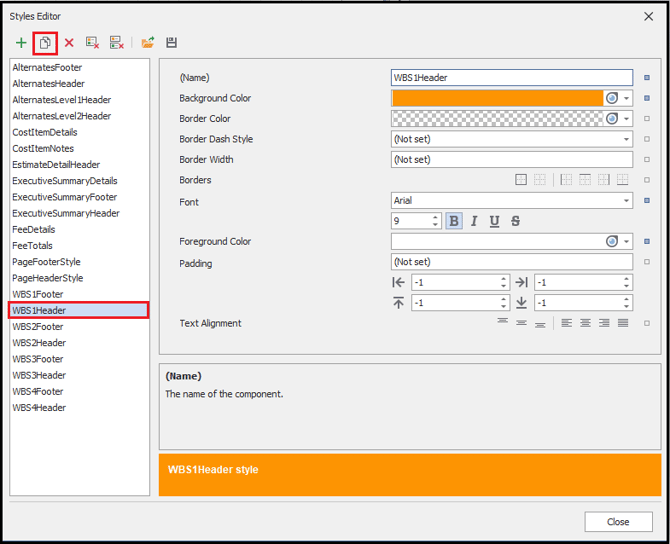
- Click the new style. For (Name), enter Header_Gray.
- Click the Background Color field and choose Gray.
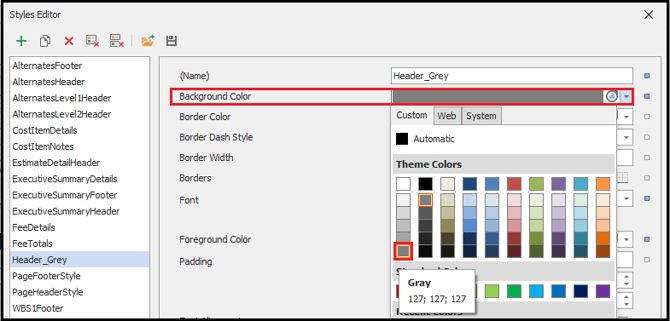
- Repeat Steps 7-10 to create another clone of the WBS1Header style with the name Header_Blue. For Background Color, choose a shade of blue.
- Clone additional styles as needed for your branding purposes.
Create a Parameter for a Group Header
The following procedure creates a parameter for the WBS Group 1 header that enables you to toggle the background colors you created in the previous procedure.
- On the right side of your screen, click the Field List tab at the bottom of Report Explorer.
- Scroll to the bottom of the Field List tab.
- Right-click Parameters and select Edit Parameters. The Report Parameters Editor opens.
- On the left side, expand the size of the parameters window to better view the names.
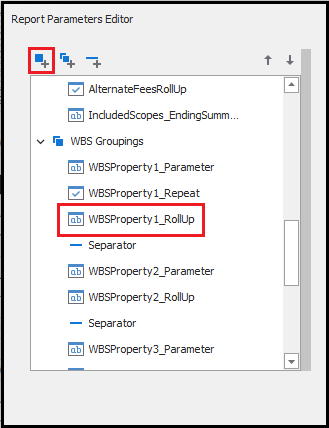
- Scroll down, select the WBSProperty1_RollUp parameter, and click the Add Parameter button.
- Scroll back up to locate the new parameter.
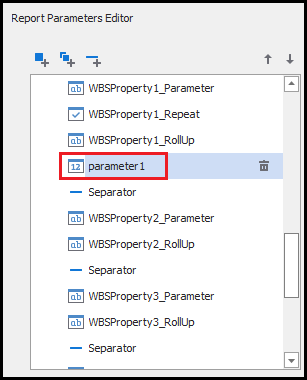
- With the new parameter selected, enter the following information and click OK. For any setting not specified here, leave the default configuration:
- Name: WBSProperty1_Style
- Description: Level One Style
- Type: String
- Default Value: Header_Gray
- Value Source: Static List. Click the +Add button and enter new values for Header_Blue and Header_Gray:
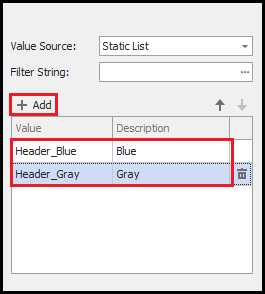
Note: Verify the name you specified for Default Value (for example, Header_Gray) matches one of the names specified for Value.
Also, verify that all names entered for Value match the names of the styles you created in the previous procedure.
Words entered in the Description box are the user-facing labels displayed at runtime.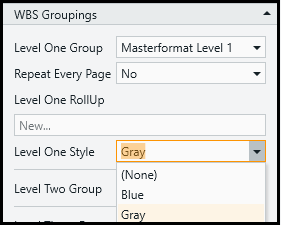
Repeat this procedure for any additional WBS Group levels you want to customize. The following table lists recommended locations, descriptions, and names for each new parameter:
|
Add Parameter After |
Description |
Name |
|
WBSProperty2_RollUp |
Level Two Style |
WBSProperty2_Style |
|
WBSProperty3_RollUp |
Level Three Style |
WBSProperty3_Style |
|
WBSProperty4_RollUp |
Level Four Style |
WBSProperty4_Style |
Designer Changes
Most styles in standard reports are applied directly to bands. Use the following procedure to update the style for the WBSProperty1 GroupHeader band.
- Click the Report Explorer tab at the bottom of Report Explorer.
- Enter GroupHeader_LineItemWBS1 in the Search field and select the result.
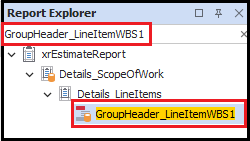
- In Designer in the middle of your screen, scroll down to the GroupHeader_LineItemWBS1 band you selected in the last step and click the Function button on the right side of the band. Expression Editor opens.

- On the left side, click Style Name.
- Paste the following in the text box and click OK:
?WBSProperty1_Style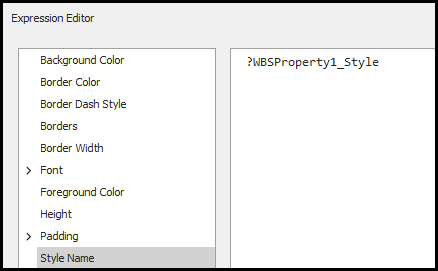
- Repeat Steps 2-5 for each WBS GroupHeader band you want to customize. When you're finished, save and run the report:
|
Grouping |
GroupHeader Band |
Expression |
|
WBSProperty2 |
GroupHeader13 |
?WBSProperty2_Style |
|
WBSProperty3 |
GroupHeader12 |
?WBSProperty3_Style |
|
WBSProperty4 |
GroupHeader11 |
?WBSProperty4_Style |
Toggle Styles
-
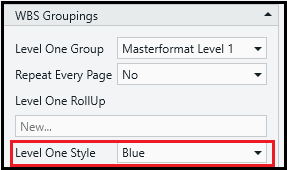
In the Report Viewer, you can toggle different styles using the Level # Style option.
-
Toggle a style change for a WBS Grouping level and then click Submit.
-
Scroll down in the report to see the new style:
