
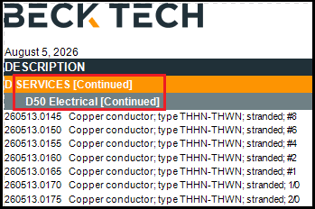
DESTINI Cloud reports include built-in support for repeating the Level One Group in the page header on every page. With a few simple modifications, you can extend this functionality to other WBS groupings. This article explains how to configure the Level Two Group to repeat on every page and display [Continued] when the group spans multiple pages, as shown in the following example.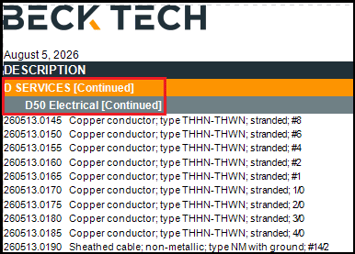
Configure Level Two Group to Repeat
- Open an estimate in DESTINI Cloud Estimator.
- Navigate to Home > New Report. Report Designer opens.
- Click File > Open.
- Navigate to the folder with the report template file (.repx) you want to modify.
- Click the .repx file to open it.
- Using the Report Explorer on the right side of your screen, type GroupHeader13 into the Search field. Click GroupHeader13 in the results.
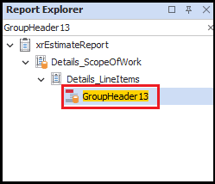
- Inside the Designer in the middle of your screen, scroll down and locate the selected band from the previous step.
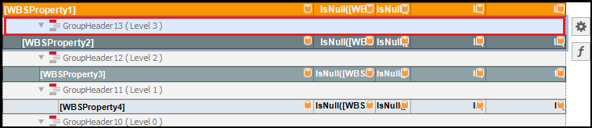
- With the band selected, click the Gear button to the right. The Group Header Tasks dialog box displays.

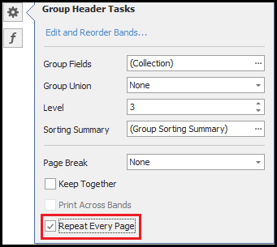
- Inside the Group Header Tasks dialog box, select Repeat Every Page.
- Within the same group band, locate and select the [WBSProperty2] cell and then click the Function button. The Expression Editor opens.
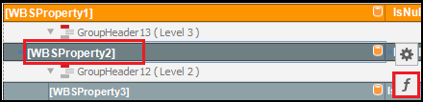
- In the left pane, select Text and then paste the following expression into the editor.
[WBSProperty2] + Iif(GroupIndex(0) + GroupIndex(1) + GroupIndex(2) = 0, '', ' [Continued]')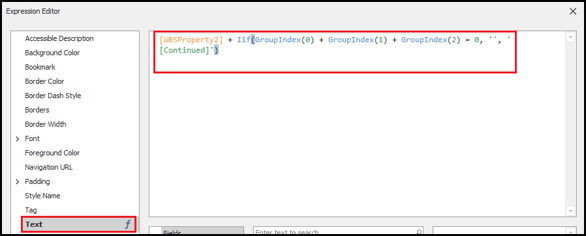
- Click Ok.
- Save and run your report.
- In the report viewer, in the Parameters pane on the left side of your screen, locate the WBS Groupings section.
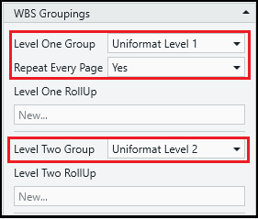
- For Level One Group, choose a group from the list and select Yes for Repeat Every Page. Then choose a group for Level Two Group.
- Click Submit.
- Scroll down in the report to locate repeating grouping levels similar to the following. If the report doesn't include enough line items, you might not see the repeated group headings.
(Optional) To configure additional group header bands to repeat, work through the previous procedure again and specify the values in the following table to update the WBSProperty3 and WBSProperty4 group header bands.
|
Grouping |
GroupHeader Band |
Table Cell Expression |
|
WBSProperty3 |
GroupHeader12 |
|
|
WBSProperty4 |
GroupHeader11 |
|
(Optional) Parameter Clean Up
After you initially ran the report in the last procedure, you selected Yes for Repeat Every Page for the Level One Group.
If you hadn't selected Yes for the Level One Group, the report would display as follows: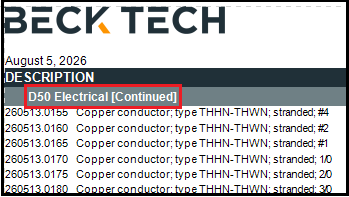
The Level Two Group is now configured to always repeat on each page. For consistency, you can configure your reports so you don't have to select Yes for Repeat Every Page for the Level One Group. Like the Level Two Group, the Level One Group header will always repeat.
- At the bottom of Report Explorer on the right side of your screen, click the Field List tab.
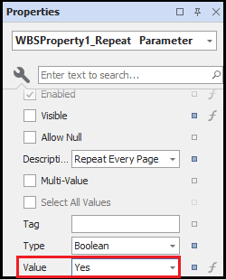
- Scroll down, expand Parameters, and select WBSProperty1_Repeat.
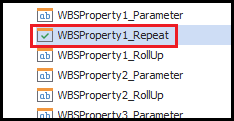
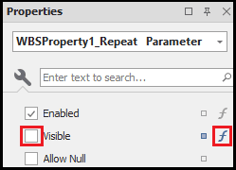
- Inside the Properties panel on the bottom right of your screen, clear the Visible checkbox and click the Function button to the right. The Expression Editor opens.
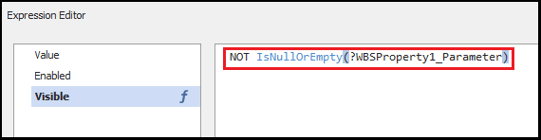
- Delete the expression in the Expression Editor and click OK.
- In the Properties panel, for Value, choose Yes.
- Save and run the report.
Related Articles
How to Append [Continued] to the WBS Property 1 Value Across Multiple Pages