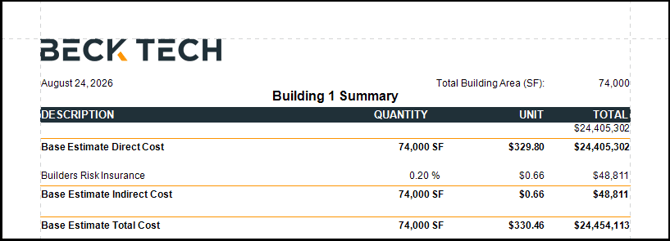
When running a report with filters applied, it can be helpful to display a custom Report Title that clearly identifies the report’s scope. By using a placeholder parameter, you can dynamically update the title each time you run the report. This article explains how to create a Report Title parameter and display its value in the page header.
Add New Parameter
- Open an estimate in DESTINI Cloud Estimator.
- Navigate to Home > New Report. Report Designer opens.
- Click File > Open.
- Navigate to the folder with the report template file (.repx) you want to modify.
- Click the .repx file to open it.
- On the right side of your screen, click the Field List tab at the bottom of the Report Explorer.
- Scroll to the bottom of the Field List tab.
- Right-click Parameters and select Edit Parameters.
- On the left side of the Parameters window, locate and select the Page Setup group.
- Click the Add Parameter button on the top left side of the window.
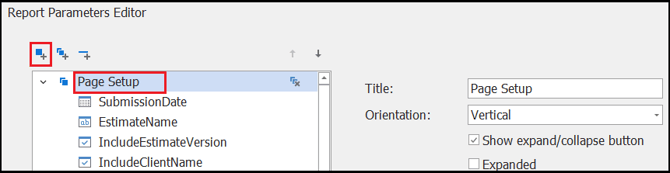
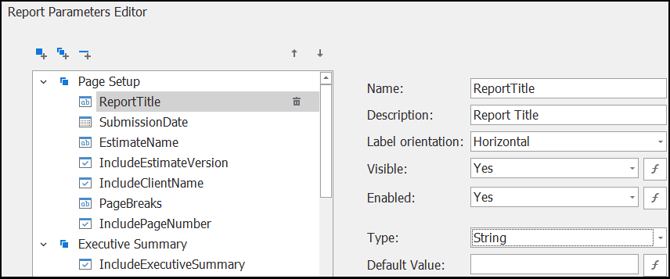
- With the new parameter selected, enter the following information and then click OK. For any setting not specified here, leave the default configuration:
-
- Name – ReportTitle
- Description - Report Title
- Type - String
(Optional) Create a New Style
By default, all controls inside the PageHeader band are formatted with the same font. If you would like to use a different size font for your Report Title, we recommend creating a new style.
For more information about styles, see Change Fonts and Colors in Your Report With the Styles Editor
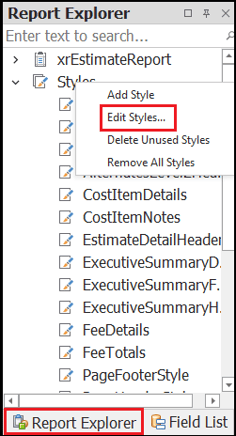
- On the right side of your screen, click the Report Explorer tab at the bottom of the Field List.
- Right-click the Styles node and select Edit Styles.
- Inside the Styles Editor window, select PageHeaderStyle on the left side.
- Click the Clone a style button at the top of the window.
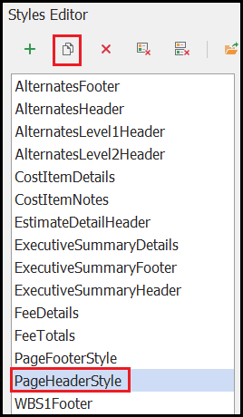
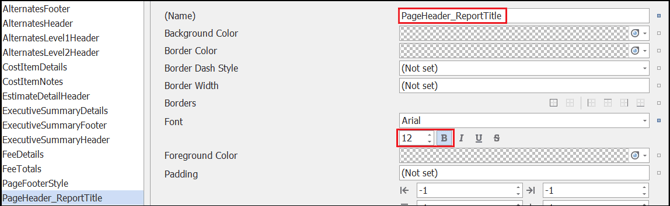
- With the new style selected, enter the following information and click the Close button:
- (Name): PageHeader_ReportTitle
- Font = 12, Bold
Designer Changes
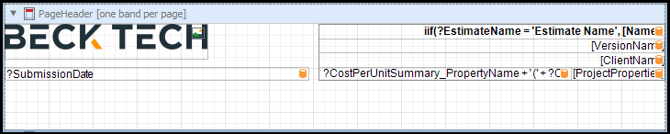
- In the Designer section in the middle of your screen, locate and select the PageHeader band. Drag the bottom edge downwards to create more vertical space.
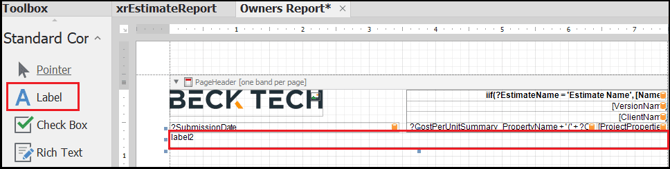
- In the Toolbox panel on the left side of your screen, drag and drop a Label control into your PageHeader band.
- With your label selected, drag the left and right edges to the page margin.
- Click the Function button on the right side of the label cell.
- Inside the Text section, paste the following expression:
?ReportTitle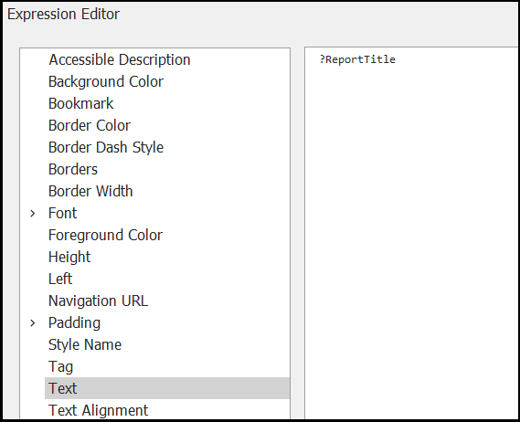
- On the left side of the window, select Style Name and paste the following expression:
'PageHeader_ReportTitle' - Click OK.
(Optional) Adjust the Formatting
- With the new label still selected, use the menu bar button at the top of your screen to Center align your text.
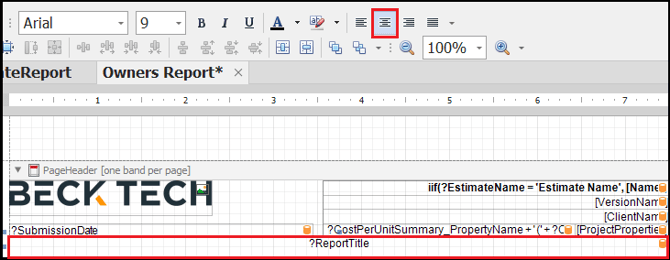
- Reselect the PageHeader band and drag the bottom edge upwards to remove any vertical empty space.

- Save and run your report.
- To dynamically change your Report’s Title, expand the Page Setup group in the Parameters pane on the left side of the Report Viewer.
- Type anything inside your Report Title parameter (i.e. Building 1 Summary).
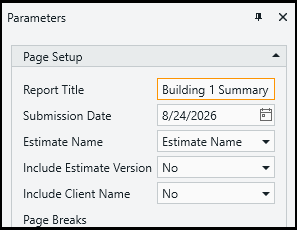
- Click Submit.