Configure a New Parameter
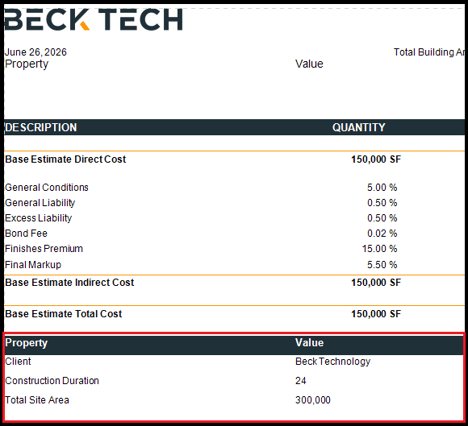
The following procedure describes how to create a new parameter in Report Designer and specify the properties (for example, Client, Construction Duration, Total Site Area) you want to display in your report.
- Open an estimate in DESTINI Cloud: Estimator.
- Navigate to Home > New Report. Report Designer opens.
- Click File > Open.
- Navigate to the folder with the report template file (.repx) you want to modify. The example in this article uses the standard Owners Report template file.
- Click the .repx file to open it.
- On the right side of your screen, click the Field List tab at the bottom of Report Explorer.
- Scroll to the bottom of the list, right-click Parameters, and then click Edit Parameters. The Report Parameters Editor dialog box opens.
- Click the Executive Summary group and then click the add parameter button
 at the top of the list.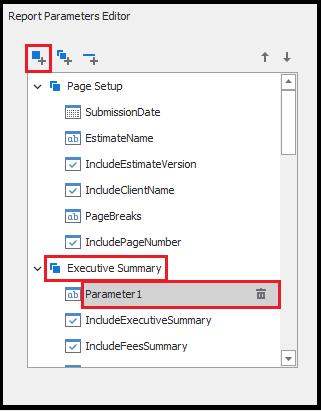
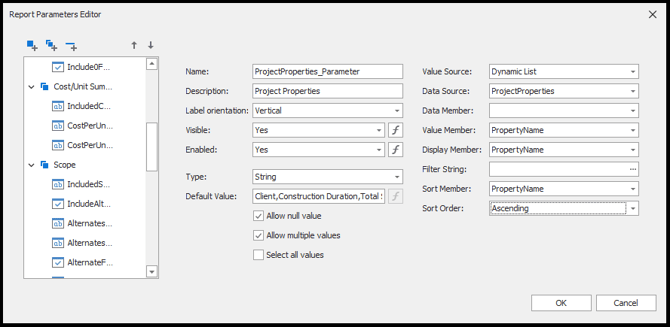
- Report Designer creates the new parameter directly beneath the Executive Summary group and displays its properties. Fill in the following fields. For any field or option not listed here, retain the default value. Click OK when you've entered values in all required fields.
- Name: Name your parameter, for example ProjectProperties_Parameter.
- Description: Specify a label to display when you run the report, for example Project Properties.
- Label orientation: Vertical
- Allow multiple values: This checkbox is displayed lower in the dialog box, but we recommend you check it now to preserve the default values you will specify momentarily.
- Type: String
- Default Value: Specify project properties to display in the report. Separate properties using a comma and no space between properties. For example:
Client,Construction Duration,Total Site Area
Note: Property spelling must match properties listed in Project View. - Allow null value: Check this box.
- Value Source: Dynamic List
- Data Source: ProjectProperties
- Data Member: Leave blank
- Value Member: PropertyName
- Display Member: PropertyName
- Filter String: Leave blank
- Sort Member: PropertyName
- Sort Order: Ascending
Create a New DetailReport Band
Complete the following steps to add a new DetailReport band to the bottom of your report. The new band displays Property and Value when you run the report. If you prefer, you can move the new DetailReport Band into the Executive Summary, as described later in this article.
-
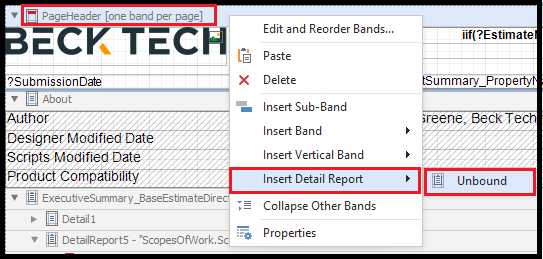
In Report Designer, right-click PageHeader, and then click Insert Detail Report > Unbound.
- Scroll to the bottom of the report.
- Click the header of the new DetailReport band, and then click the gear icon to the right.
The Detail Report Tasks dialog box opens.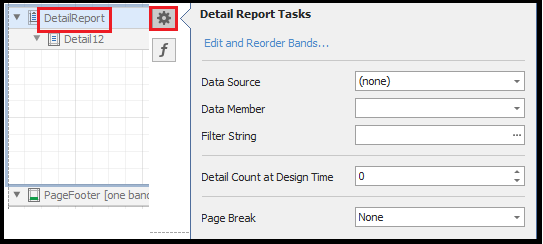
- Click Data Source > ProjectProperties.
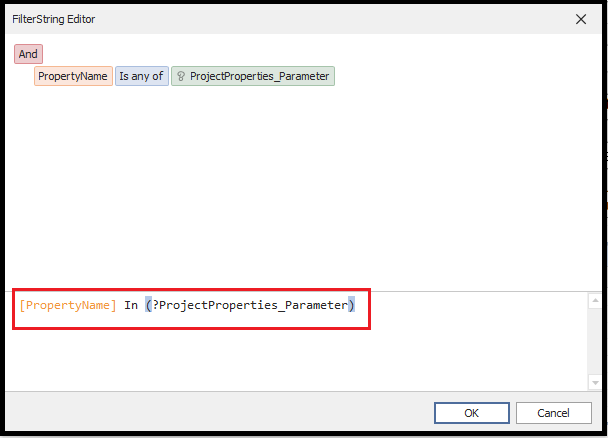
- In the Filter String field, click the ellipses (...). The FilterString Editor opens.
- Copy the following statement:
[PropertyName] In (?ProjectProperties_Parameter) - Paste the statement into the bottom half of the FilterString Editor, as shown in the following screenshot:
- Click OK.
Populate the New DetailReport Band
-
Right-click the DetailReport band header and click Insert Band > ReportHeader.
-
Under Standard Controls, click Table and drag it into the new ReportHeader box. The ReportHeader now includes a table with three cells.
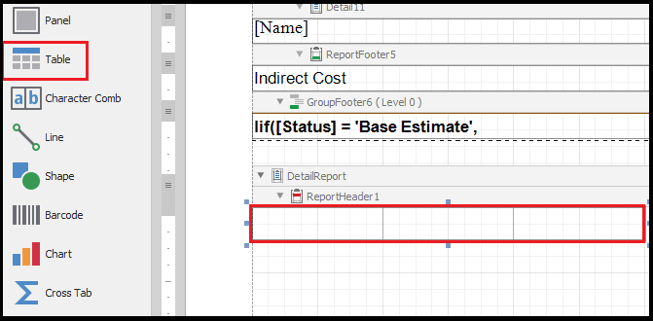
- Click the first cell and type Property.
- Click the second cell and type Value.
- Right-click the third cell and choose Delete > Column.
- Hover your cursor over the table and click the
 symbol. The table displays resizing
handles.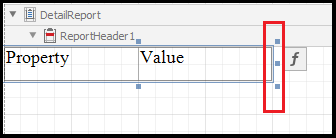
- Click the handle on the right side of the table and drag it the width of the report.

- ClickReportHeader1 to select the band. Drag the lower edge up to resize it.

- Hover your cursor over Property and click the symbol again.
- On your keyboard, press CTRL-C to copy the table.
- Click into the Detail12 band, and then press CTRL-V on your keyboard to paste the table. If necessary, resize the bottom edge until both tables looks like the following example:

- Click Property in the lower table, and then click the gear icon. Report Designer opens the
Table Cell Tasks dialog box.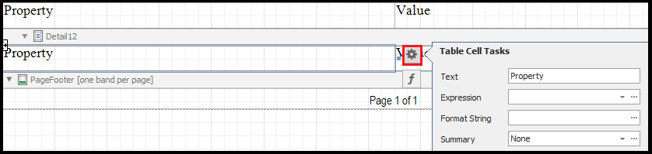
- In the Expression field, click the drop-down arrow and click PropertyName.
- Click outside of the Table Cell Tasks dialog box to close it.
- Click Value in the lower table, and then click the
 icon. Expression Editor opens.
 - Paste the following into Expression Editor:
[StringValue] +FormatString('{0:n0}', [NumericValue]) +FormatString('{0:M/d/yyyy}', [DateTimeValue])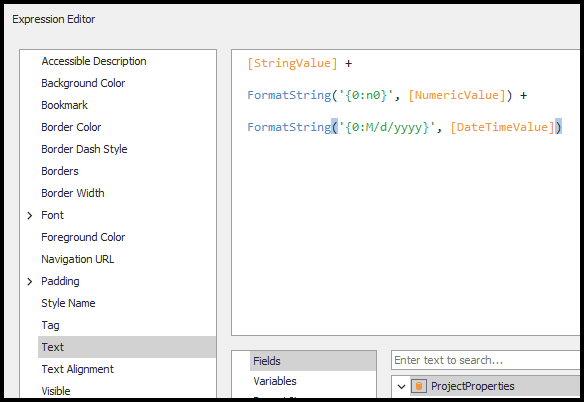
- Click OK.
- Click the Detail12 header, and then click the gear icon. The Detail Tasks dialog box opens.
- Click the ellipses (...) in the Sort Fields box. The Group Field Collection Editor opens.
- Click Add.
- In the empty cell next to Field Name, choose PropertyName from the drop-down list.
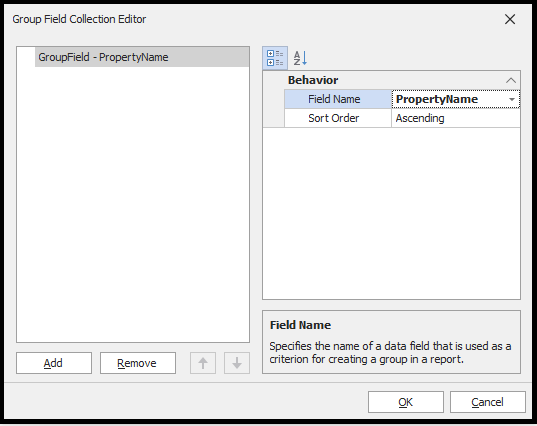
- Click OK.
Relocate the Report Band into the Executive Summary
By default, Report Designer adds the new DetailReport band to the bottom of the report. Use the following procedure to move the band into the Executive Summary. If you want to leave the DetailReport band at the bottom of this report, you can skip this procedure.
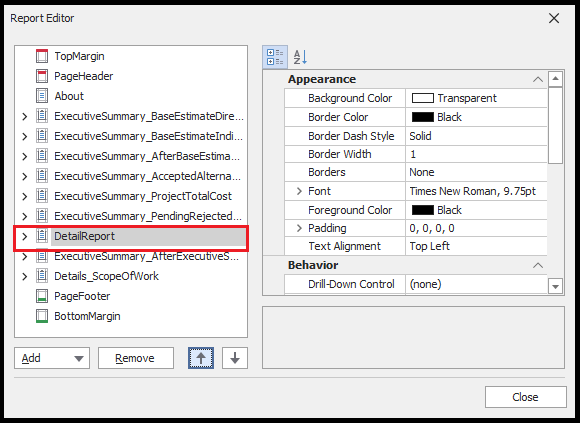
- Right-click the DetailReport header and then click Edit and Reorder Bands. Report Editor opens.
- Click DetailReport in the left pane.
- Click the up arrow until the DetailReport band sits above ExecutiveSummary_AfterExecutiveSummaryPageBreak.
- Click Close.
- In the report, scroll up to the DetailReport band.
- Click the ReportHeader1 band. The properties for the band display in a window on the lower right side of your screen.
- In the Properties window, expand Styles.
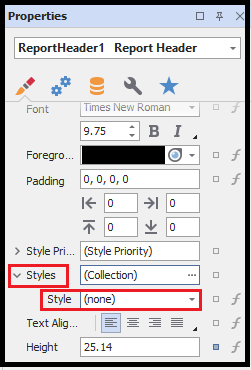
- Click the drop-down menu in the Style field and choose ExecutiveSummaryHeader.
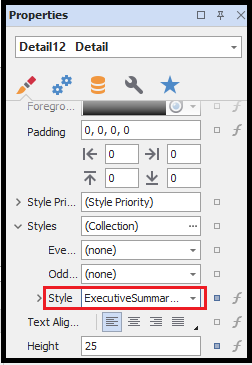
- Click the Detail12 header to display the properties in the lower right of your screen.
- Expand Styles and then click ExecutiveSummaryDetails from the Style drop-down menu.
- Click the Save button in the Report Designer ribbon.
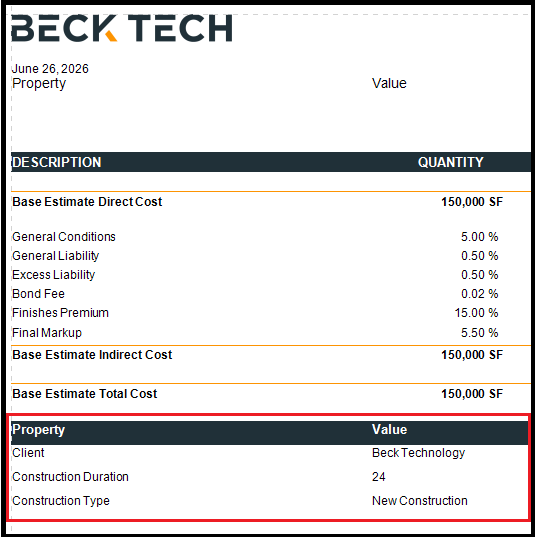
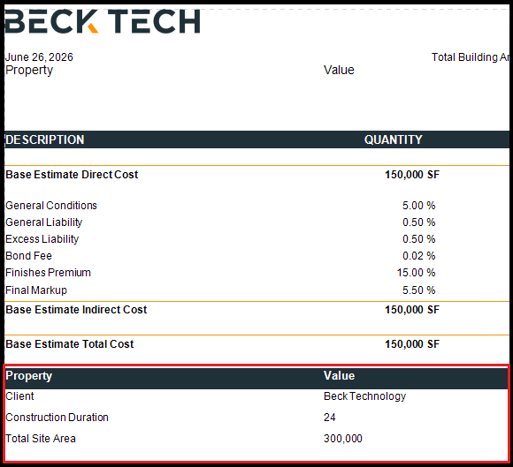
- Run the report. The properties and corresponding values display in the Executive Summary.
Dynamically Change the Properties List When Running a Report
Perform the following steps to change the displayed properties when you run a report.
- Open an estimate in DESTINI Cloud: Estimator.
- Navigate to Home > Find and Run Report.
- In the Parameters panel, expand the Executive Summary group.
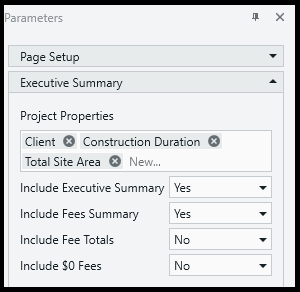
- In the Project Properties box, click New, and then choose the properties to display in the report. For example:
Client,Construction Type,Construction Duration - Click OK.
- Save and run the report. The new properties display in the report.