
DESTINI Cloud Estimator reports display the WBS value in the header and footer of each WBS Property group. Here's an example.
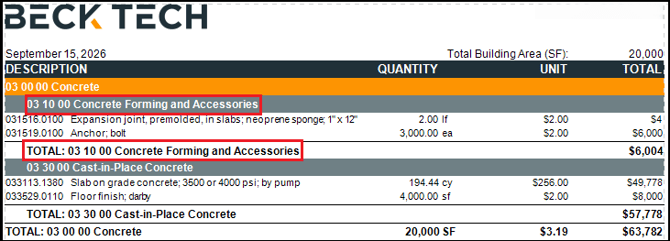
If you don't want to display a footer for a particular WBS level, you can replace it with a blank row without rolling up or hiding the associated line items. This article describes how to configure the blank row using parameters and styles.
Create a Parameter
- Open an estimate in DESTINI Cloud Estimator.
- Navigate to Home > New Report. Report Designer opens.
- Click File > Open.
- Navigate to the folder with the report template file (.repx) you want to modify.
- Click the .repx file to open it.
- In the Report Explorer panel on the right side of the screen, use the tabs to switch to the Field List panel.
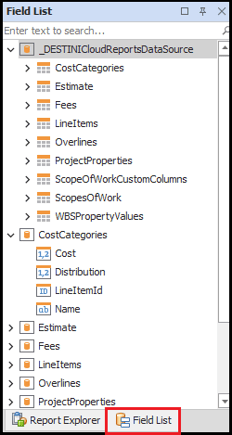
- Scroll to the bottom of the list. Right-click Parameters and select Edit Parameters.
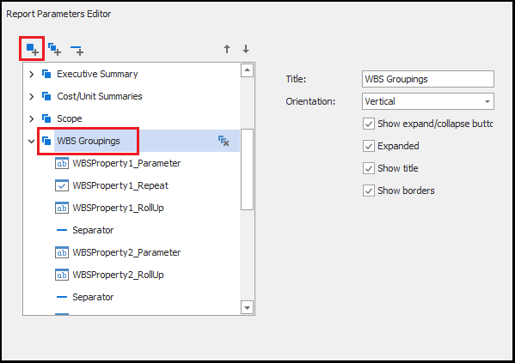
- In the Parameters window, locate and select the WBS Groupings group.
- Click the Add button in the top left corner of the window.
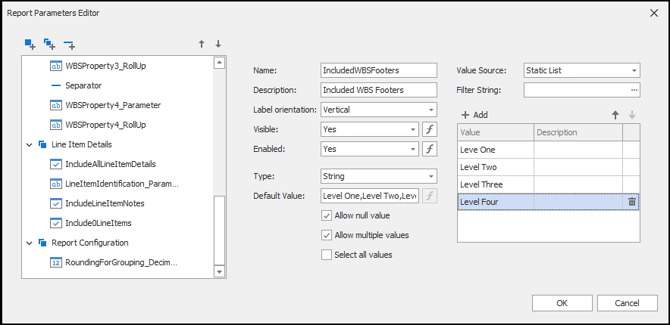
- With the new parameter selected, configure the following and click OK:
- Name – IncludedWBSFooters
- Description – Included WBS Footers
- Label orientation – Vertical
- Type – String
- Allow null value – Checked
- Allow multiple values – Checked
- Default Value – Copy and paste the following into the field:
Level One,Level Two,Level Three,Level Four - Value Source – Choose Static List, click Add, and add each of the following values to their own row:
- Level One
- Level Two
- Level Three
- Level Four
Create a Style
As part of this workflow, a blank row will be printed if the WBS Footer is turned off. For simplicity, the WBS Footer row for this example will be updated to use a white font.
- In the Field List panel on the right side of your screen, click the Report Explorer tab.
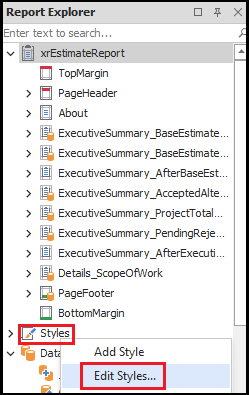
- In Report Explorer, right-click Styles > Edit Styles.
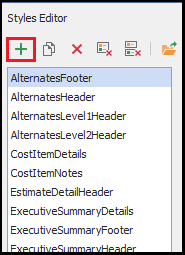
- Click the Add a Style button in the top left corner of the window.
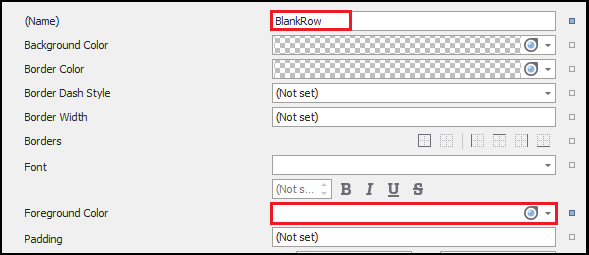
- With the new style selected, enter the following information and then click Close:
- (Name) – BlankRow
- Foreground Color – White
Designer Changes
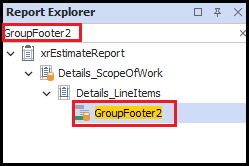
- In Report Explorer, search for and select GroupFooter2.
- In Designer in the middle of your screen, scroll down and locate the band selected in the previous step.
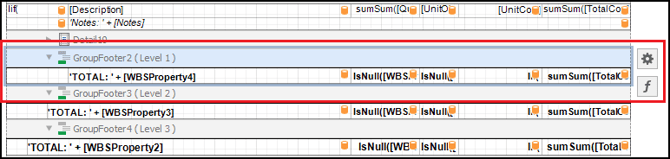
- Click the Function button to the right.

- In Expression Editor, click Style Name in the left pane.
- Copy and paste the following expression into the expression box and click OK:
Iif('Level Four' in (?IncludedWBSFooters), 'WBS4Footer', 'BlankRow')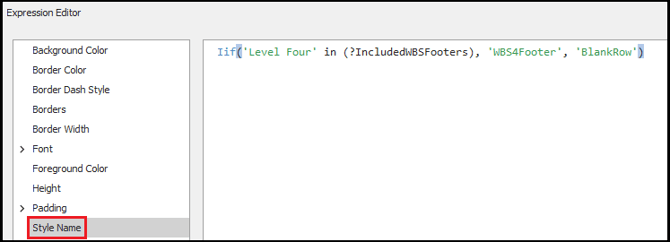
- Using the following table, repeat Steps 1-5 for the remaining WBS Footer bands.
Band
Control Name
Style Name Expression
WBS Property 3 Footer
GroupFooter3
Iif('Level Three' in (?IncludedWBSFooters), 'WBS3Footer', 'BlankRow')
WBS Property 2 Footer
GroupFooter4
Iif('Level Two' in (?IncludedWBSFooters), 'WBS2Footer', 'BlankRow')
WBS Property 1 Footer
GroupFooter5
Iif('Level One' in (?IncludedWBSFooters), 'WBS1Footer', 'BlankRow')
- Save and run your report.
- In the Report Viewer Parameters pane, choose a WBS property from the Level One Group dropdown list. You can choose additional WBS properties for the Level Two, Three, and Four groups, if you like.
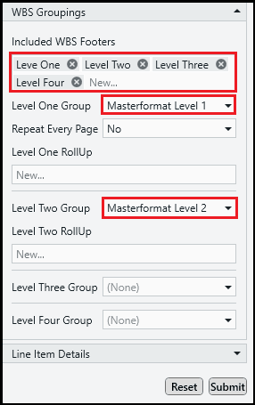
- Click Submit.
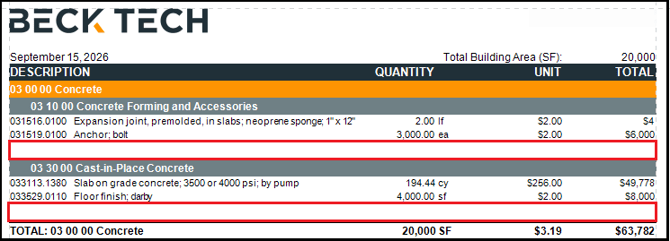
- The report prints a white row instead of the WBS footer.
Related Articles
- Remove WBS Footers from Line Item Details
- How to Repeat WBS Groupings on Every Page of a Report
- How to Fix Orphaned WBS Footers in a Report
- Change Fonts and Colors in Your Report With the Styles Editor