
In DESTINI Cloud Estimator reports, the Font drop-down in Report Designer enables you to select from a list of fonts installed on your local machine. If your company requires custom fonts, you can download them from Microsoft and install them on your local machine.
- Download the custom font to your local machine. For more information, see Manage Fonts in Windows.
Note: The custom font lives on your local machine, not inside the report. Therefore, the font needs to be installed on all machines that will run the Cloud Report, otherwise a comparable font will appear at runtime. - Open an estimate in DESTINI Cloud Estimator.
- Navigate to Home > New Report. Report Designer opens.
- Click File > Open.
- Navigate to the folder with the report template file (.repx) you want to modify.
- Click the .repx file to open it.
- In Report Explorer on the right side of your window, right-click Styles > Edit Styles. The Styles Editor opens.
- Select the first style in the list.
- Inside the Font drop-down, select your custom font.
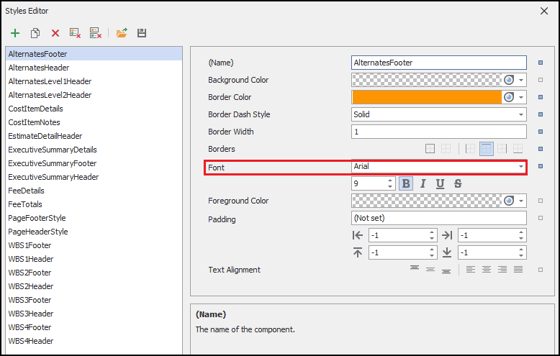
- Repeat Steps 8 and 9 for all styles in the window.
- Click Close
- Save and run your report.
Related Articles
Change Fonts and Colors in Your Report With the Styles Editor