
You can customize standard DESTINI Cloud Estimator reports to display selected percent fees in the Page Header. For example, you can add fees such as Sales Tax, Labor Burden, and other cost adjustments so they appear in the Page Header each time the report is generated. This provides a consistent, at-a-glance summary of key fees on every report. 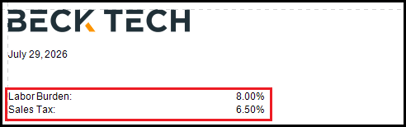
This article describes how to add dynamic placeholder parameters so you can easily change which fees display in the Page Header when you print the report. This process is useful, for example, if reports for internal leaders need to include different fees in the Page Header versus reports for external customers or clients.
Add a New Parameter
Use the following procedure to create a parameter to dynamically select a Fee from the current estimate.
- Open an estimate in DESTINI Cloud Estimator.
- Navigate to Home > New Report. Report Designer opens.
- Click File > Open.
- Navigate to the folder with the report template file (.repx) you want to modify.
- Click the .repx file to open it.
- On the right side of your screen, click the Field List tab at the bottom of Report Explorer.
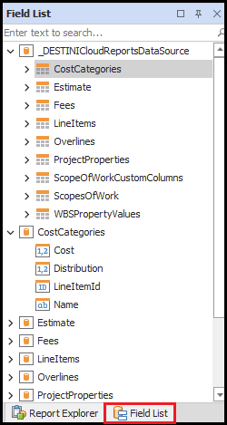
- Scroll to the bottom of the Field List tab.
- Right-click Parameters and select Edit Parameters.
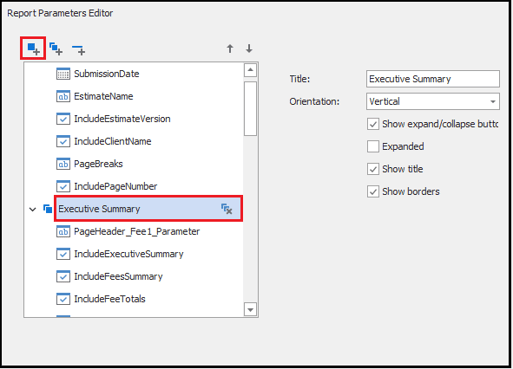
- On the left side of the Parameters window, click Executive Summary.
- Click the Add Parameter button on the top left side of the window.
- With the new parameter selected, enter the following information and click OK. For any setting not specified here, leave the default configuration:
- Name: PageHeader_Fee1_Parameter
- Description: Page Header Fee 1
- Type: String
- Default Value: Sales Tax (or any percentage fee name inside your fee table)
- Allow null value: Checked
- Value Source: Dynamic List
- Data Source: Fees
- Value Member: Name
- Display Member: Name
- Filter String:
[Enabled] = 'Yes' And Not [Type] In (##ToString#LumpSum#, ##ToString#Subtotal#, ##ToString#RunningTotal#) And [IsDistributed] = 'No' - Sort Member: Name
- Sort Order: Ascending
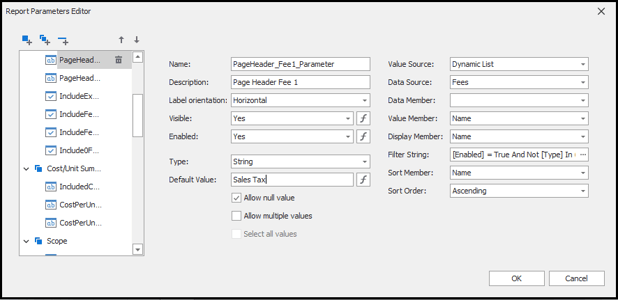
Verify that Allow multiple values is unchecked. If it is enabled, this workflow doesn't work correctly.
If you are working through this procedure a second time to add additional fees to the Page Header, then change the following values from Fee1 to Fee2, as shown:
Name: PageHeader_Fee2_ParameterDescription: Page Header Fee 2
Add a Calculated Field
Use the following procedure to create a calculated field that prints the fee's percentage value.
- On the right side of your screen, verify that the Field List tab is selected.
- Scroll up to _DESTINICloudReportsDataSource at the top of the hierarchy.
- Right-click any node underneath _DESTINICloudReportsDataSource and select Edit Calculated Fields. The Calculated Field Collection Editor opens.
- Click the Add button.
- With the new calculated field selected, enter the following information and click OK. For any setting not specified here, leave the default configuration:
- Data Member: Fees
- Expression:
[][[Name] == ?PageHeader_Fee1_Parameter].Single([Amount]) - Field Type: Decimal
- (Name): PageHeader_Fee1
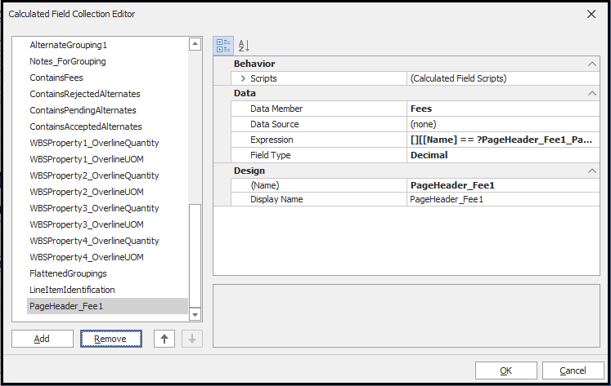
If you are working through this procedure a second time to add an additional fee to the Page Header, then change the following values from Fee1 to Fee2, as shown:
Expression:[][[Name] == ?PageHeader_Fee2_Parameter].Single([Amount])(Name): PageHeader_Fee2
Designer Changes
Use the following procedure to change the design of your PageHeader band so it accommodates the new parameter.
- In the Design section in the middle of your screen, locate and select the PageHeader band. Drag the bottom edge downwards to create more vertical space.
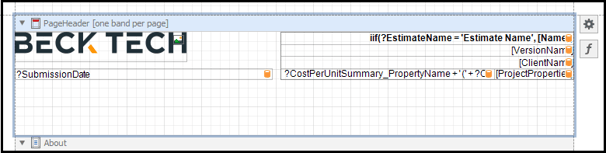
- In the Toolbox panel on the left side of your screen, drag and drop a Table control into your PageHeader band. The new table includes three cells.
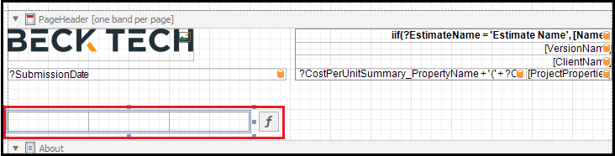
- Right-click the last cell on the right and select Delete > Cell.
- Select the left cell and click the Function button to the right. Expression Editor opens.
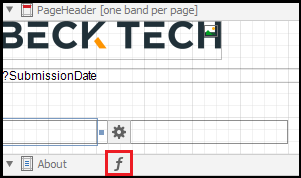
- Paste the following expression and click OK:
?PageHeader_Fee1_Parameter + ':'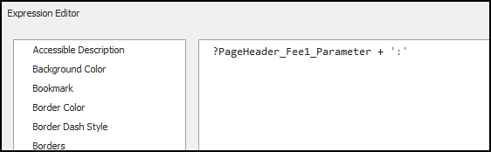
Note: If you are working through this procedure a second time to add an additional fee to the Page Header, then change the expression value from Fee1 to Fee2, as shown:
Expression:?PageHeader_Fee2_Parameter + ':' - In the Design section in the middle of your screen, select the right cell and click the Gear button to the right. The Table Cell Tasks dialog box opens.
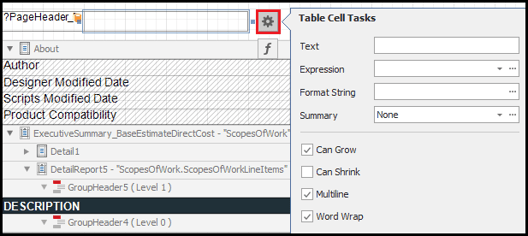
- Click the ellipsis button (...) inside the Format String field. The Format String Editor opens.
- Click Percent and choose an option.
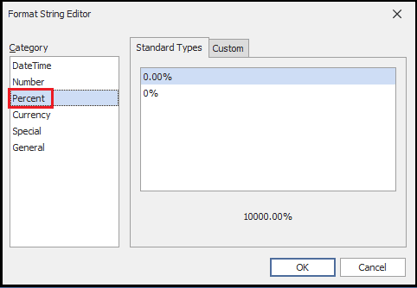
- Click Ok.
- Inside the Expression field, click the ellipsis button (...). Expression Editor opens.
- Paste the following expression and click OK:
[Fees].[PageHeader_Fee1]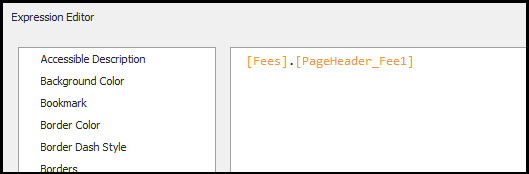
Note: If you are working through this procedure a second time to add an additional fee to the Page Header, then change the expression value from Fee1 to Fee2, as shown:[Fees].[PageHeader_Fee2]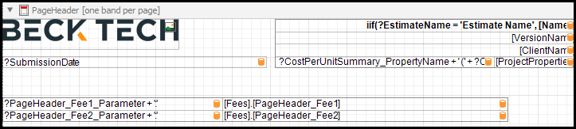
- Save and run your report.
To add additional dynamic parameters that display Fees in the Page Header, repeat the following sections:
- Add a New Parameter
- Add a Calculated Field
- Designer Changes (skip steps 1-3)
When you're ready to add more dynamic fees to the Page Header in the Designer, add additional rows to the table you created in the last procedure by right clicking the table and selecting Insert > Row Below.
(Optional) Adjust the Formatting of the Printed Information
Use the following procedure to adjust cell height and width to match the default formatting in the Page Header.
- Use the Ctrl key to multi-select the right cells of the table. Drag the left and right borders to adjust the table width.
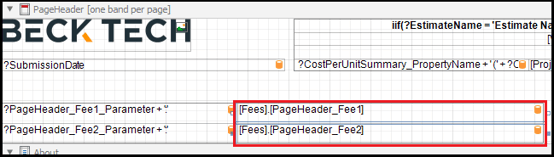
- On the right side of your screen, click the Report Explorer tab at the bottom of the Field List panel.
- In the Designer in the middle of your screen, click the left cell of the first row. Report Explorer automatically selects that table cell in the tree.
- Click the tableRow above it.
- In the Properties panel below Report Explorer on the right side of your screen, scroll down and select the Height field.
- Set Height = 16.
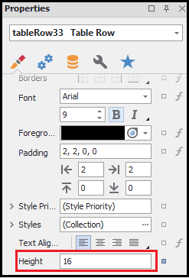
- Repeat Steps 3 - 6 for each new row you added.
- In the Designer in the middle of your screen, select the Page Header band and drag the bottom edge upwards to remove any vertical empty space.
- Save and run your report.
- To dynamically change which fees display in the report, expand Executive Summary in the Parameters pane on the left side of Report Viewer.
- Use the drop-down lists to choose new fees.
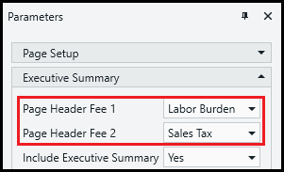
- Click Submit at the bottom of the Parameters pane.
Related Articles