This article will walk you through the simple process of creating and adding a new drop-down list to your Project View.
In this example, we will create a list of cities in a 'data' sheet, and then demonstrate how to display this list as a neat dropdown in our main sheet.
Create the List Data
Although not technically necessary, it's common practice to have backend data sets such as lists contained within a separate sheet from your main working sheet. First, let's create a 'data' sheet, and set up our list.
- Navigate to the Project View.

- In our standard Project View template, there is a 'setup' sheet where you can add new list data, but in this example, we will create a new sheet (click Add Property Sheet button in the top ribbon).
Note: Even if you are using the standard template, it might be a good idea to create a new sheet as shown above so that you can keep custom work separate from Beck Tech's standard data structure.

- To rename the new sheet, double-click the sheet tab to open the SpreadsheetGear Workbook Explorer window. The sheet name will be automatically selected in the left panel, ready for you to type a new name. Here, we call it 'Data'. Close the window.

- In the Data sheet, create your list. Here, we have created a short list if cities in column A. Note that your list can go anywhere in the sheet; it doesn't have to start at the top of a column, and it can be in a column or a row.

- Highlight the cells that contain your list items; in this example, our data is in Column A so we click the column header to highlight the entire column (as shown below). Highlighting the entire column like this will make it easy to add new entries to the list, as we will demonstrate later. However, if you like, you can also simply highlight the specific cells that contain your data.

- Right-click anywhere in your highlighted area and click Workbook Explorer.

- In the SpreadsheetGear Workbook Explorer window, right-click on Defined Names and click New Defined Name.

- Give your list an appropriate name. Here, we call our list 'Cities'. Close the window.

Create the Dropdown
Now that we have a Defined list, it's time to assign that list to the relevant cell in our main sheet.
- Use the sheet tabs to navigate back to your main sheet. Here, we navigate back to 'Example Sheet'.

- Right-click on the cell in which you would like to create your dropdown, then click Range Explorer.

- In the SpreadsheetGear Range Explorer window, click on Validation.

- Click on the Type dropdown and select List.

- In the Input source field, type an '=' symbol, followed by the name of your list. We called our list 'Cities', so here we enter '=Cities'.

- Click Apply, and then Close.

- You will now have a functioning dropdown.

- Since we set the list up to pull from the entire column 'A' in our Data sheet, we can add new cities to the list simply by entering them in that column.


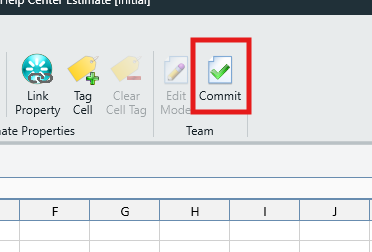
- Click the Commit button in the top ribbon to lock in your Project View changes.
NOTE: Changes made to a Project View are not automatically saved. Whenever you edit your Project View, don't forget to lock in your changes by clicking the Commit button in the top Ribbon.
Link your Dropdown to a Project Property
Linking your the dropdown cell to a Project Property will apply the selected value to that property. See the example below:
- In the Project View, click the Add Property button in the top ribbon to create a new Project Property.
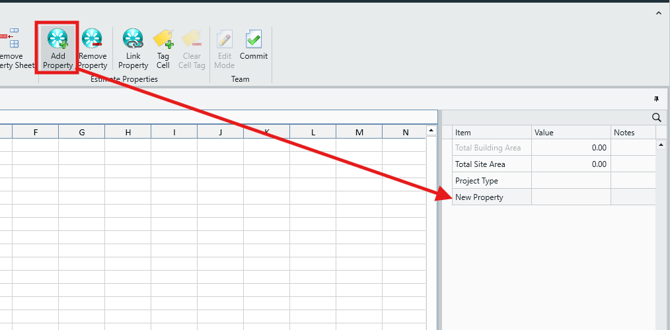
- Rename your Project Property appropriately. Here, we call it 'City'.

- Click on your Project Property to select it, then click on your dropdown cell in the main Project View. They should both be selected.
- Click the Link Property button in the top ribbon.
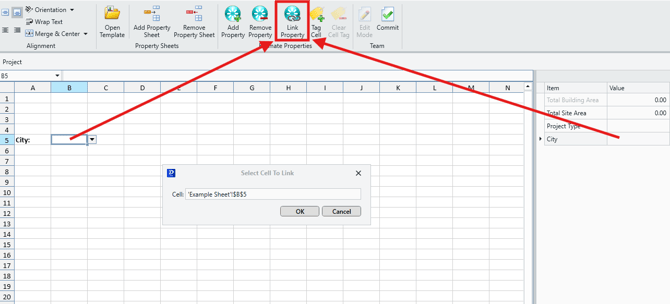
- Confirm the correct cell is being linked, then click OK.

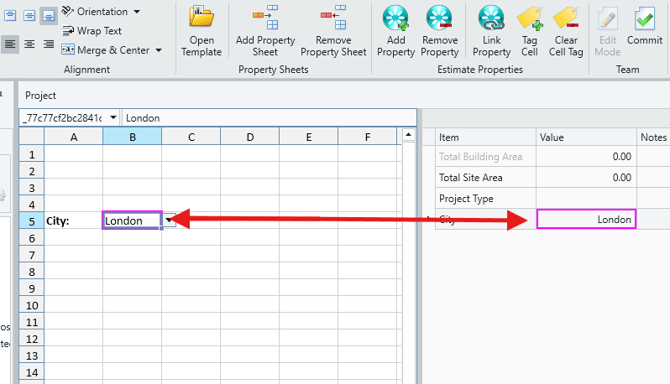
- You should now see that any value selected in the dropdown will be replicated in the linked Project Property.
- Click the Commit button in the top ribbon to lock in your Project View changes.
Submit Your Suggestions to Help Improve This Article