
You can configure DESTINI Cloud: Estimator reports to display line-item notes. By default, notes are hidden. When enabled, they appear below each line item as a row. If your branding standards call for a different layout, you can configure notes to display as a column instead. This article describes how to configure notes to always appear in column format.
- Open an estimate in DESTINI Cloud: Estimator.
- Navigate to Home > New Report. Report Designer opens.
- Click File > Open.
- Navigate to the folder with the report template file (.repx) you want to modify.
- Click the .repx file to open it.
- On the right side of your screen, click the Field List tab at the bottom of Report Explorer.
- Scroll to the bottom of the Field List tab and expand Parameters.
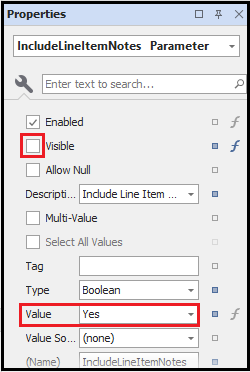
- Click IncludeLineItemNotes. The Properties panel displays at the bottom right side of your screen.
- In the Properties panel, clear the option for Visible.
- In the Value field drop-down list, click Yes.
Add the Notes Column
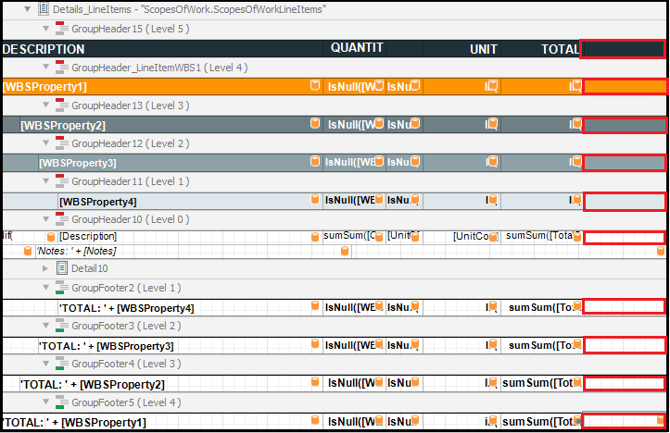
- In the Designer, scroll down to the Details_LineItems - "ScopeOfWork.ScopesOfWorkLineItems section.
- Right-click the Total column header and click Insert > Column to Right. Repeat this step for each row, as shown in the following screen shot.
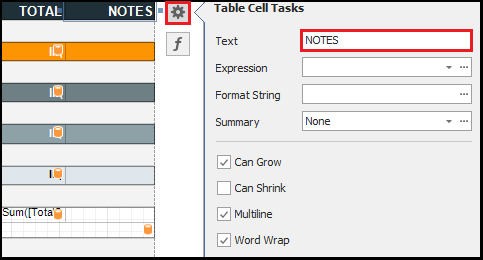
- Click the new column header beside TOTAL that you created in the previous step.
- Click the gear icon. In the Text field, type NOTES. Click out of the dialog box to save your changes.
- Locate the first instance of sumSum([Total a few rows down.
- Click the new column cell you created and then click the gear icon
 .
. - In the Expression field, click the drop-down menu and click Notes.
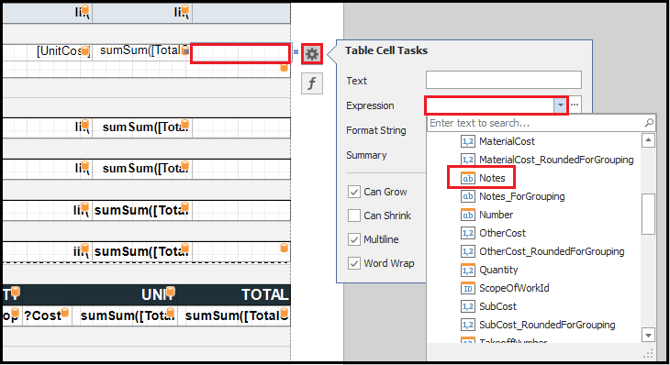
Report Designer adds [Notes] to the cell.
Adding a new column reduces the width of existing columns. As a result, some headers (such as Quantity) may wrap to a new line. To adjust column width, select the cell and drag its left or right edge.
Adjust Formatting
By default, the column you created use the styles applied to their respective bands. Use the following procedure to apply a different style so notes print in their own format. For more information, see Change Fonts and Colors in Your Report With the Styles Editor.
- Right-click the row labeled 'Notes:' + [Notes].
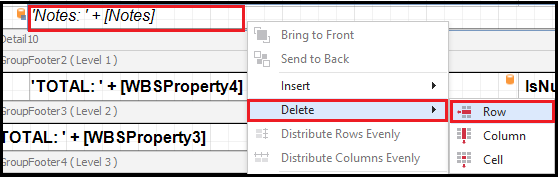
- Click Delete > Row.
- Select the band containing the line item’s details (GroupHeader10 in the standard Cloud Owners Report). Drag the bottom edge of the band up to remove the empty space.

- In the same band, click the new [Notes] cell.
- Locate the Properties panel on the bottom right corner of your screen.
- (Optional) Expand Styles. Click the drop-down arrow in the Style field, and then click CostItemNotes.
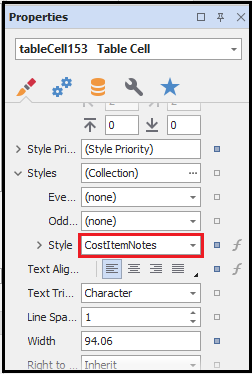
- In the Text Alignment section, click the left justified icon
 .
. - In the Designer, click the NOTES column header.
- In the Properties panel, in the Text Alignment section, click the left justified icon.
- Save and run your report.