
Conditions are predefined measurement rules used to quantify materials and building components from digital construction drawings. Instead of using generic markup tools, you can create conditions for specific materials or assemblies, allowing DESTINI Takeoff to automatically calculate quantities and organize results.
DESTINI Takeoff Conditions is currently in Beta and subject to change without notice.
Main Types of Conditions
- Linear Conditions – Measure items by length, such as walls, baseboards, conduit, piping, and framing.
- Area Conditions – Measure surface-based materials, including flooring, roofing, ceilings, insulation, and concrete slabs.
- Count Conditions – Tally individual items such as doors, windows, fixtures, columns, and equipment.
What a Condition Includes
A condition typically stores:
- Visual properties (color, line style, patterns) to distinguish items on plans.
- Dimensional properties such as wall height or thickness for advanced calculations.
- Calculation rules for quantities, waste factors, volume, weight, labor, or cost.
Why Conditions Matter
- Organization: Automatically groups quantities by material or assembly type.
- Efficiency: Reusable condition libraries speed up future takeoffs.
- Integration: Quantities can flow directly into estimating and bidding systems for pricing and labor calculations.
In short, conditions define what is measured, how it is measured, and how quantities are calculated, making digital takeoffs faster, more accurate, and more consistent.
Note the following important distinctions in DESTINI Takeoff:
-
AI takeoff automatically detects elements in a drawing, such as walls, doors, windows, and rooms.
-
Conditions control how those elements are measured, displayed, and organized.
Add Default Conditions to Your Project
If your organization has already created a set of basic or default conditions, you can save time by loading them into your takeoff project.
- Load a drawing into DESTINI Takeoff.
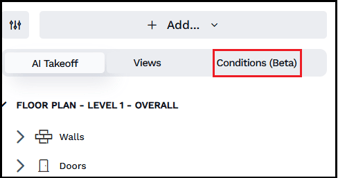
- Click the Conditions tab in the left panel.
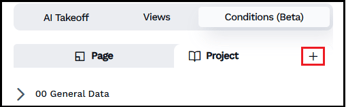
- Click the + button on the Project tab. The Condition Library opens.
- DESTINI Takeoff administrators see two tabs in the Condition Library: Projects and Company. Users who aren't admins in DESTINI Takeoff see the Conditions list.
Admins can click the Company tab to view all conditions saved in the system. The page can take a few seconds to load, depending on how many conditions exist in DESTINI Takeoff.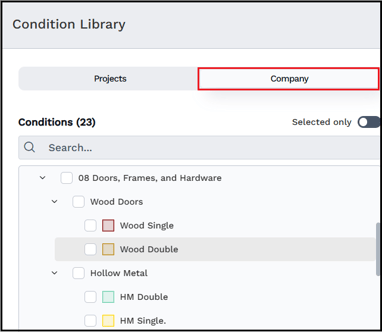
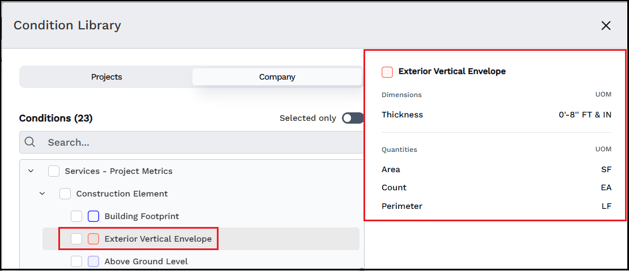
- (All users) click the name of a condition (not the checkbox beside it) to view the properties.
Select one or more conditions (or a group) and then click Add Selected.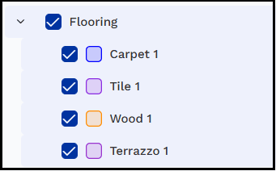
DESTINI Takeoff adds the conditions to the Project tab.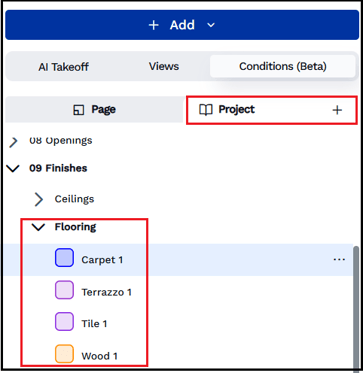
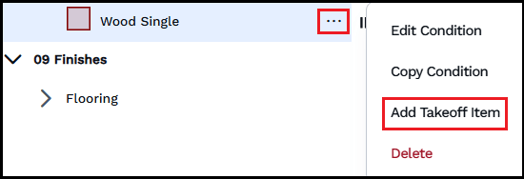
- Click the ellipses (...) beside a condition to view an options menu. You can edit, copy, add a takeoff item, or delete a condition from the menu.
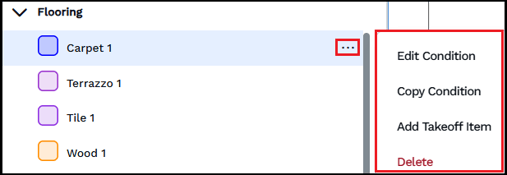
Add Takeoff Item initiates Add Mode, which enables you to draw takeoff associated with that condition.
Create Custom Conditions
If you need additional conditions beyond the default, you can create your own.
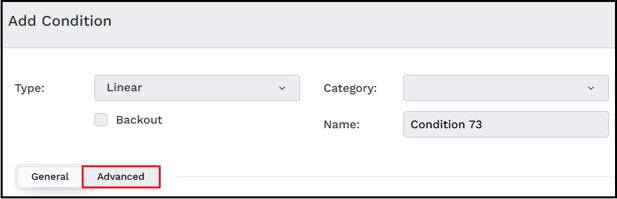
- Click +Add > Create Condition in the left panel. The Add Condition dialog box opens.
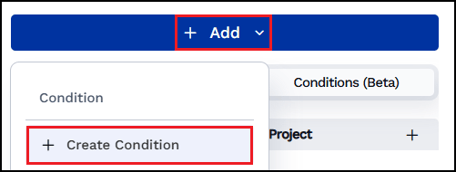
- Configure the new condition using the following options. When you're finished, click Save to add the new condition to the Project tab.
- Type: Choose between Linear, Area, and Count takeoff.
- Backout: Designates this condition as a backout, which removes quantities. Use this option with manual takeoff.
- Category: Choose a category, for example Walls or Flooring. To create more categories, click the Advanced tab.
-
- Name: Enter a name.
- General/Advanced: You can create more categories and attributes on the Advanced tab.
- Dimensions: Configure measurements like thickness, width, height, and slope. These options change dynamically based on the selected Type.
-
- Appearance: Configure the stroke and fills color, or the shape of the condition items. These options change dynamically based on the selected Type.
- Results: Define how this condition will define quantities, like count, perimeter, surface area, and more. Also set the desired Unit of Measure.
- Description: Add more detail to the intended uses of the Condition.
Using Conditions with Takeoff
Now that you've added conditions to your project, you can manually assign them during takeoff.
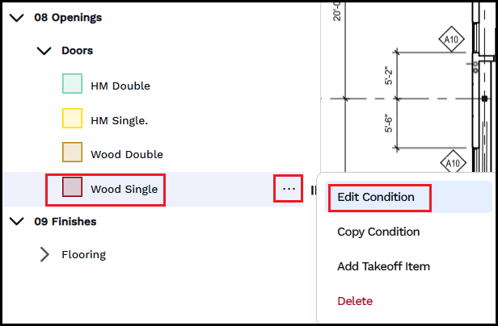
- Click on a condition to select it for takeoff. The example in this procedure uses Wood Single door.
- Click the ellipses (...) beside it and then click Edit Condition.
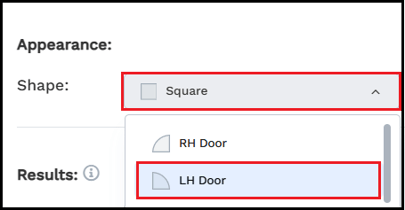
- Under Appearance, choose Shape, and then scroll up and choose LH Door.
- Click Save.
- Press the space bar on your keyboard to enter Add mode or click the ellipses next to the condition and select Add Takeoff Item.
Add mode will be confirmed as shown: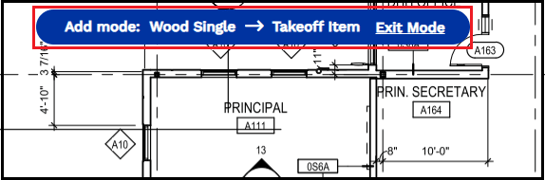
- Sketch conditions onto the diagram by drawing walls or areas, single-click doors, or selecting count items. For Wood Single doors, single-click left-hand doors.
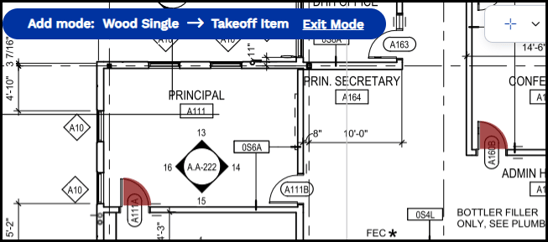
Note: After you add a condition to a diagram, you can reposition it if it doesn't align with the drawing, as shown in the following example.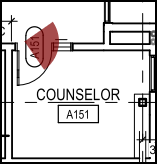
To reposition a condition on your diagram, exit Add mode (or press the Esc key on your keyboard). Select the condition and drag it to the desired location. Then click the rotation icon.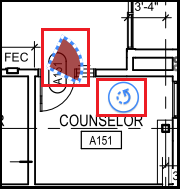
Rotate the condition until its flush with the corresponding takeoff item on the diagram.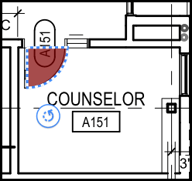
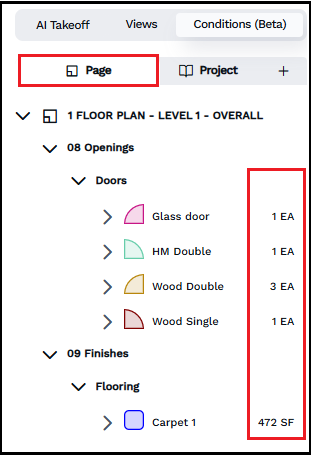
- Drawn takeoff items are automatically added, categorized, and quantified on the Page tab in the left pane according to their associated condition.
For information about assigning WBS properties to conditions and mapping conditions to line items in an estimate (which automatically updates totals), see DESTINI Takeoff: Mapping WBS Properties and Line Items to Takeoff.