
DESTINI Takeoff helps estimators quickly detect and quantify building components to identify, classify, and measure items directly from architectural and construction drawings. This article walks you through the end-to-end process of manually performing takeoff in DESTINI Takeoff.
You can significantly reduce takeoff time while maintaining accuracy, consistency, and project-wide organization by using DESTINI AI Takeoff. For more information, see DESTINI Takeoff: Performing AI Takeoff.
Table of Contents
Before You Begin
An administrator in your company must grant you access to DESTINI Takeoff. If you're not an administrator or if you don't have permission to use the application, request access from your administrator.
DESTINI Takeoff was previously called Workpak. You might see this name in URLs, communications, or other aspects of the product as the software is being rebranded.
Create a New Project
Use the following procedure to create a new project and upload a PDF of architectural or construction drawings for takeoff.
- Log in to DESTINI Takeoff.
- If the Project Dashboard does not open automatically, click Projects at the top of the screen.

Note: Only administrators in your company have the Admin Panel tab visible in DESTINI Takeoff. - Click Create Project.
- Enter a title and a description.
- Select an Access Setting. We recommend using Company-shared for collaborative projects.
- Private: Only you can access the project.
- Company-shared: All users in your company can access the project.
- Select a Measurement System. You can change the system at a later time, but the new system affects only newly created documents. Existing documents retain the original system.
- Imperial: For example, yards, feet, inches
- Metric: For example, kilometers, meters, centimeters
- Click Create. DESTINI Takeoff creates an empty project using the specified title on the Browser tab.
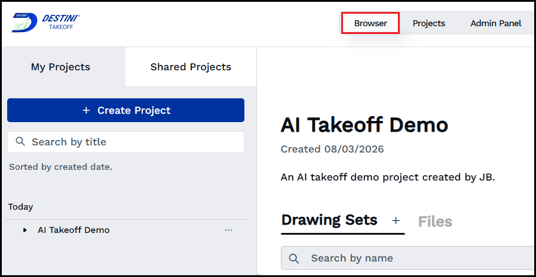
- Click +New Set. Either drag and drop the PDF file containing the drawings into the dialog box or click the option to browse for the files. DESTINI Takeoff supports the following file types:
- PDF files (required for AI Takeoff)
- Microsoft Office files
- ZIP files
Note: Image files aren't supported.
- For Set Name, enter a name. Revisions are handled at the drawing set level, so this name should remain consistent across the project. If you split the plans by discipline on a large project, you can name it for example
123 Main Street – Structural, but the recommendation is to not name it according to the design package. You can add this to the Revision Name below. - For Revision Name, enter a name or a number such as 1.
Important: A revision name is required. - Click Upload. Depending on the number of drawings in the file, DESTINI Takeoff can take several minutes to upload the file into your project.
- When the upload completes, click Split Review.
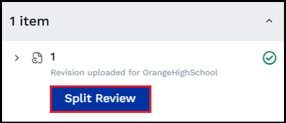
The Split Review page lets you review your drawings, assign drawing numbers, and confirm the discipline for each page. The page also displays errors if problems were detected in the PDF file during import. The drawing shows a status of Unpublished in the project.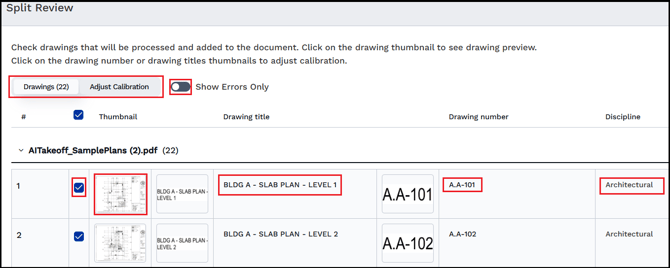
- On the Split Review page:
- Toggle between the Drawings and Adjust Calibration tabs for more granular adjustments to drawing details.
- Toggle Show Errors Only to view pages that returned errors during import.
- Clear the checkmark for any drawings you don't want to add to DESTINI Takeoff.
- Click drawing thumbnails to view larger images and confirm the drawings imported correctly.
- Click in the Drawing Title and Drawing Number cells to adjust these values.
- Click the Discipline dropdown list to select a new discipline.
- Click Publish Selected. The Update Current Set dialog box displays.
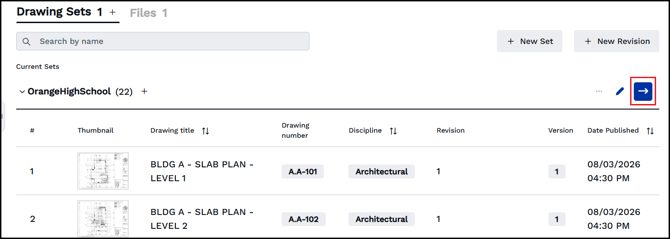
- Confirm your changes and click Update Current Set. DESTINI Takeoff returns you to the Browser page. You can view the added files by expanding the name of the current project. When you're ready to start performing takeoff in the new files, click the Open in Viewer button.
Add Conditions to Your Project
Conditions are predefined measurement rules used to quantify materials and building components from digital construction drawings. Instead of using generic markup tools, you can create conditions for specific materials or assemblies, allowing DESTINI Takeoff to automatically calculate quantities and organize results.
We recommend adding conditions to your project from a Company Library. By using established conditions, you improve consistency for condition names, draw styles, patterns, and colors for all teams across all projects.
For more information about conditions, including how to add them to your project, see DESTINI Takeoff: Working with Conditions. After you add conditions to your project, continue with the next section in this article, Draw Conditions onto Your Diagram.
Draw Conditions onto Your Diagram
Now that you've added conditions to your project, you can manually assign them during takeoff. You can sketch conditions onto the diagram by drawing walls or areas, single-clicking doors, or selecting count items. The following procedure includes examples for adding an area condition and doors.
- Click the Conditions (Beta) tab.
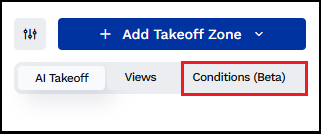
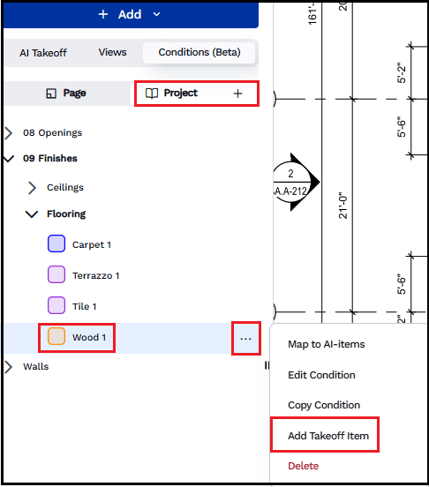
Note: You can click Add Takeoff Zone and choose an option from the list to designate an area for takeoff. If you don't, DESTINI Takeoff automatically creates a takeoff zone for the whole page when you add a condition to a drawing in the next step. - On the Project tab, click a condition. The first example in this procedure uses a wood flooring area condition called Wood 1. Click the ellipses (...) beside it and then click Add Takeoff Item.
- Single-click in each corner of the room where you want to add area takeoff.
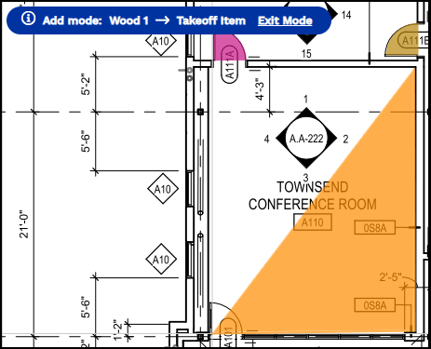
To complete the area takeoff, click the original starting point.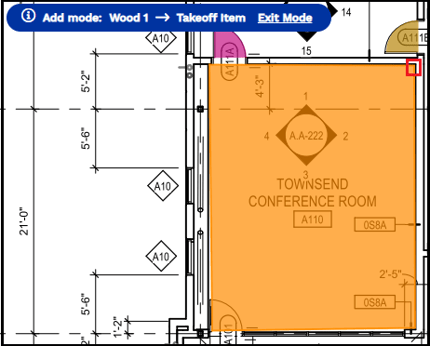
- Choose another condition on the Project tab. The next example in this procedure uses Wood Single door.
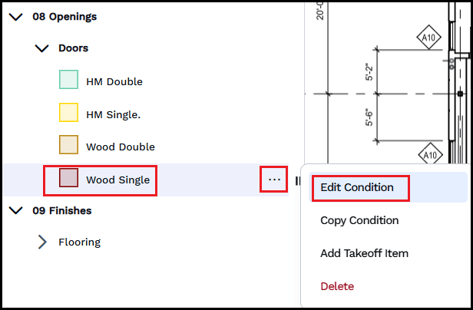
- Click the ellipses (...) beside it and then click Edit Condition.
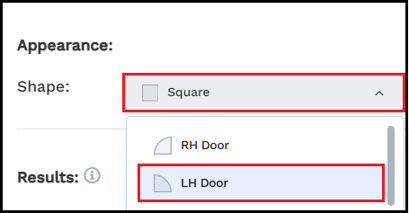
- Under Appearance, choose Shape, and then scroll up and choose LH Door.
- Click Save.
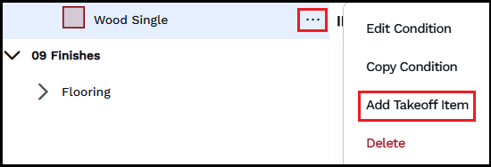
- Press the space bar on your keyboard to enter Add mode or click the ellipses next to the condition and select Add Takeoff Item.
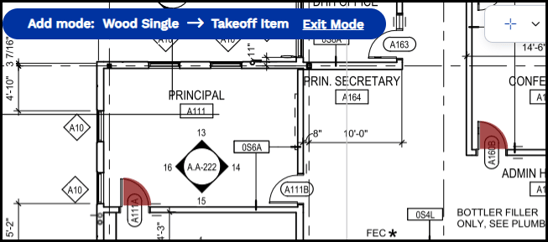
DESTINI Takeoff confirms Add mode as shown: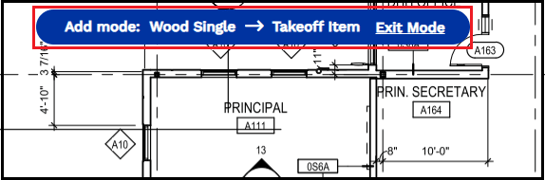
- For Wood Single doors, single-click a left-hand door on the diagram.
Note: After you add a condition to a diagram, you can reposition it if it doesn't align with the drawing, as shown in the following example.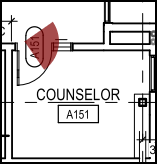
To reposition a condition on your diagram, exit Add mode (or press the Esc key on your keyboard). Select the condition and drag it to the desired location. Then click the rotation icon.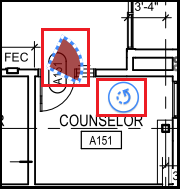
Rotate the condition until it's flush with the corresponding takeoff item on the diagram.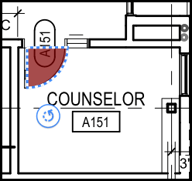
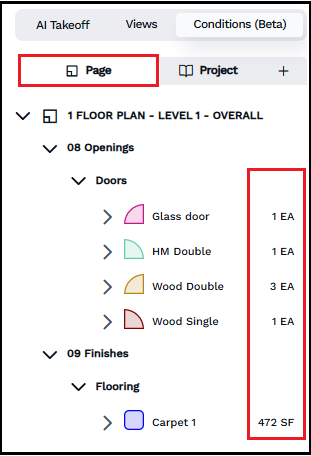
- Drawn takeoff items are automatically added, categorized, and quantified on the Page tab in the left pane according to their associated condition.
Export Results to Excel
After you finish mapping conditions, you can export condition data or all takeoff data to Excel. You can then integrate the data with your estimate or reporting processes.
- Click Export.
- Select an option. DESTINI Takeoff exports the data.