
With the help of AI, DESTINI Takeoff helps estimators quickly detect and quantify building components to identify, classify, and measure items directly from architectural and construction drawings. Using DESTINI Takeoff, estimators can significantly reduce takeoff time while maintaining accuracy, consistency, and project-wide organization.
This article walks you through the end-to-end process of performing AI takeoff in DESTINI Takeoff.
Table of Contents
Before You Begin
An administrator in your company must grant you access to DESTINI Takeoff. If you're not an administrator or if you don't have permission to use the application, request access from your administrator.
Note the following information:
- DESTINI Takeoff was previously called Workpak. You might see this name in URLs, communications, or other aspects of the product as the software is being rebranded.
- This article supplements the DESTINI Takeoff Training modules. If you haven't already, review the following DESTINI Takeoff basic training courses:
Create a New Project
Use the following procedure to create a new project and upload a PDF of architectural or construction drawings for takeoff.
- Log in to DESTINI Takeoff.
- If the Project Dashboard does not open automatically, click Projects at the top of the screen.

Note: Only administrators in your company have the Admin Panel tab visible in DESTINI Takeoff. - Click Create Project.
- Enter a title and a description.
- Select an Access Setting. We recommend using Company-shared for collaborative projects.
-
- Private: Only you can access the project.
- Company-shared: All users in your company can access the project.
- Select a Measurement System. You can change the system at a later time, but the new system affects only newly created documents. Existing documents retain the original system.
- Imperial: For example, yards, feet, inches
- Metric: For example, kilometers, meters, centimeters
- Click Create. DESTINI Takeoff creates an empty project using the specified title on the Browser tab.
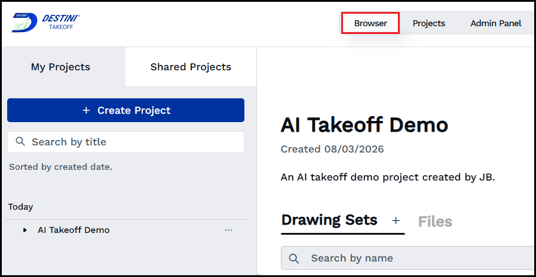
- Click +New Set. Either drag and drop the PDF file containing the drawings into the dialog box or click the option to browse for the files. DESTINI Takeoff supports the following file types:
- PDF files (required for AI Takeoff)
- Microsoft Office files
- ZIP files
Note: Image files aren't supported.
- For Set Name, enter a name. Revisions are handled at the drawing set level, so this name should remain consistent across the project. If you split the plans by discipline on a large project, you can name it for example
123 Main Street – Structural, but the recommendation is to not name it according to the design package. You can add this to the Revision Name below. - For Revision Name, enter a name or a number such as 1.
Important: A revision name is required. - Click Upload. Depending on the number of drawings in the file, DESTINI Takeoff can take several minutes to upload the file into your project.
- When the upload completes, click Split Review.
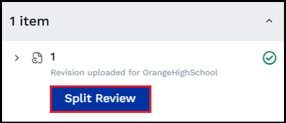
The Split Review page lets you review your drawings, assign drawing numbers, and confirm the discipline for each page. The page also displays errors if problems were detected in the PDF file during import. The drawing shows a status of Unpublished in the project.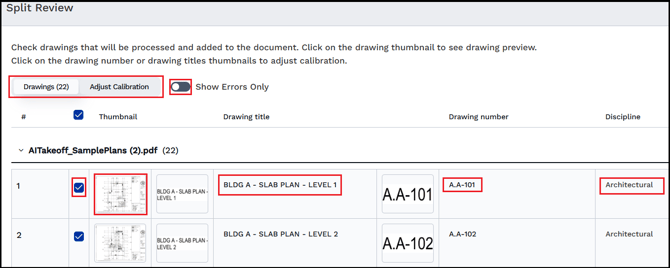
On the Split Review page:
- Toggle between the Drawings and Adjust Calibration tabs for more granular adjustments to drawing details.
- Toggle Show Errors Only to view pages that returned errors during import.
- Clear the checkmark for any drawings you don't want to add to DESTINI Takeoff.
- Click drawing thumbnails to view larger images and confirm the drawings imported correctly.
- Click in the Drawing Title and Drawing Number cells to adjust these values.
- Click the Discipline dropdown list to select a new discipline.
- Click Publish Selected. The Update Current Set dialog box displays.
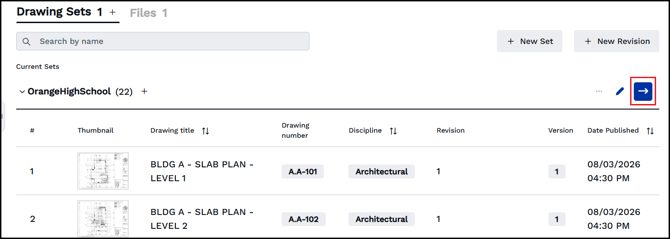
- Confirm your changes and click Update Current Set. DESTINI Takeoff returns you to the Browser page. You can view the added files by expanding the name of the current project. When you're ready to start performing takeoff in the new files, click the Open in Viewer button.
Configure AI Takeoff
Use the following procedure to create an AI takeoff zone and specify labels. These features tell the AI which areas of the drawing to analyze and how to categorize what it finds.
- Use the dropdown list to choose a drawing. If you are still new to DESTINI Takeoff, a floor plan is a good starting point.
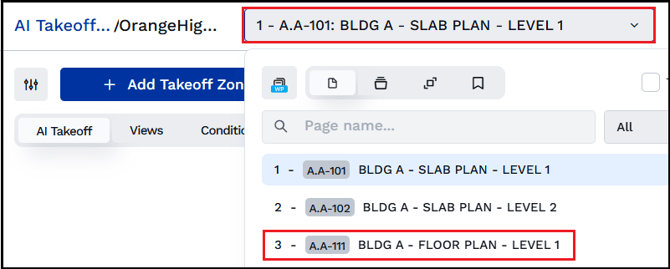
The search and navigation features in the dropdown can help you locate a drawing.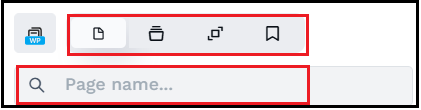
- At the top of the page, toggle on AI-Setup Mode.
- Use the zoom controls to adjust the page size so you can see the entire drawing.
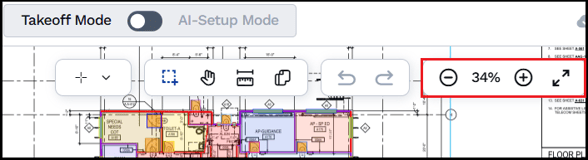
Tip: Hold the Ctrl key on your keyboard and scroll up or down on your mouse wheel to zoom in or out. - In the left pane, click + Add > Takeoff Zone and then choose an option:
- Auto Detection: The AI creates a takeoff zone around the entire drawing.
- Manual Select Region: Click and drag a takeoff zone around an entire drawing or a portion of it.
- Manual Select Polygon: Click to create individual lines around a portion of a drawing in a random shape. The lines must eventually connect.
- Takeoff Zone Exclusion: Click to exclude an area such as a stairwell from takeoff.
- If you selected a manual option, click and drag a boundary around the area to analyze. DESTINI Takeoff highlights the selected takeoff zone and displays a properties panel.
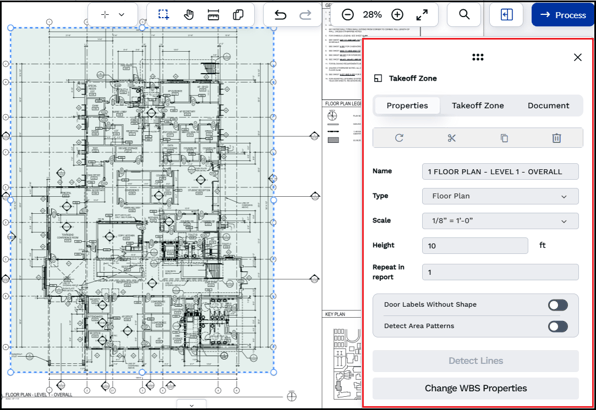
Note: If auto-detection creates a zone for a portion of the drawing that should not be included (such as the Key Plan), or if you want to redraw a zone, right-click the zone and choose Delete.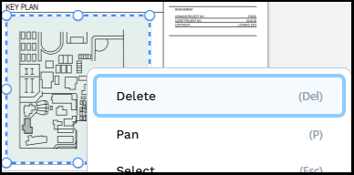
- If they aren't already displayed, click the takeoff zone to view its properties. Configure the following options:
-
Name: Specify a custom zone name (optional).
-
Type: Verify the detected drawing type.
-
Scale: Confirm or update the scale.
-
Height: Enter a wall height to enable wall area calculations.
-
Repeat in report: Use this option when quantities apply to multiple identical floors or spaces. For example:
- Hotel rooms
- Apartment units
- Repeated floor layouts
Note: Repeated values appear in Excel exports.
- Door Labels Without Shape: Door labels/tags typically include a symbol. If they don't, select this option and the AI looks for text in the location near where doors are detected.
- Detect Area Patterns: Toggle on to detect patterns, for example, on landscape or site plans or interior/exterior elevations.
-
- In the left pane, click + Add > Label Template and select an option such as Door Label Template. Labels help AI identify and organize drawing elements. You'll map labels to schedules later in this article.
- Zoom into the drawing.
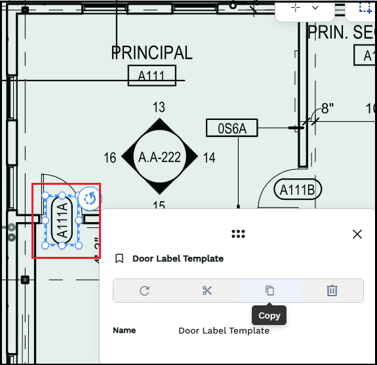
- Click and drag a border around a label. DESTINI Takeoff detects the label and displays a dialog box about it.
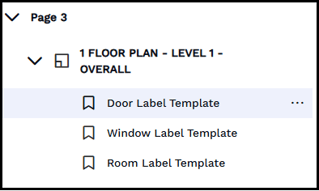
- Add additional labels for each element type in your drawing. The left pane lists all labeled elements.
Add Schedule Tables
Identifying schedule tables in your drawing set such as door and room finish schedules helps AI process your drawings. Use the following procedure to identify one or more schedule tables for AI processing.
- Locate a schedule sheet in your project.
- Zoom out so you can view the entire table.
- Click + Add > Table and then draw a box around the schedule. Include the entire schedule and border.
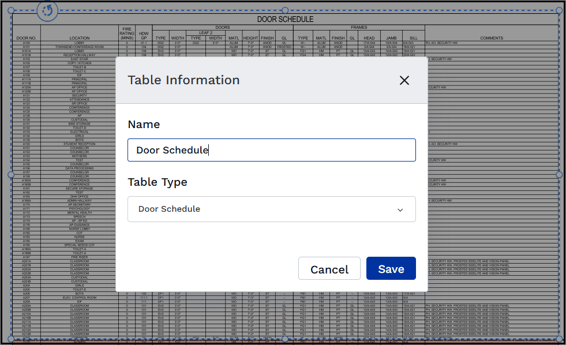
- Confirm the detected table type.
- Click Save. Repeat this process for each type of schedule in your project.
Run AI Takeoff
After creating takeoff zones, labels, and schedule tables, you are ready to process the takeoff.
- In the upper right corner, click Process. DESTINI Takeoff prompts you to verify the details before processing.
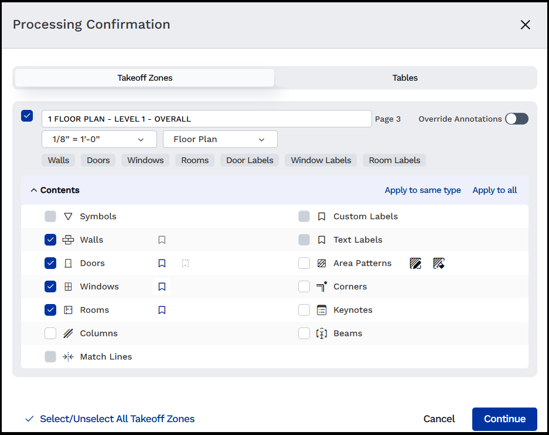
- On the Takeoff Zones tab, expand Contents to add or remove elements from AI processing. You can change the name, for example, from 1 Floor Plan - LEVEL 1 - Overall to something more user friendly. You can also adjust the scale using and the diagram type using the drop-down lists. Use the checkboxes to select which types of takeoff will be processed.
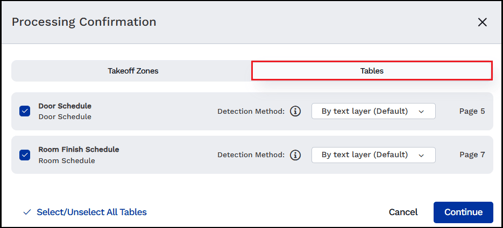
- Click the Tables tab and verify the tables you previously selected are included in the list.
- When you're ready, click Continue. DESTINI Takeoff locks the document while AI processes takeoff based on the previously identified zone, labels, and schedules. The process can take several minutes. When processing is complete, DESTINI Takeoff displays a message and sends an email stating your document is ready for review.
Review AI Takeoff Results
This section describes how to review, group, edit, and map conditions to ensure the AI takeoff results align with your estimating standards and reporting requirements. In order to validate AI-generated results, we recommend checking for:
- Missing items
- Incorrect classifications
- Incorrect groupings
- Schedule mismatches
- Measurement issues
To get started, use the following procedure to filter and group elements so you can efficiently review the results.
- Expand the page navigation at the top of the viewer and click Takeoff only.
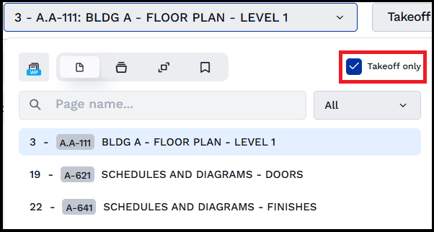
- Select a floorplan page that includes AI-generated takeoff.
- At the top of the left navigation, click the filter icon. Clear the checkmarks beside all but one element such as doors or rooms.
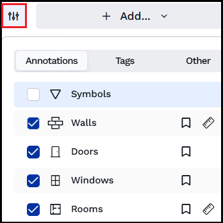
- Zoom into the drawing. Verify that AI takeoff correctly identified all of the selected elements. The following example is filtered to display rooms.
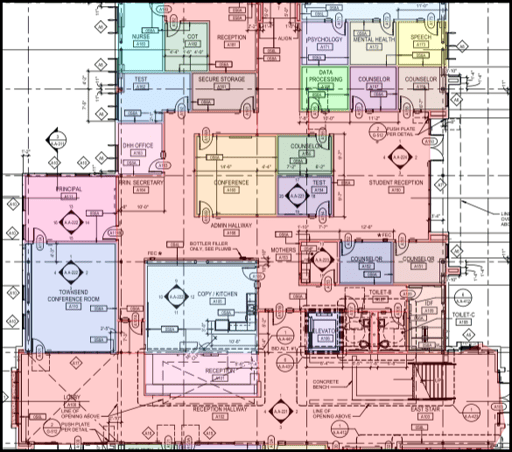
Make note of any inaccuracies. You'll have an opportunity to edit takeoff later in this article. - Create a group to further organize results and improve takeoff reporting. Using doors as an example, you can create the following groups:
- Interior Doors
- Exterior Doors
- Toilet Partition Doors
- Overhead Doors
- Expand the AI-generated group for an object such as A107 (1).
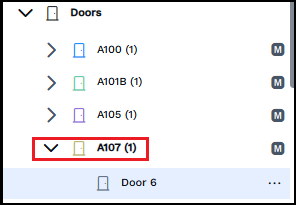
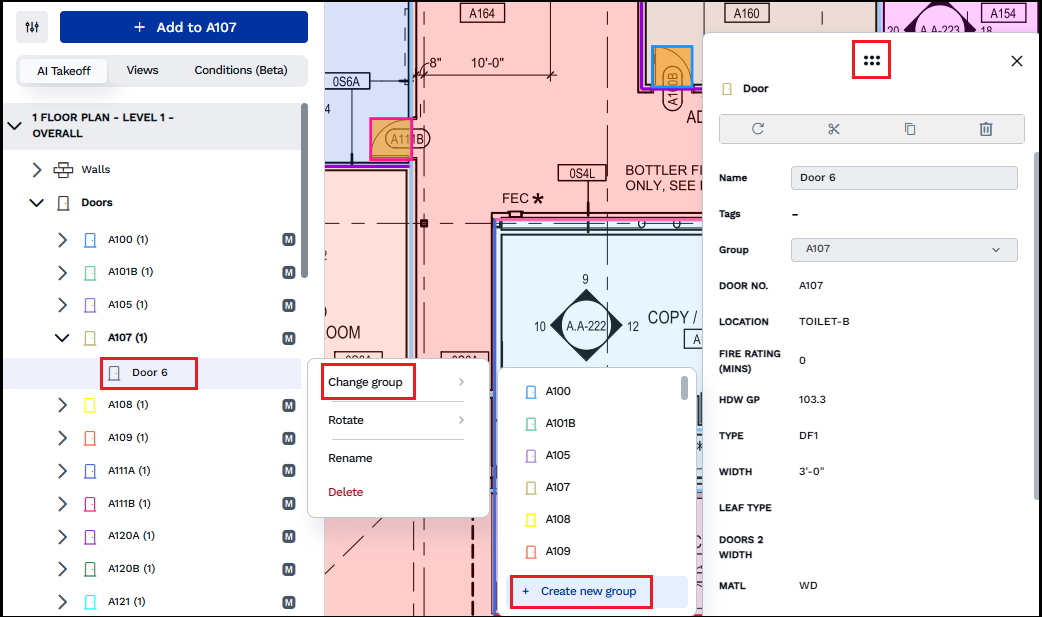
- Right-click an object in the group such as Door 6. DESTINI Takeoff displays a context menu and a properties panel with information about the selected object. If the properties panel is in the way, click the six dots at the top of the panel and drag it out of the way. In the context menu, choose Change group > Create new group.
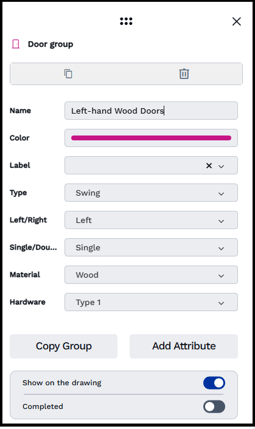
- In the group properties panel, enter a name and select desired attributes for the group.
- Add relevant objects to the group by right clicking a new object and choosing Change group > group name. Note: Scroll to the bottom of the list to locate the group you created.
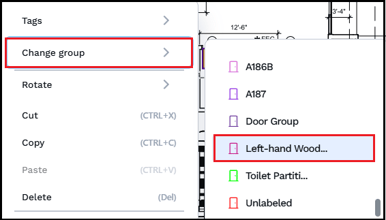
After you add an object to a group (with the object still selected), you can add additional objects to the group by pressing Ctrl on your keyboard and then select multiple relevant objects.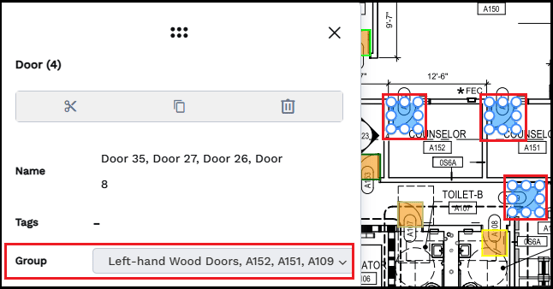
- Verify the objects were added to your group in the left navigation. Scroll down to locate the group.
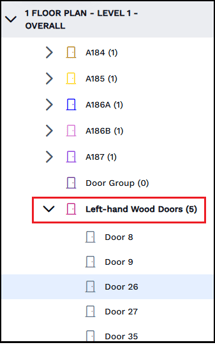
Common Takeoff Adjustments
Beyond adding objects to groups, you can adjust AI takeoff using the following methods.
Delete Items
To remove an incorrectly detected object from a drawing, select it and then click the Delete (trash can) icon from the properties panel.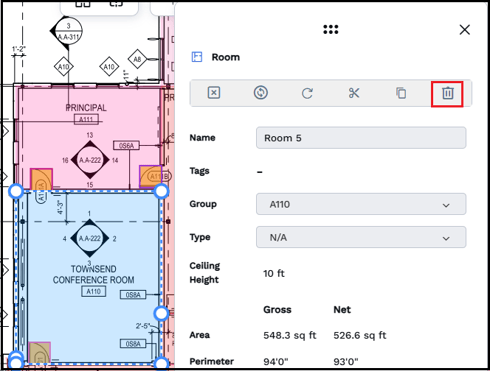
Move Items or Modify Geometry
You can click and drag points or geometry to adjust locations.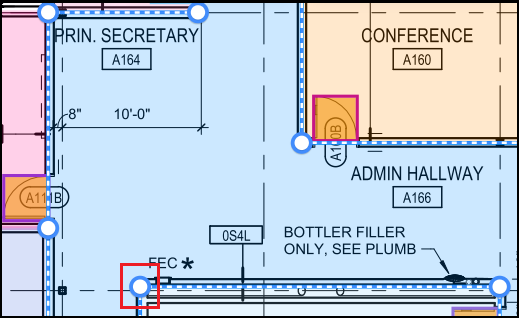
Additionally, you can:
-
Add Points
-
Move Vertices
-
Extend Lines
-
Shorten Lines
Copy and Paste Takeoff
Use the following procedure to copy and paste takeoff.
- Right-click an item.
- Select Copy.
- Right-click another location.
- Select Paste.
Split Rooms
Use the following procedure to split multiple rooms that were accidentally combined during AI takeoff.
- Determine how you want to split the room.
- Right-click the room and choose Split.
- Click to start a new boundary line.
- Click to complete the boundary line. DESTINI Takeoff divides the rooms using the new boundary line.
Merge Rooms
Use the following procedure to merge multiple rooms that were accidentally separated during AI takeoff.
- Right-click a room and choose Merge.
- Select one or more additional rooms.
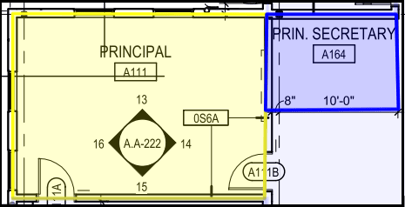
- Press Escape on your keyboard when finished.
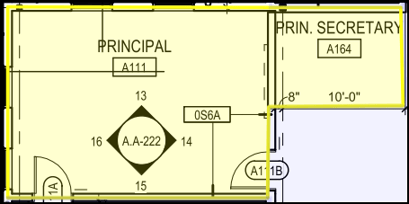
The merged room inherits properties from the first selected room.
Create Exclusion Areas
Exclusions remove portions of a room from calculations while preserving the remaining area. Estimators commonly exclude the following from takeoff:
- Stair openings
- Elevator shafts
- Open-to-below areas
- Atriums
- Courtyards
- Mechanical shafts
Use the following procedure to create an exclusion area.
- Right-click inside the area.
- Select Add Exclusion Area.
- Click each point of the boundary.
- Press Escape on your keyboard when finished.
Verify calculations update appropriately.
Add Annotations
Annotations clarify information in a drawing for reviewers. Use the following procedure to annotate a drawing:
- Click the Annotation icon.

- Select Free Text.

- Click and drag a text box on the drawing in a location you want to annotate.
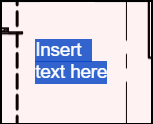
- Enter notes such as:
- Open to Above
- Stair Opening
- Not in Scope
- Elevator Shaft
Map AI Takeoff to Conditions
Conditions take raw data and condition it into usable information. So far, AI takeoff has assisted you with the following:
Detection: AI detected the relevant geometry in your drawing. For example, after assigning label templates, AI takeoff detected all of the following: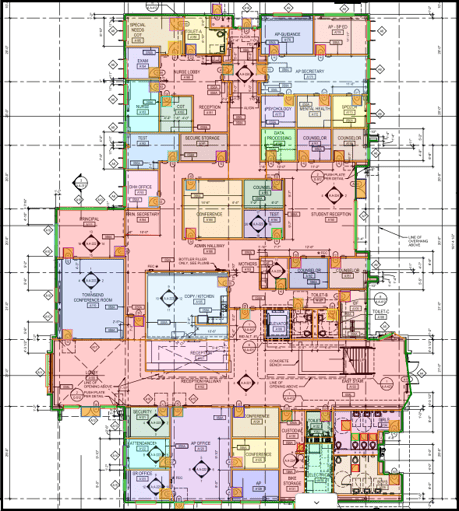
Classification: After detecting the relevant geometry, DESTINI Takeoff classified the geometry into walls, doors, windows, and areas (rooms).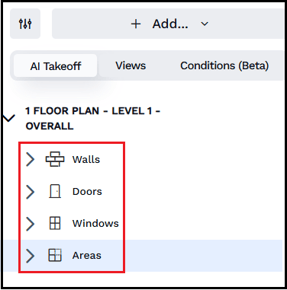
Quantification: AI takeoff then quantified the takeoff type and measurement (for example, room area in square feet)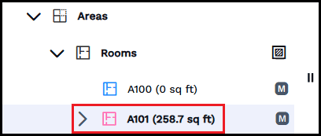
Now that you have this raw data, you can condition it to better organize it, report on it, and use it in your estimate. Conditions further refine classifications. For example, if takeoff discovered 30 doors, conditions can help you organize those doors into single/double wood doors or single/double hollow metal doors. The refined data can then be mapped to line items.
Check for a Condition Library
If your company has predefined conditions in the Condition Library, you can quickly add conditions to your project with a few clicks. Before you create new conditions, use the following procedure to check for and add conditions from a library.
-
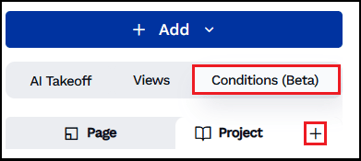
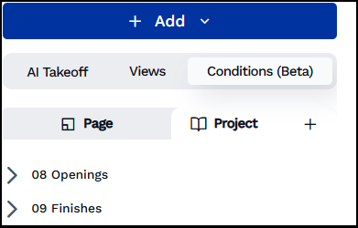
Click the Conditions (Beta) tab and then click the + icon on the Project tab.
- In the Condition Library, click the Company tab. If your company has predefined conditions they will automatically display. The process can take a minute.
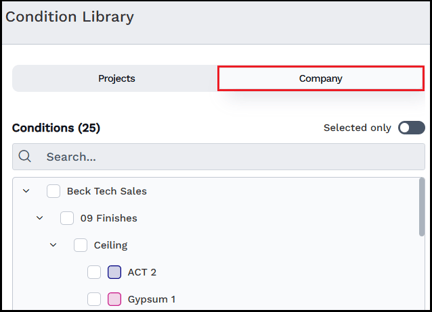
- Select conditions you want to add to your project and then click Add Selected. The conditions are added to your Project tab.
Manually Add Conditions
If you didn't find conditions in the Condition Library, use the following procedure to create one or more conditions.
- Click the Conditions (Beta) tab and then click Add at the top of the panel.
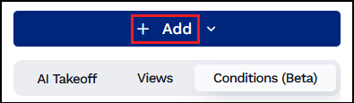
- Click Create Condition. The Add Condition dialog box opens.
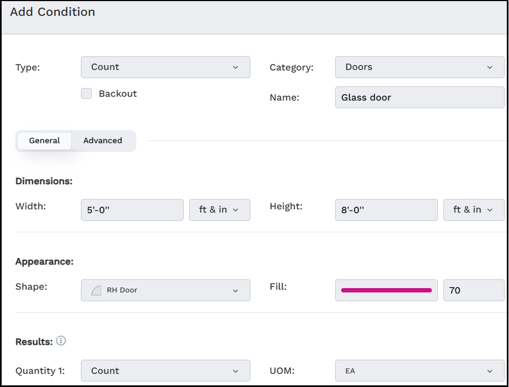
- Specify the details of your new condition and then click Save.
Map Takeoff to a Condition
- On the AI Takeoff tab, hover your cursor over a takeoff zone and click the ellipsis (...).
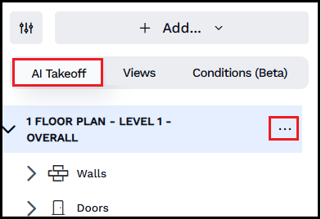
- Click Map Conditions. The Mapping Mode dialog box opens.
- Select a condition you want to map to takeoff. DESTINI Takeoff displays all related AI takeoff objects in the drawing. Click the objects for which you want to assign the selected condition.
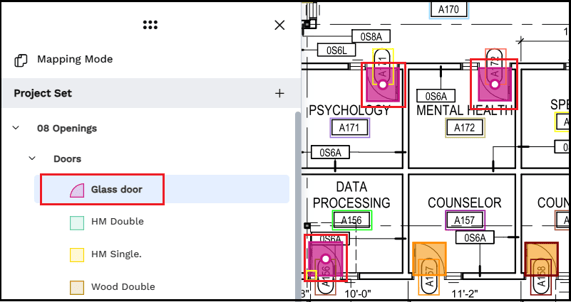
- Map additional conditions.
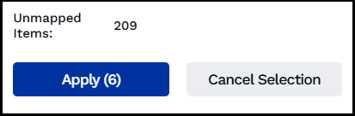
- DESTINI Takeoff displays a count of mapped and unmapped objects at the bottom of the Mapping Mode dialog box. Click Apply to complete the mapping.
Edit Condition Properties
You can edit the properties of a condition to change its appearance on the drawing, adjust dimensions, add a description, and more.
-
On the Conditions tab, click Page.
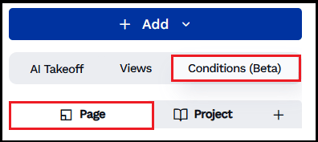
- Right-click a condition and click Edit Condition. The Edit Condition dialog box opens.
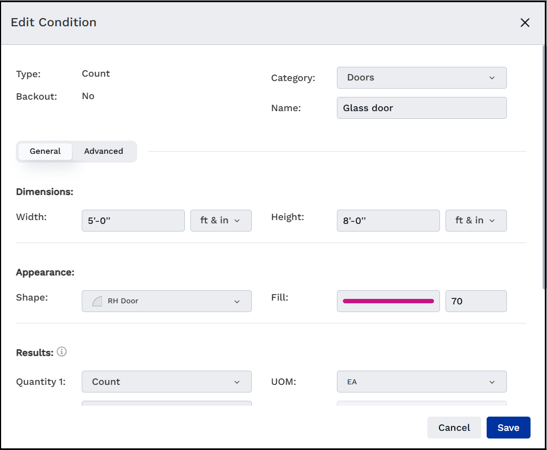
- Change properties.
- Click Save.
Export Results to Excel
After you finish mapping conditions, you can export condition data or all takeoff data to Excel. You can then integrate the data with your estimate or reporting processes.
- Click Export.
- Select an option. DESTINI Takeoff exports the data.