The Reports button in DESTINI Estimator can be configured to provide quick access to your banded report template files and is the fastest way to generate a report. By default, Estimator references a local reports folder on each user’s PC. This article outlines a workflow for storing files in a centralized location and the steps for each user to take in order to reach them with ease.
The Reports Button
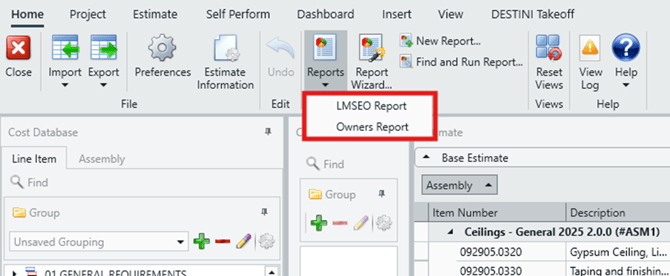
The Reports button is located on the Home View in the main ribbon.
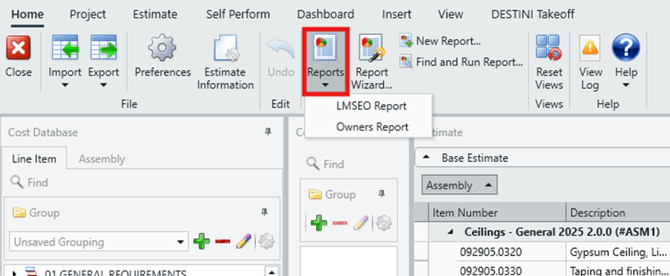
When clicked, it displays a list of report template files stored in a specific folder.
The location of these files is defined in the Preferences menu.
By default, this configuration points to a local folder on the user’s computer. While this works for individual users, it creates extra overhead when reports are updated or customized, since each user must receive the updated files and manually place them in their local reports folder.
A more efficient approach is to store report template files in a centralized location. With this setup, a company leader or administrator can update report files in one place, making those changes immediately available to all users.
Storing Your Report Files
Standardizing the reports available to all users starts with storing report template files in a shared location within your environment. The exact type of shared location may vary by organization, but common options include:
- Network Shared Drives (File Servers)
- A network shared drive hosted on a company file server and mapped to each user’s computer using a designated drive letter.
- Cloud File Storage Platforms
- Cloud‑based storage locations, such as OneDrive, that are mapped in File Explorer so they can be accessed by Estimator.
Regardless of the option you choose, the key requirement is that the location is accessible to all Estimator users and remains consistent across machines.
Configuring Estimator
Once your report template files are stored in a shared location, each user must configure Estimator to reference that folder.
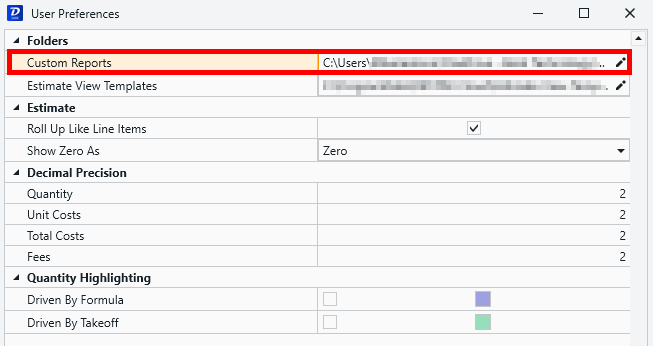
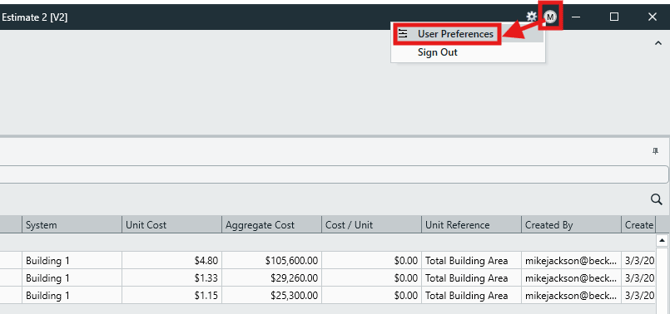
- In Estimator, click the User Menu button in the title bar and select User Preferences.
- In the Folders section, locate the Custom Reports field.
- Click the pencil icon to edit the file path.
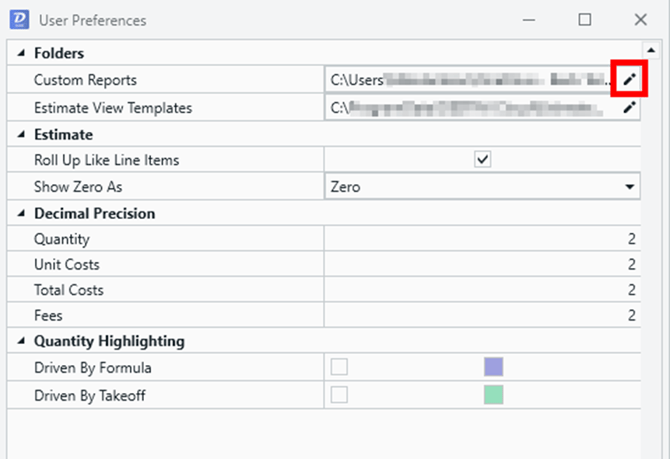
- Navigate to the shared location where your report files are stored and click Open.
- Close User Preferences.
- Click the Reports button to verify that the report files now appear in the list.

Each user in your environment must complete these steps on their local installation of Estimator to ensure the Reports button references the centralized reports folder.
Submit Your Suggestions to Help Improve This Article