
This article describes how to configure DESTINI Estimator standard reports to print one or more WBS properties. You can add a WBS property as a column.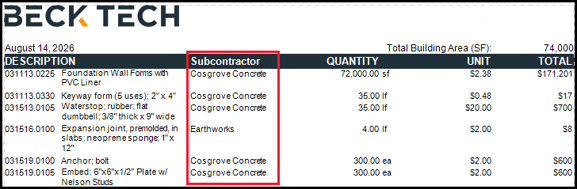
Alternatively, you can add it as a row.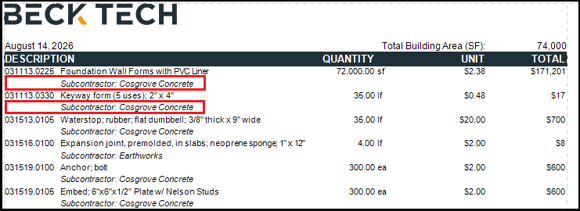
This article describes how setup and configure both options.
Create a New Report Parameter
- Open an estimate in DESTINI Cloud Estimator.
- Navigate to Home > New Report. Report Designer opens.
- Click File > Open.
- Navigate to the folder with the report template file (.repx) you want to modify.
- Click the .repx file to open it.
- On the right side of your screen, click the Field List tab at the bottom of Report Explorer.
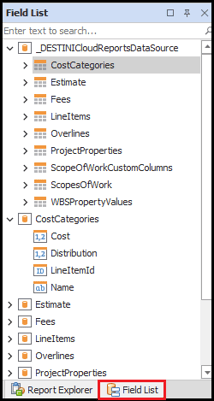
- Scroll to the bottom of the Field List tab.
- Right-click Parameters and select Edit Parameters. The Report Parameters Editor opens.
- In the left pane, scroll down and select a location where you want to add a new parameter for the WBS property. The new parameter will be added below your selection. This article adds the new parameter below WBSProperty4_Rollup.
- Click the Add Parameter button.
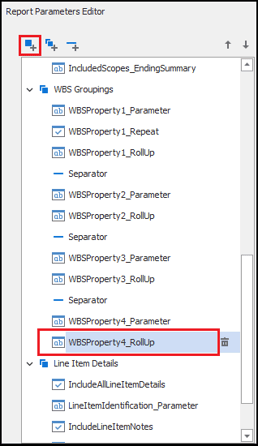
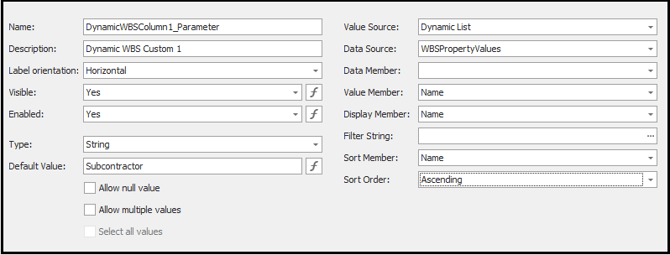
- With the new parameter selected, enter the following information and click OK. For any setting not specified here, leave the default configuration:
- Name: DynamicWBSColumn1_Parameter
- Description: Dynamic WBS Custom 1
- Type: String
- Default Value: Any WBS property you want to specify
- Value Source: Dynamic List
- Data Source: WBSPropertyValues
- Value Member: Name
- Display Member: Name
- Sort Member: Name
- Sort Order: Ascending
Add a Calculated Field
Use the following procedure to create a calculated field that prints the WBS property in the report.
- On the right side of your screen, verify that the Field List tab is selected.
- Scroll up to _DESTINICloudReportsDataSource at the top of the hierarchy.
- Right-click any node underneath _DESTINICloudReportsDataSource and select Edit Calculated Fields. The Calculated Field Collection Editor opens.
- Click the Add button.
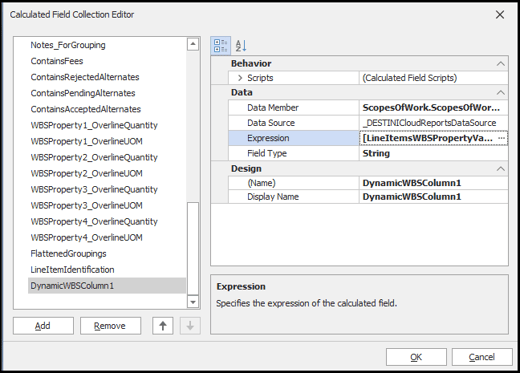
- With the new calculated field selected, enter the following information and click OK. For any setting not specified here, leave the default configuration:
- Data Member: ScopesOfWork > ScopesofWorkLineItems
- Data Source: _DESTINICloudReportsDataSource
- Expression:
[LineItemsWBSPropertyValues][[Name] == ?DynamicWBSColumn1_Parameter].Single([Value]) - (Name): DynamicWBSColumn1
Configure a Column
Use the following procedure to display the new WBS Property in a column. If you prefer to display it in row, see Configure a Row later in this article.
- To specify a column name, in the design section in the middle of your screen, scroll more than halfway down the report and select the Description cell above the [WBSProperty1] band.
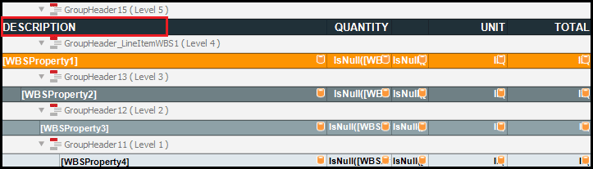
- Right-click Insert > Cell.
- Select the new cell and then click the gear icon.

- Click the drop-down in the Expression field, expand Parameters, and then select the DynamicWBSColumn1_Parameter parameter.
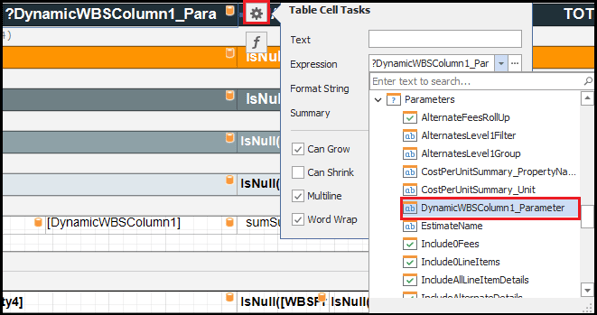
- The parameter expression displays in the cell.

- In the Design section in the middle of your screen, locate the [WBSProperty4] band, and then right-click the [Description] field below it. Choose Insert > Cell.
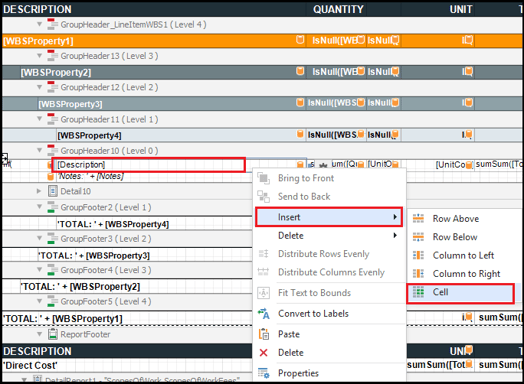
- Select the new cell and then click the gear icon.
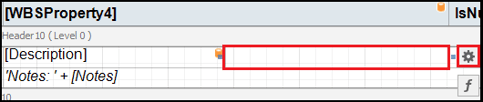
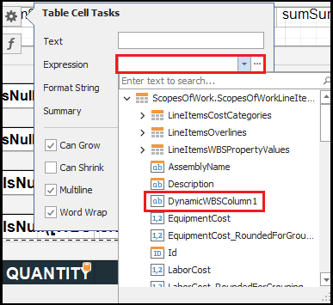
- Click the drop-down in the Expression field, and then select the DynamicWBSColumn1 calculated field. Note: You might have to scroll up to locate the calculated field.
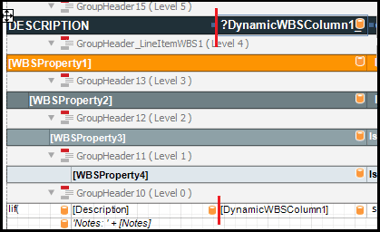
- To ensure the new WBS Property column header and the data printed in the report align properly, locate the new column you created above the [WBSProperty1] band. Click and drag the left edge of the cell to the right until it aligns with the new cell you created in the [WBSProperty4] band.
- Proceed to Configure the Group Header later in this article.
Configure a Row
Use the following procedure to configure your report so the new WBS Property displays as a row beneath line items.
-
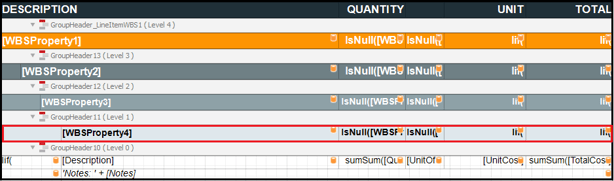
In Designer, in the middle of your screen, locate the [WBSProperty4] band.
-
Right-click the first cell of the 'Notes:'+[Notes] row immediately below the [Description] row and click Insert > Row Below.
![Right-click the first cell in the 'Notes:'+[Notes] row](https://howto.beck-technology.com/hs-fs/hubfs/image-png-Aug-11-2026-06-27-27-2048-PM.png?width=670&height=65&name=image-png-Aug-11-2026-06-27-27-2048-PM.png)
- Select the cell below 'Notes:'+[Notes] and then select the Function button. The Expression Editor opens.

- Copy and paste the following expression into the text field:
?DynamicWBSColumn1_Parameter + ': ' + [DynamicWBSColumn1]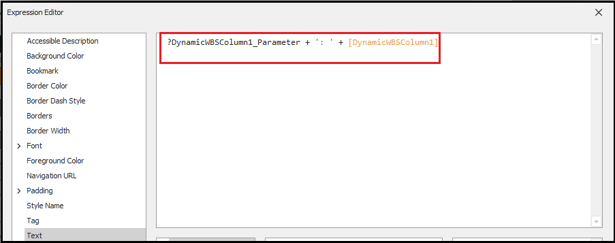
- Click OK. Report Designer adds the expression to the cell.

- Hover your mouse next to the left edge of the first cell in the row until a black arrow appears. Click your mouse to select the entire row. Then click the Function button.

- In Expression Editor, in the left pane, click Visible.
- Copy and paste the following expression into the text field:
NOT IsNullOrEmpty([DynamicWBSColumn1])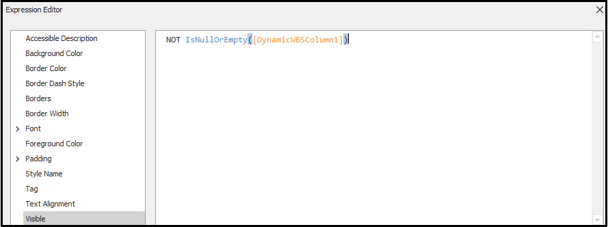
- Click OK.
- Configure the group header, as described in the next procedure.
Configure the Group Header
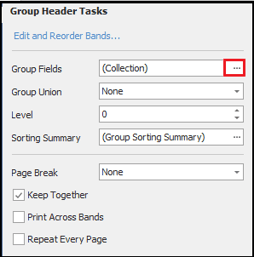
- Select GroupHeader10 band immediately below the [WBSProperty4] band and then select the gear icon.

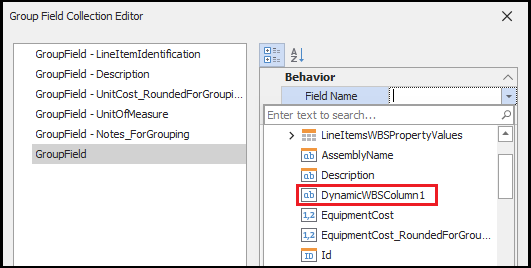
- In the Group Fields field, click the ellipses (...). The Group Field Collection Editor opens.
- Click Add.
- Click Field Name and then choose DynamicsWBSColumn1 from the drop-down list.
- Click OK.
- Save and run the report.
Verify the Changes
- In Report Viewer, in the Parameters panel on the left side of your screen, locate the Dynamics WBS Custom 1 grouping.
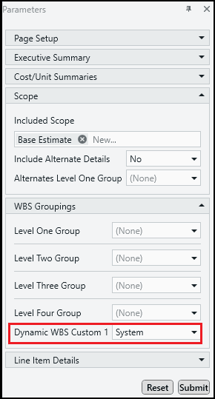
- Select a WBS property from the list and click Submit.
- Scroll to the second page of the report and verify the selected WBS Property appears in the report.