This article is designed to help individuals extend their Standard Report to better suit their business needs. We will show you how to add context to your report by adding a WBS Property Parameter and Calculated Field to the line item details section. It may be used as a new column or row in the report.
Getting Started
-
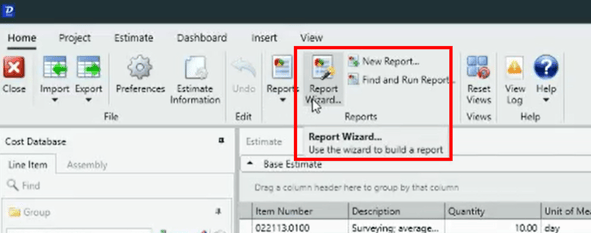
Open the report inside the End User Report Designer
- Click on the report wizard on the Home tab
- Click Next
- Click Modify
- Select the report from the drop-down
- Click Next
- Click Finish
- Click Yes to trust the source
- Expand the file
Add a Parameter
-
Navigate to the Field List panel on the right side of your screen.
-
Scroll down to the Parameters.
- Right-click on Parameters
- Click on Edit Parameters
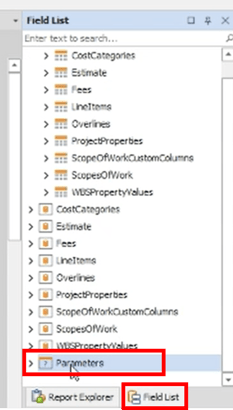
- Scroll down in the list of Parameters to the location where you want to place the new Parameter. In this example, we are placing the new parameter underneath WBSProperty4_RollUp.
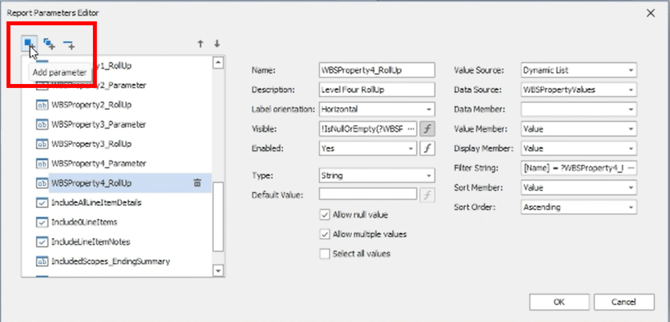
- Click the Add button at the top of the dialog
Set Values for Parameter
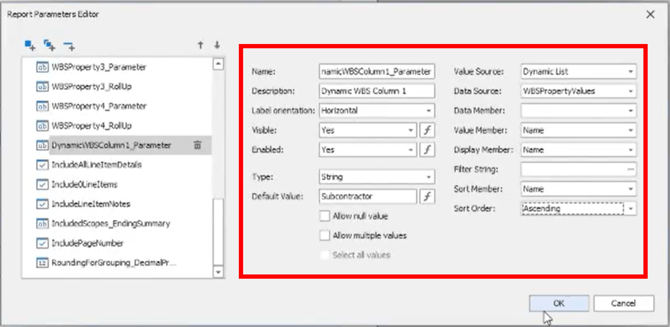
- We're naming the new parameter: DynamicWBSColumn1_Parameter
- Add a User facing description. We're using Dynamic WBS Custom 1
- Set the Type to String
- Set the Default Value to Subcontractor
- Set the Value Source to Dynamic List - this allows there to be a drop-down to access the values.
- Set the Data Source to WBSPropertyValues
- Set the Value Member to Name
- Set the Display Member to Name
- Set the Sort Member to Name
- Set the Sort Order to Ascending
- Click OK
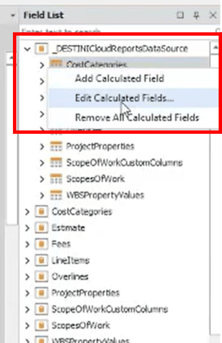
Add a Calculated Field
-
Return to the Field list on the right side of the screen.
-
Click on any field within the first expansion of _DESTINICloudReportsDataSource
-
Select Edit Calculated Fields
-
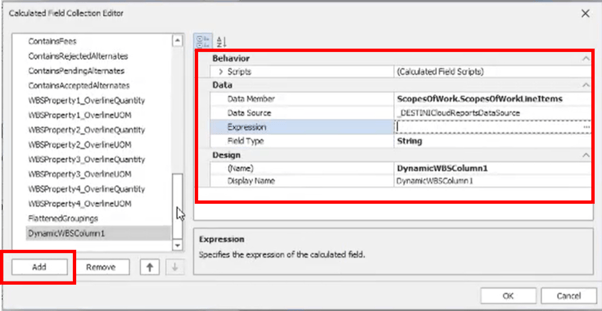
Click Add in the Calculated Field Collection Editor
-
We're going to name the calculated field something similar to your parameter so it easily identifiable. Type in DynamicWBSColumn1 as the Display Name
-
Apply the Data Source: select _DESTINICloudReportsDataSource
-
Apply the Data Member: select ScopesOfWork > ScopesofWorkLineItems
-
Set Field Type to String
-
Set the Expression by clicking on the ellipses within the Expression field. We paste in the first expression, but the second option is also workable. It depends on whether you want to reference a parameter or a single field.
- [LineItemsWBSPropertyValues][[Name] == ?DynamicWBSColumn1_Parameter].Single([Value])
- [LineItemsWBSPropertyValues][[Name] == 'Subcontractor'].Single([Value])
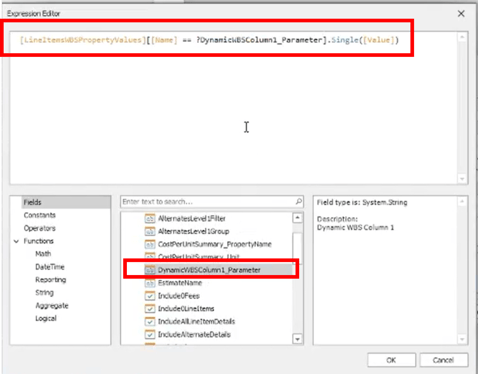
Tip: copy and paste expressions from other places and make minor modifications by selecting the parameter from the field list in the dialog or typing in a single field name.
Put the Parameter to Work in the Designer
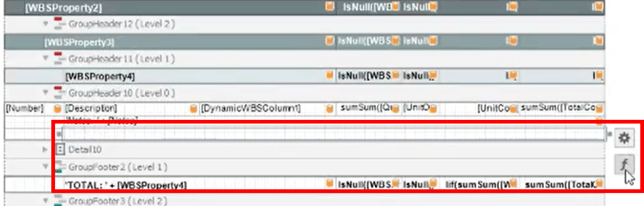
- Locate the Line Items section in the Designer: Details_ScopeOfWork - "ScopesOfWork"
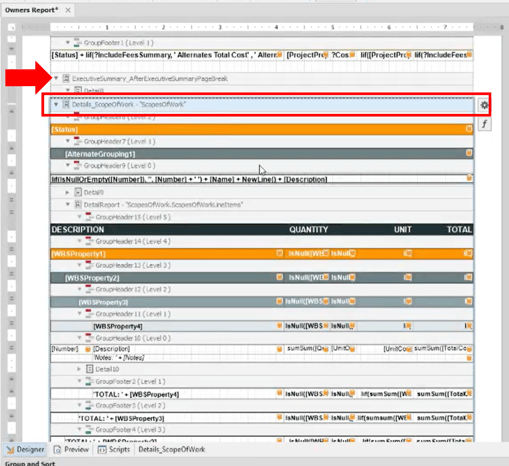
- Scroll down until you find the Page Break after after Alternates
- You'll see DetailReport - "ScopesofWork.ScopesOfWorkLineItems" You may recall that we selected a similarly worded item as the Data Member
- Below that you'll see several Groups. In this report we go down to Group Level 10 where there are fields for Number, Description, SumQty, Units, Unit Cost, SumTotalCost
- Click on the Description Field
- Select Insert > Cell
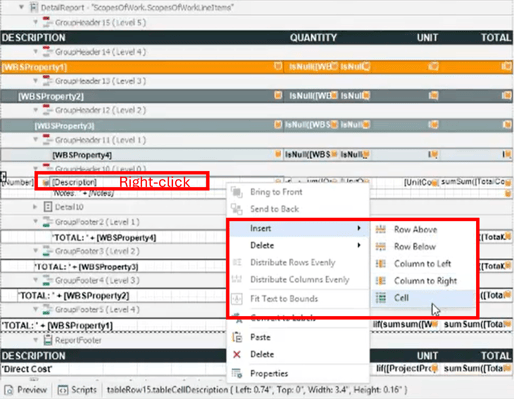
- With the new cell selected, click on the gear icon
- Click in the Expression drop-down
- Find and select the DynamicWBSColumn1 Calculated Field just created
- Optional: Provide a cell to act as a column name
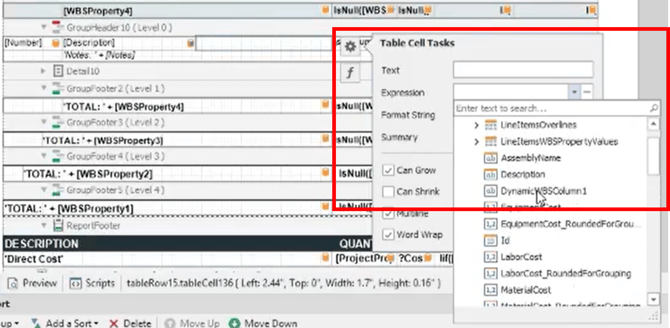
- Click on the Group Header acting as a Column Name called Description
- Select Insert > Cell
- Click on the Expression drop-down
- Scroll down to Parameter and select the DynamicWBSColumn1_Parameter
- Optional: Add a row to print the new Parameter
- Scroll down to the detail section again just below the Notes field
- Mouse-over the Notes row until you see a dark black arrow, then right-click to select the whole row
- Select Insert
- Select Insert below or Insert above. In our example, we Insert below
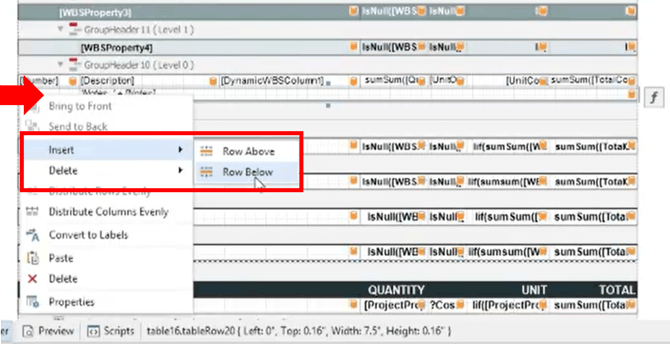
- The cell just below Notes should be active
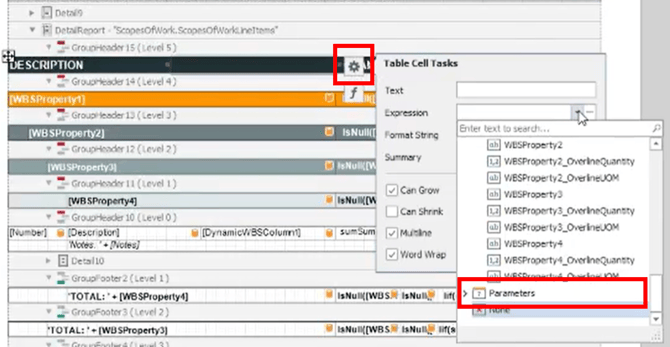
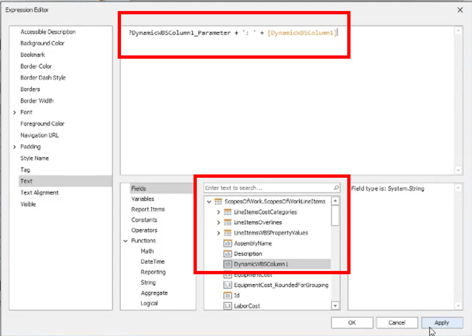
- Select the function button
- Double-click the name of the Parameter, DynamicWBSColumn1_Parameter in the Fields list
- Type + ': ' +
- Double-click the calculated field. Find it in the ScopesOfWork.ScopesOfWorkLineItems section under LineItemsWBSPropertyValues. We are using DynamicWBSColumn1
- End result: DynamicWBSColumn1_Parameter + ': ' + DynamicWBSColumn1
- End result in laymans terms: Name of the WBS Property: Name of the WBS Value
- Click Apply
- Click OK
Setup Conditional Visibility
- Select the whole row
- Select the Function button
- Select Visible in the Expression Editor left panel
- Type NOT IsNullorEmpty()
- Select DynamicWBSColumn1 from the Fields listed in the center pane while within the parentheses.
- Click Apply
- Click OK

The program will help you write the expression as you type. Select the property within the parenthesis for the expression to work correctly.
Setup Conditional Visibility on the Group Header
- Select the GroupHeader band, in our example it is GroupHeader10
- Select the Gear
- Select the ellipse in the Group Fields cell
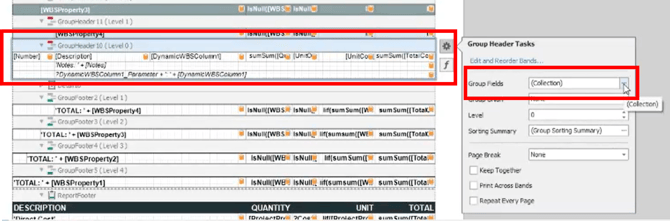
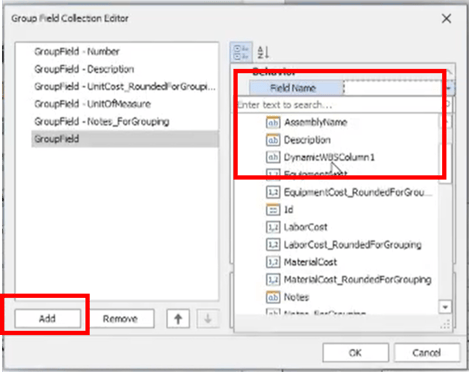
- Click Add in the Group Field Collection Editor
- Find and Select DynamicWBSColumn1 field
- Click OK
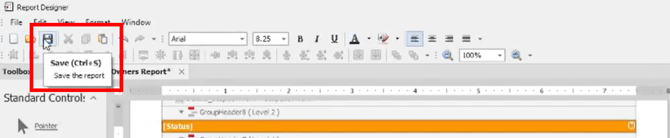
- Click Save on the report ribbon
Test the Report
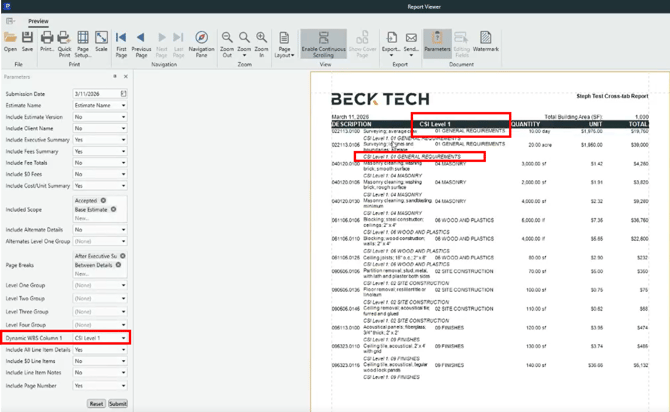
- Go to DESTINI Cloud
- Run the revised report
- Review the Parameters pane on the left of the screen and locate the Dynamic WBS Column 1 parameter.
- Make a selection in the Parameter
- Click Submit
- Review the second page of the report to see the WBS property printed on the page in the row details below Notes and/or in the Column to the right of Description.
Note: If the column text and header do not line up exactly, go back to the Report Designer and make the minor adjustment to line them up by dragging the bounding box as needed.
Suggest an Improvement to this Article